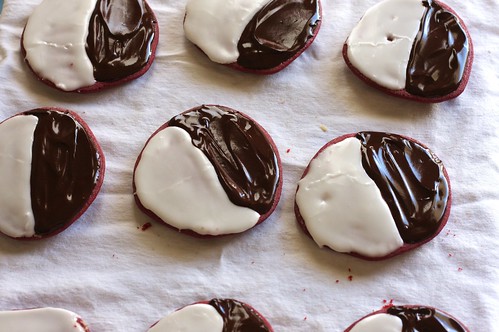
Ok, you might need to sit down for this one. This is going to be good. I don’t know where to start with these cookies. Red Velvet Black and White Cookies- they brilliantly combine the tradition of black and white cookies with the near religion that is red velvet cake. The cookie is soft, moist and cakey, and the frosting… shut up! They were SO incredibly good… and this is coming from me… I practically eat cookies for a living!
When it comes to Black and White Cookies, I think I have a problem. They are absolutely my favorite cookie in the world. I like Black and White Cookies more than I like…. I dunno: puppies. Yea, and who doesn’t like puppies!? So it’s pretty serious.
I can’t take credit for the cleverness of this delicious cookie. The idea is from Rachel Ray. I know… she seems to be everywhere these days, even a dog food cooking show. Crazy.
Onto the cookie.
Seriously. Please understand me when I say that YOU MUST MAKE THESE COOKIES! They’re brilliant! They’ll instantly make you more popular (if you share) and they’ll reduce the fine lines and puffiness under your eyes (if you use them like spa cucumber slices). I wouldn’t lie to you. Go. Make!
Red Velvet Black and White Cookies
recipe by RayRay
makes 10 large cookies
1 1/4 cup all-purpose flour
1 Tablespoon cocoa powder
1/2 teaspoon salt
1/2 teaspoon baking soda
5 Tablespoons butter, at room temperature
3/4 cup sugar
1 egg
1 Tablespoon red food coloring
1 teaspoon vanilla
1/2 cup buttermilk
For Vanilla Glaze
2 cups powdered sugar
1 tablespoon light corn syrup
1/2 teaspoon vanilla extract
1-2 tablespoons hot water
For Chocolate Glaze
4 ounces semi-sweet chocolate
3 Tablespoons butter
1 Tablespoon light corn syrup
Preheat oven to 350 degrees F. Line two baking sheets with parchment paper, or grease and flour the pan well so the cookies don’t stick. In a medium bowl, sift together flour, cocoa, baking soda and salt.
Using a mixer, 5 Tablespoons of butter with the granulated sugar until fluffy, about 3 minutes. Beat in the egg, food coloring and 1 teaspoon vanilla. Beat in the flour mixture alternately with the buttermilk until smooth.
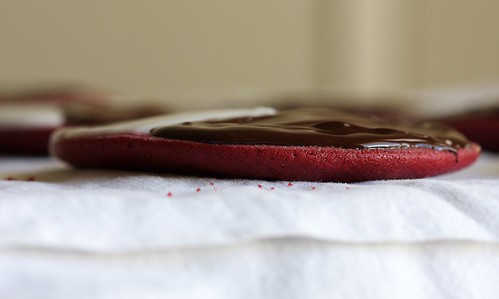
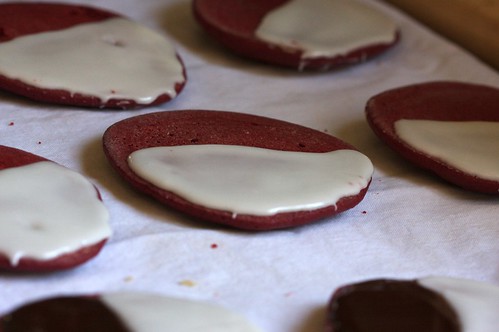
Place 1/4-cup scoops of batter 2 inches apart of the prepared baking sheet, spread the batter out with a butter knife, so they’re not completely flat but look like the pictures below. Bake until a toothpick inserted in the center comes out dry, 12 to 15 minutes. Let the cookies sit for 5 minutes, then transfer to a rack to cool.

To make the glazes-
In a bowl, whisk together the powdered sugar, 1/2 teaspoon vanilla extract, 1 tablespoon of corn syrup and 2 tablespoons hot water, until smooth. That’s your vanilla glaze.
In a seperate bowl, melt the butter and the chocolate in a microwave for about 1 minute. Add the corn syrup and stir until smooth. That’s your chocolate glaze!
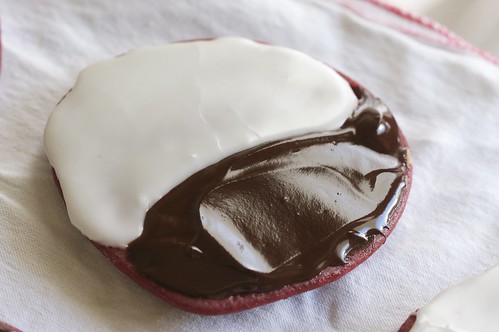
Once the cookies are cooled, face them all bottom side up of a clean surface. Spread half of the cookie with vanilla glaze and the other half with chocolate glaze. Refrigerate for 20 minutes to set. And…Yum!


115 Responses
Has this recipe been corrected? I’m excited to give this a try! It sounds yummy!
I made these cookies to take to a Christmas cookie exchange party. Of course around Christmas thing are busy, so I had just enough time scheduled to make these in between everything going on. I followed the recipe exactly. I didn’t even get to the glaze step because the cookies themselves were so bad I just threw them all away. My husband, who will eat anything, told me I should not serve those to people. Do not waste your time on this recipe like I did.
i know how crazy this time of year is… i’m so sorry you had a bad experience with this recipe.
joy, thank you, you’re amazing! I basically owe my entire baking obsession to you, because you’re adorableness and gorgeous pictures (and love appreciation of chocolate) just make me want to make everything you post!
just made these.
they’re amazing.
no surprise there.
I LOVE these cookies! They’re so gorgeous and so delicious! Made 5 batches this Christmas season.
Learned alot in the process. Light corn syrup and dark chocolate will help keep the frosting less sweet. Also, I only needed to make 1/2 the recipe of frosting to cover all the cookies. Letting the cookies cool on the cookie sheet kept the bottoms smooth, making them easier to frost. When adding corn syrup to the melted chocolate, if it “curdles” just add melted butter to make it smooth again. I tried several times to alter the recipe to make them crispy or chewey. No luck. So just accepted they are an indeed a “cakey” but yummy cookie!
Hi Joy!
You r my favorite baker ever! My aunt gave me your cookbook for my birthday and it’s amazing!!!! I was going to make this recipe but realized that I didn’t have butter. :(
So, I made the vanilla glaze and iced a whole bunch of graham crackers. Delicious!!! Thanks!
Hannah
There’s just something special about homemade cookies, especially chocolate chip cookies, so far as I’m concerned. It’s a great family activity, something even children can help with, and everyone loves eating the results..
<Until next time .-*:"https://www.caramoan.co/caramoan-tour/
Hi just want to check with you if this is a soft cookie or is it the crispy kind? And How well do they keep? At room temperature or in fridge always? Thank you
Hello just want to check with you if this is soft or crispy cookies and how well do they keep? Room temperature or in the fridge always? By the way I live in a humid country… Malaysia…. Thank you