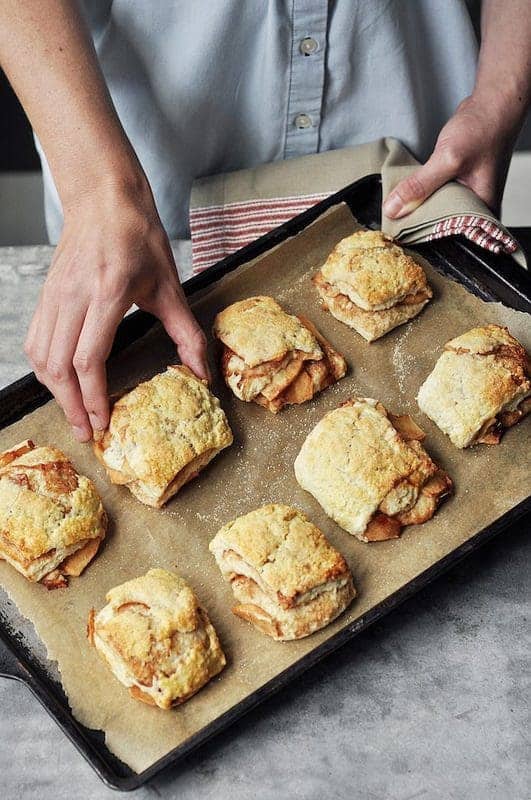
Baking is all about sharing. Sharing recipes, sharing techniques, and most definitely sharing biscuits!
It’s time for our second challenge in the Baking Bootcamp series with King Arthur Flour! You blew me away by baking the Triple Berry Braided Bread with me for our first challenge. Hundreds of you participated and made the most lovely loaves of bread studded with summer berries. I’m so happy you took the time to bake with me! It really means so much. Let’s do it again, shall we!?
For this month’s Baking Bootcamp Challenge, we’re exploring King Arthur Flour’s Self-Rising Flour. It’s a wonderfully light white flour combined with non-aluminum baking powder and salt. It’s absolutely perfect for biscuits, pancakes, and muffins. It’s a staple in my kitchen when it comes to perfectly fluffy, no-fuss biscuits. Hop on this bandwagon and let’s get baking! Below I’ll offer some alternatives for a DIY self-rising flour and a gluten-free option. I want all of us in biscuit mode!
Here is a reminder of how Baking Bootcamp works:
Four Flours + Four Recipes Challenges + One Instagram #bakingbootcamp
+ Four Awesome Sets of Prizes!
The idea is simple!
• Make these Apple Pie Biscuits (they’re sooo delicious!) and take a picture of your creation!
• Follow @joythebaker and @kingarthurflour on Instagram
• Photograph your beautiful biscuits and post them to Instagram with the hashtag #bakingbootcamp
• When you submit a photo, you’ll be entered to win a one year supply of King Arthur Flour and a Baking Essentials box valued at $250!! Official rules and details can be found here.
I’ll be answering questions and sharing your photographs here on Joy the Baker. By entering the challenge you’ll also have amazing Apple Pie Biscuits in your kitchen, so… you really can’t lose.
Let’s get started!
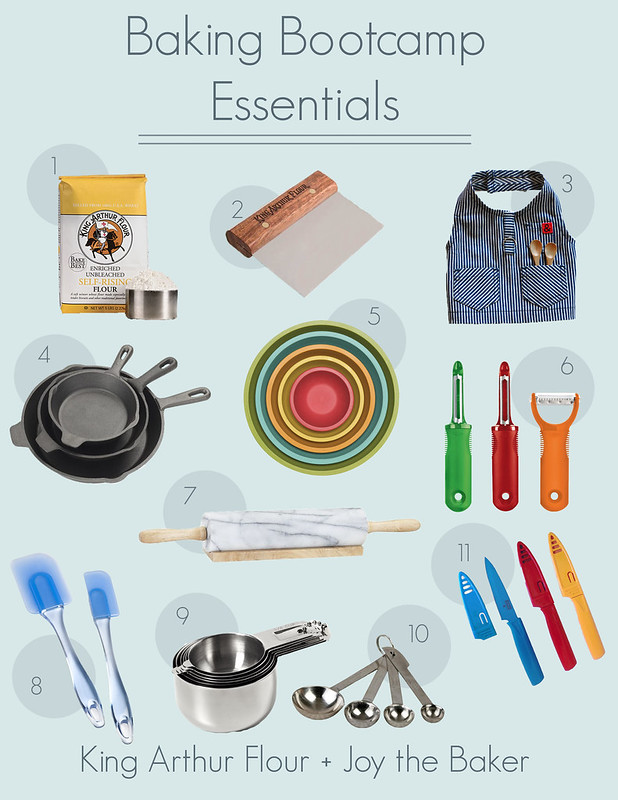
1 • King Arthur Unbleached Self-Rising Flour is perfectly soft and rolls out beautifully for these tender biscuits.
2 • I use this King Arthur Flour Bench Knife just about everyday in my kitchen. It’s perfect for scraping little dough bits from the countertop… something a sponge just pitifully attacks. You might also use the bench knife to slice though the center of the rolled dough. It’s sharp too! I love this tool!
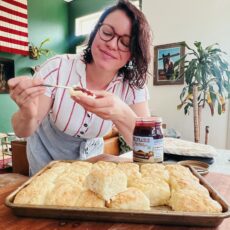
3 • Kitchen fashion is important to me. Hedley & Bennett understands my needs for a functional, durable, totally chic apron. Not too frilly. I always want to be more badass than 50’s housewife-y in the kitchen.
4 • My Cast Iron Skillets are a staple in my everyday kitchen. Some are more successfully seasoned than others, but I try to keep some cast iron specifically for savory and other just for sweets.
5 • Having Colorful Mixing Bowls is the kitchen equivalent of having a great black dress in your closet. Necessary treat.
6 • Vegetable Peelers with good finger grips to peel apples in a flash!
7 • I inherited a Marble Rolling Pin from a family friend and now I don’t know how I’ve gone without one for so long! This piece has great weight and can be chilled in the refrigerator prior to rolling to keep our doughs more amiable.
8 • Don’t skimp on good Silicone Spatulas. The ones that melt along with the butter are just infuriating.
9 • Is it normal to have a completely mismatched set of Measuring Cups, or should I just treat myself to a matching set like this? Don’t answer that…
10 • Same goes for the Measuring Spoons… it’s nice to have a full matching set.
11 • I go through Paring Knives like I go through socks. How is it possible to have them one day and then lose them the next? I don’t know. Clearly I have an issue.
Let’s get baking! #bakingbootcamp
photos in this post by Jon Melendez.
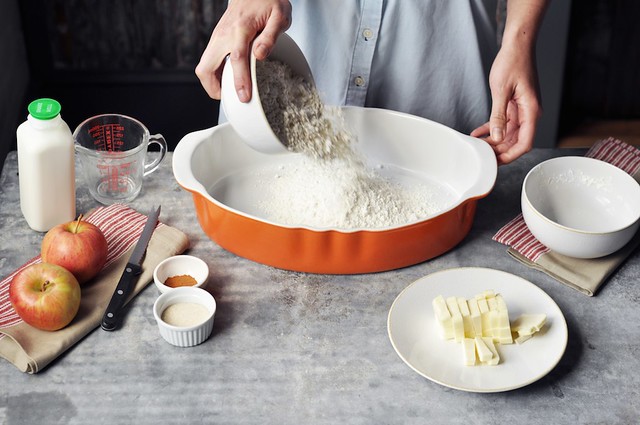
This super easy biscuit recipe features King Arthur Flour’s Unbleached Self-Rising Flour. I encourage you to go buy a bag and experience just how convenient it is! Self-rising flour has a lower protein content (8.5%) than all-purpose flour (11.7%) because it’s made using a soft wheat flour rather than the hard wheat flour that makes up all-purpose flour. The lower protein content makes the flour extra light, creating wonderfully tender biscuits.
Self-rising flour also contains non-aluminum baking powder and a dash of salt so we don’t have to deal with measuring spoons and extra additions.
How to make your own Self-Rising Flour: 1 cup all-purpose flour + 1 1/2 teaspoons baking powder + 1/4 teaspoon salt. Of course, if using all-purpose flour, the protein content will be a bit higher. Whisk together until thoroughly combined.
How to make your own Gluten-Free Self-Rising Flour: 1 cup King Arthur Gluten-Free Multi-Purpose Flour + 1 1/2 teaspoons baking powder + 1/4 teaspoon salt + 1/2 teaspoon xanthan gum.
For more on flour, check out Baking 101: The Difference Between Baking Flours.
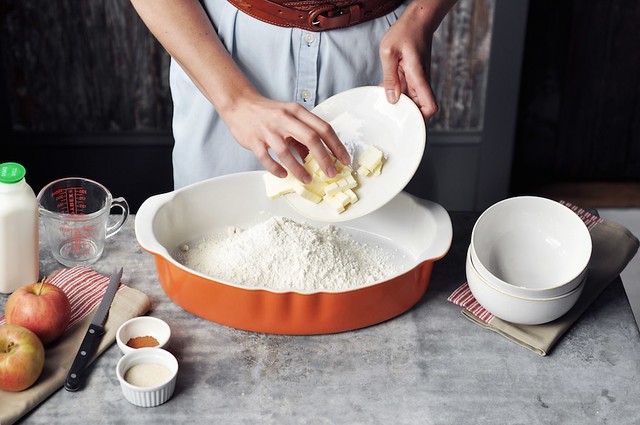
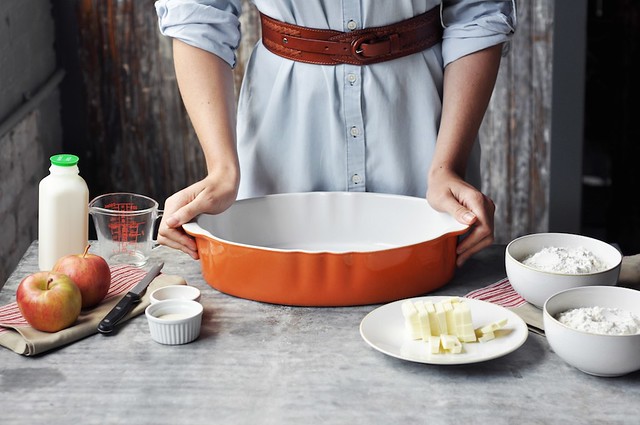
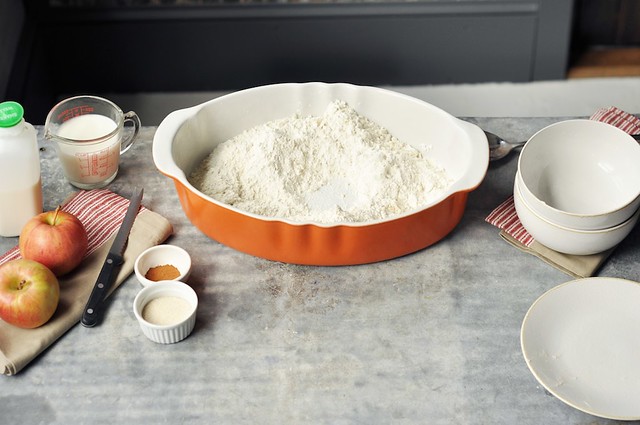
Cold butter is cut into small cubes and added to the flour. The colder the butter the better!
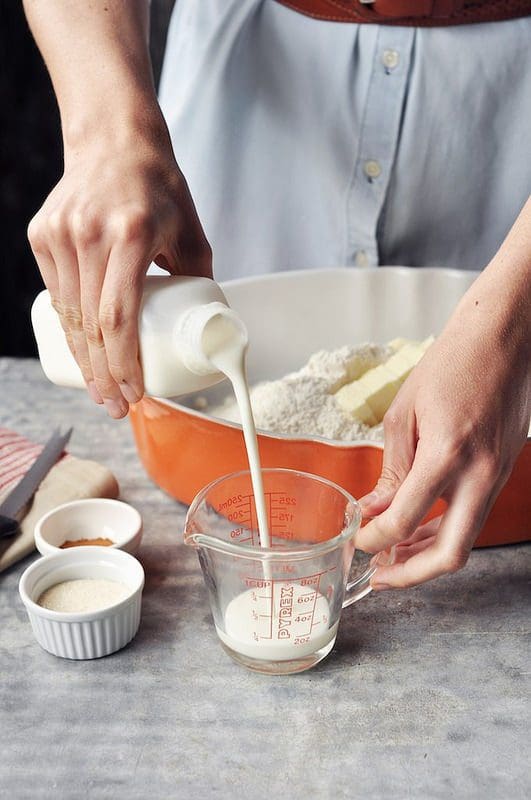
Measure out the cold buttermilk before your hands get dirty.
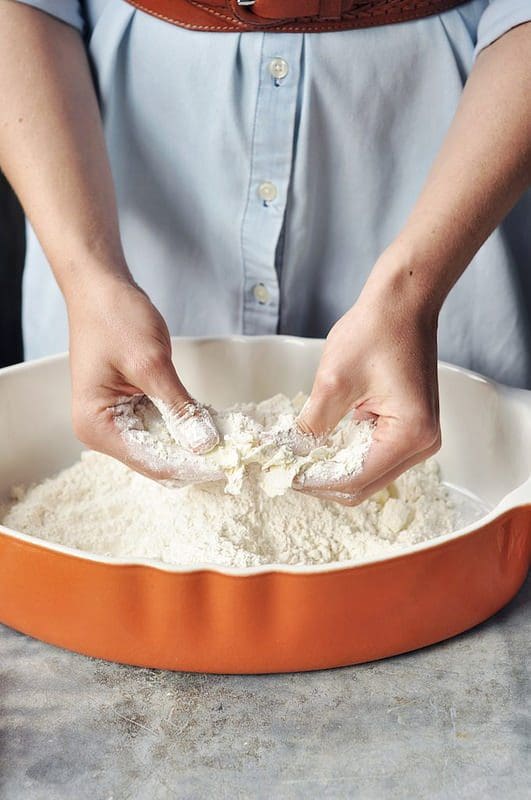
Using your fingers, break the butter down into the flour.
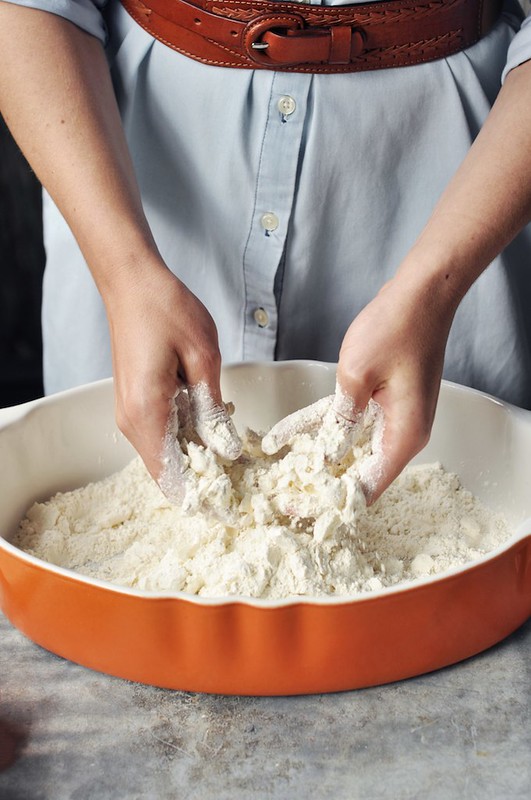
Quickly press the butter and flour in between your fingers creating little bits of butter throughout the flour.
If you work quickly, breaking down the butter into the flour will take about 4 minutes. The result will be butter bits that are the size of oat flakes and small peas.
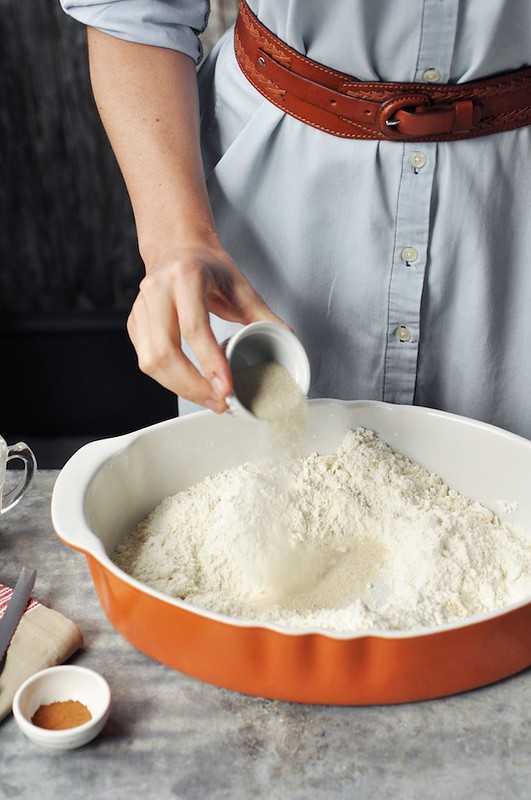
Add granulated sugar.
And stir the mixture together.
If that seems easy, it was! Baking powder and salt are already in the flour!
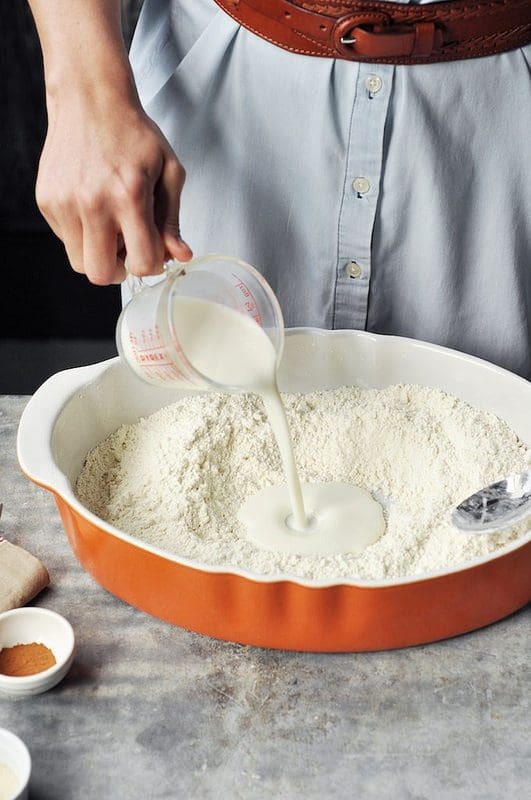
Add the cold buttermilk.
If you’re out of buttermilk, you can make your own buttermilk substitute using one of these feisty tips.
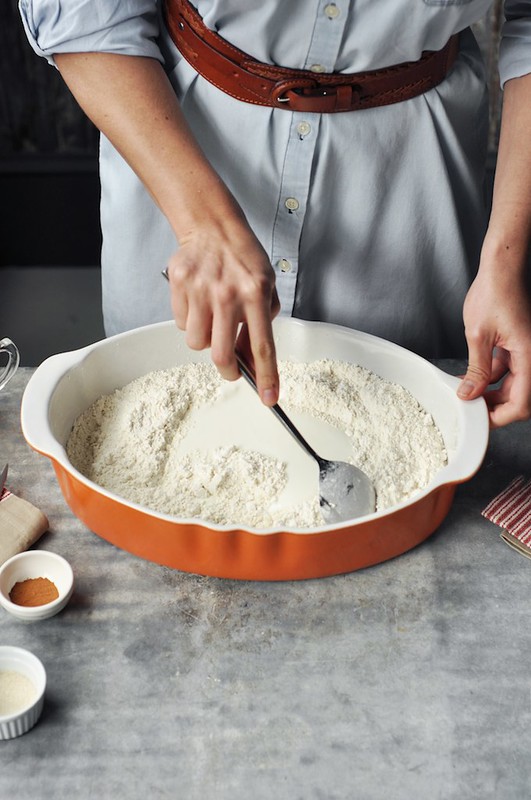
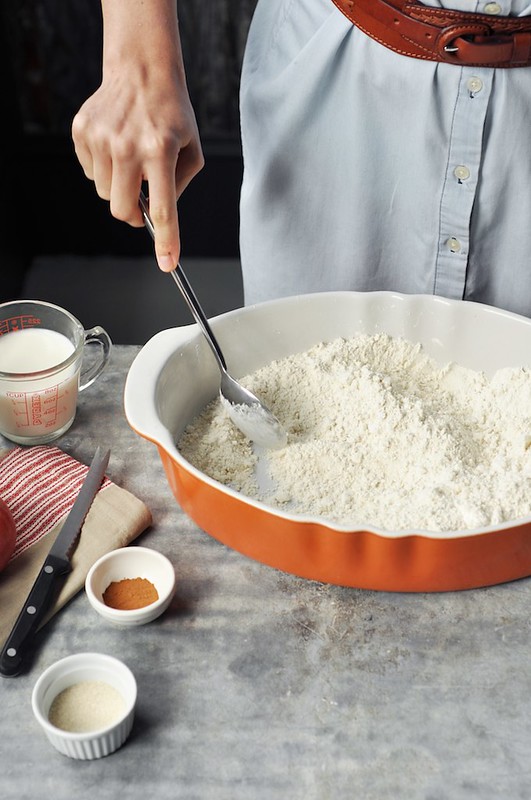
Begin to stir the dry ingredients into the buttermilk.
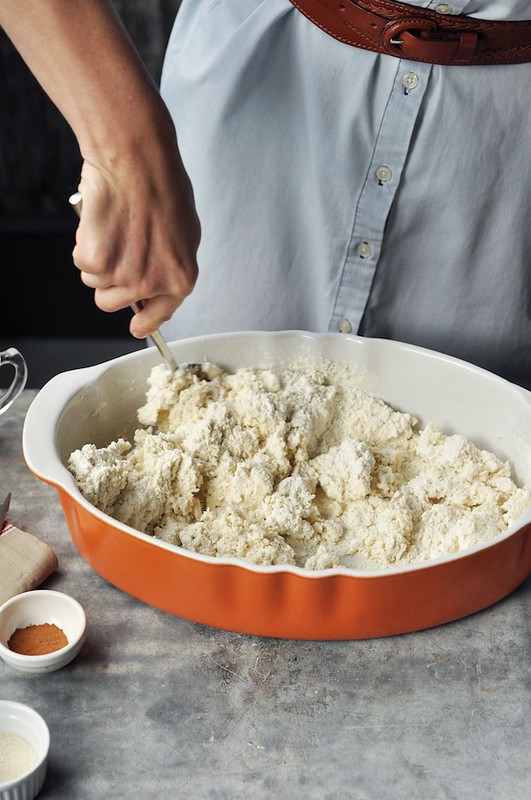
The biscuit dough will feel rather fluffy and wet.
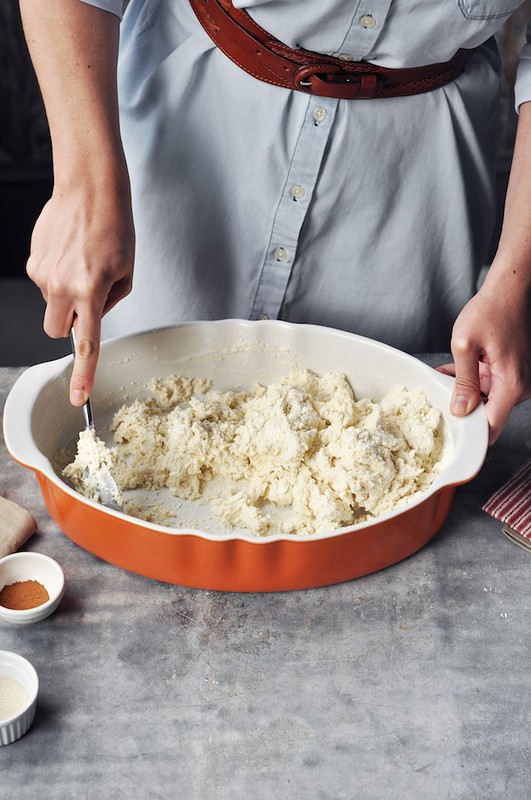
You’re on the right track! Once all of the dry ingredients are worked into the buttermilk (you may need to add a splash of extra buttermilk), place it in the refrigerator for just a few moments while you make the apple filling.
If you’re using your own homemade self-rising flour or gluten-free self-rising flour, you’ll want to add the full 3/4 cup of buttermilk.
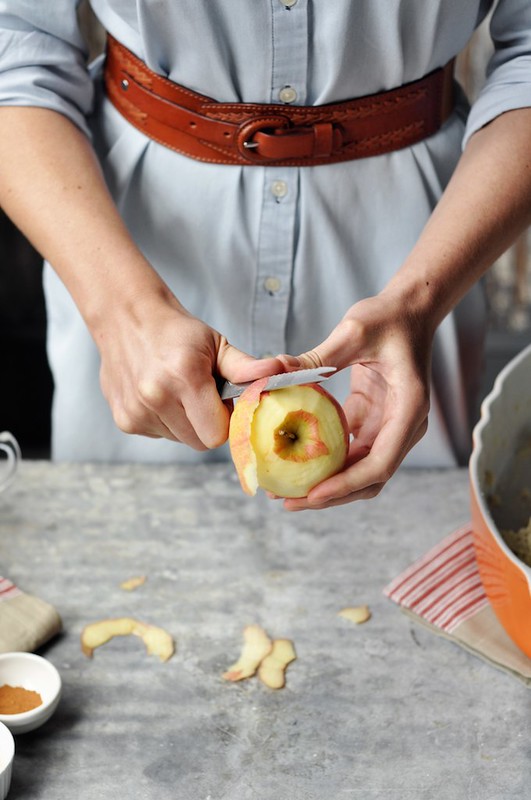
Using either a paring knife or vegetable peeler, peel an apple. I like Fuji apples for this recipe because they’re both crisp and sweet.
This is how my grandmother slices apples (and everything else), and I wonder how old I’ll be when I finally feel comfortable with this move. Don’t be like me, or my grandmother. Slice safely.
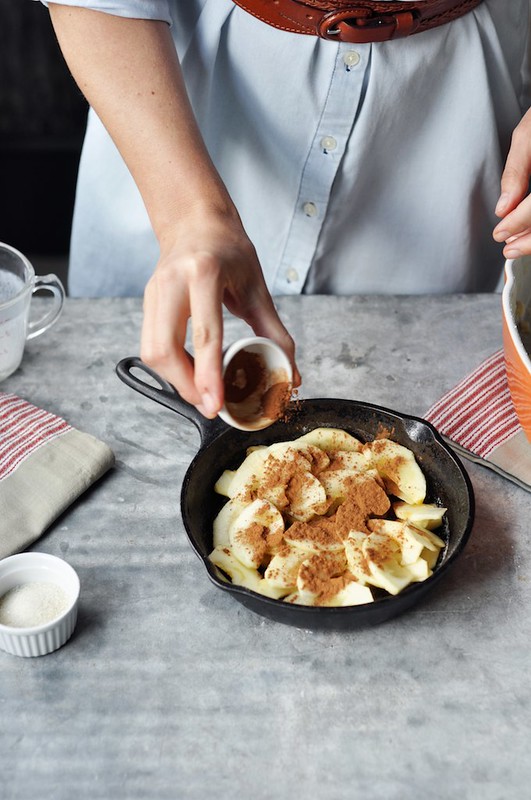
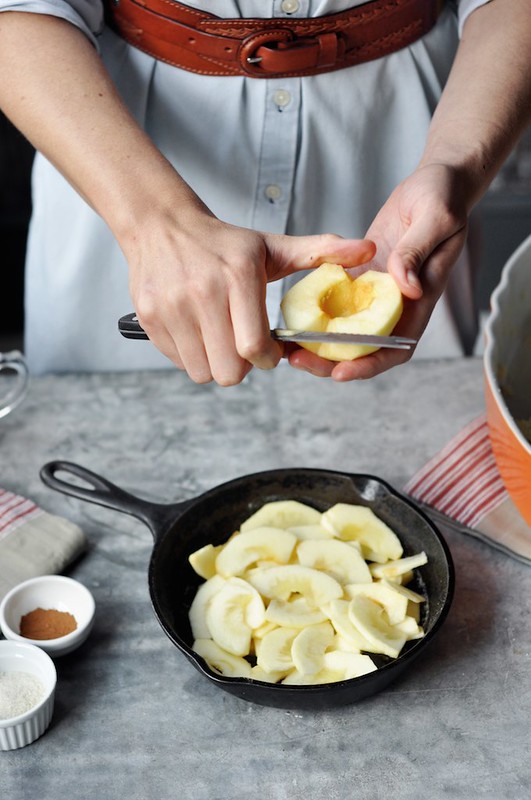
Add the apple slices to a skillet of melted butter. Add cinnamon.
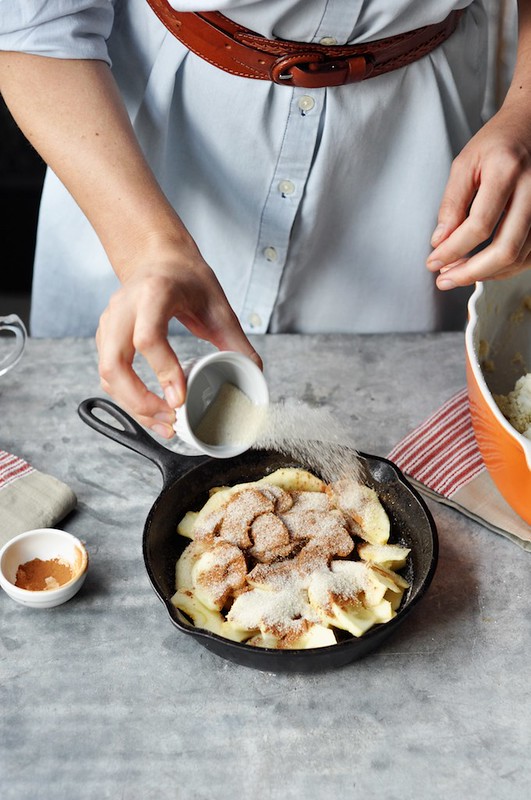
Add sugar, too!
Cook the apples down for just a bit to melt the sugar and meld the spices. The apples won’t be cooked all the way through, but they’ll finish softening in the oven.
Remove the skillet from the heat and allow to cool while you roll out the dough.
Back to the biscuit dough!
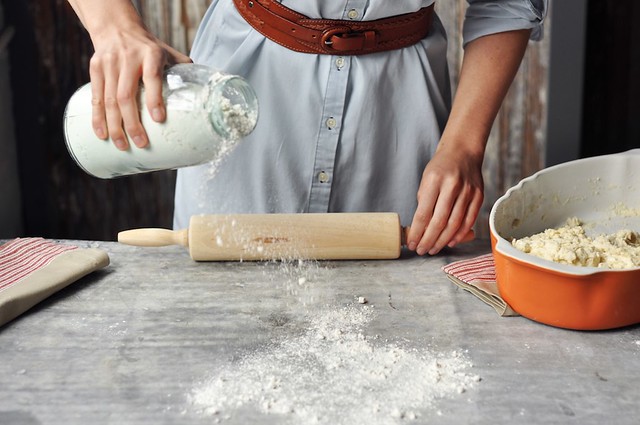
Generously dust a work surface with all-purpose flour.
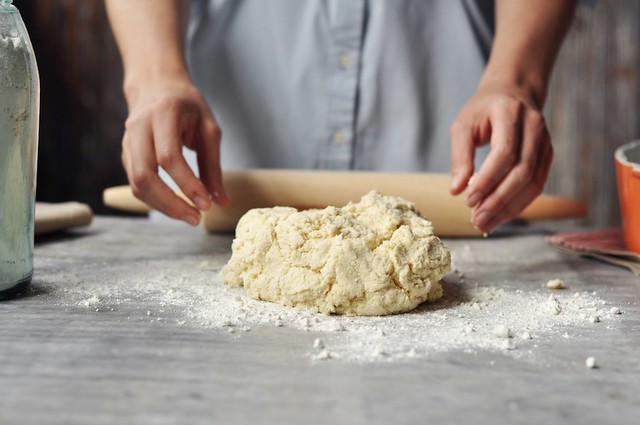
The dough should be moist but not overly wet.
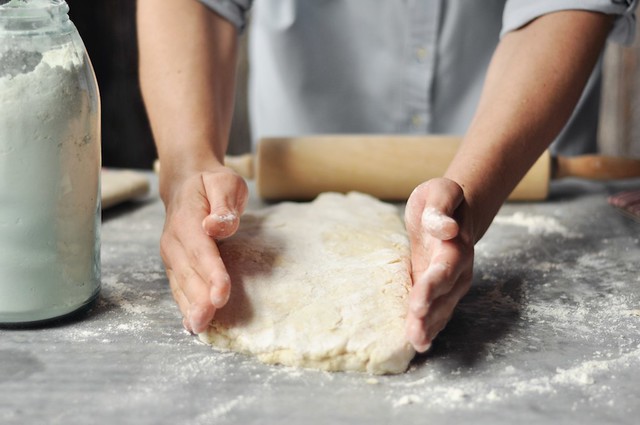
Onto the floured surface we go!
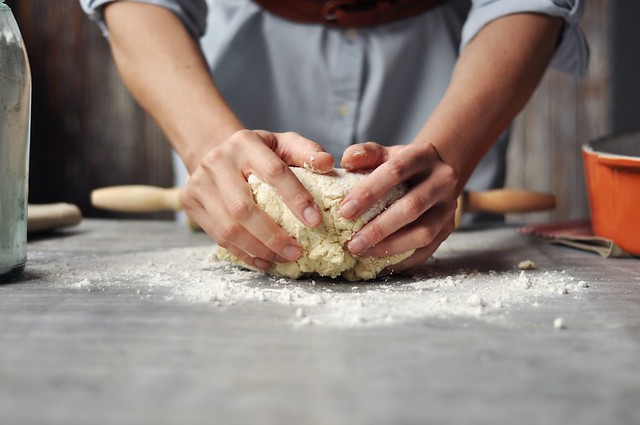
Knead the dough three or four turns. We want to create a cohesive dough, but not overwork the dough at all.
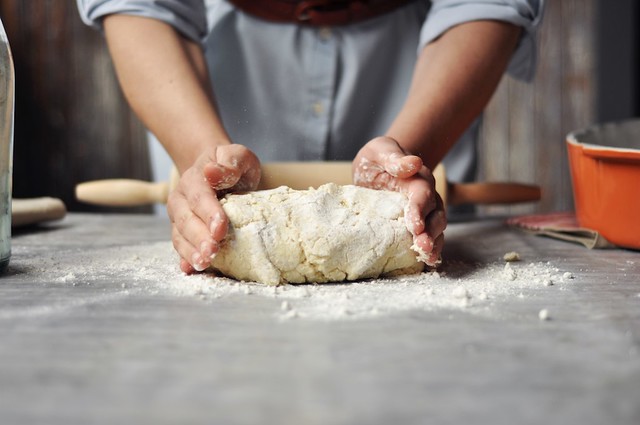
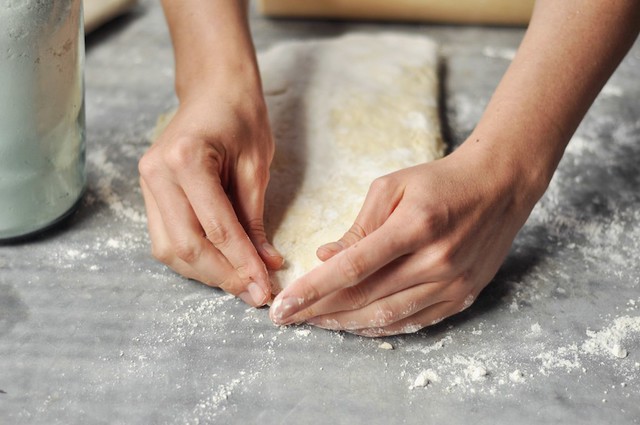
Use your hands to shape the dough into rough rectangle shape.
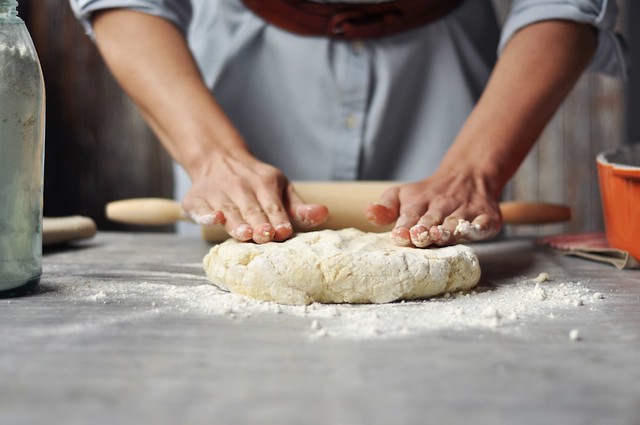
Pat it down to a 1-inch thickness.
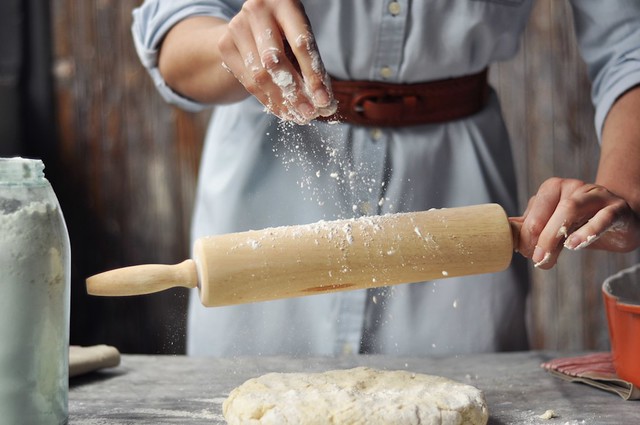
Sprinkle a rolling pin with more all-purpose flour.

Begin to roll the dough using a firm and even pressure. Try to keep the rectangle shape as much as possible.
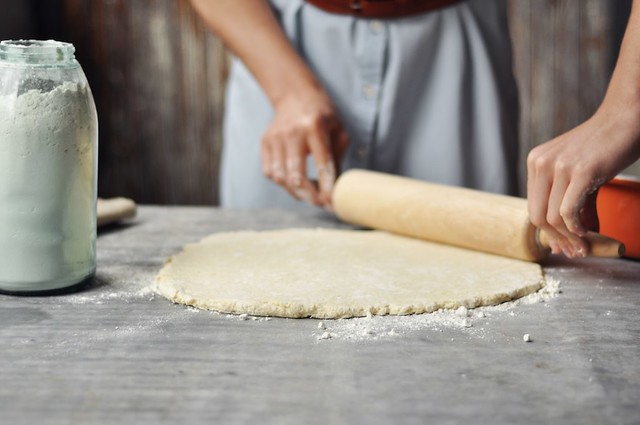
Roll the dough to a 1/2-inch thickness, about 7 x 10-inches. Move the dough around the surface a bit to ensure that it’s not sticking; this will become important later when we’re folding the dough.
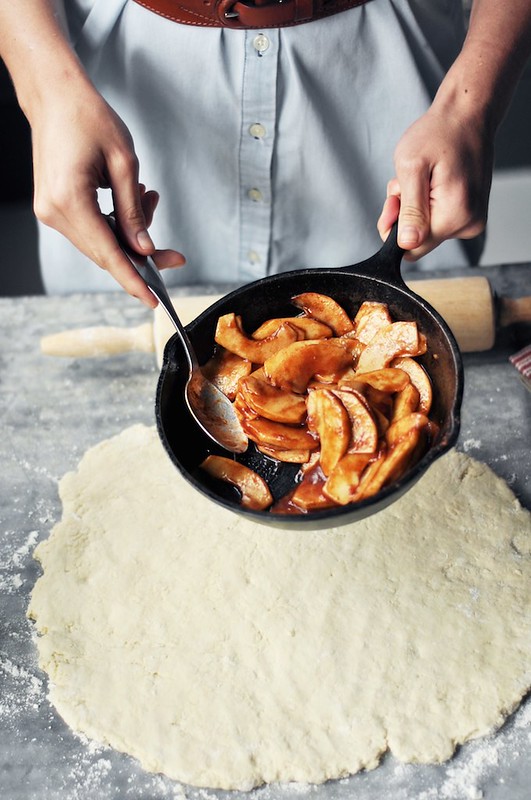
Time for the apples!

Spread the apples in a mostly even layer across half of the biscuit dough.
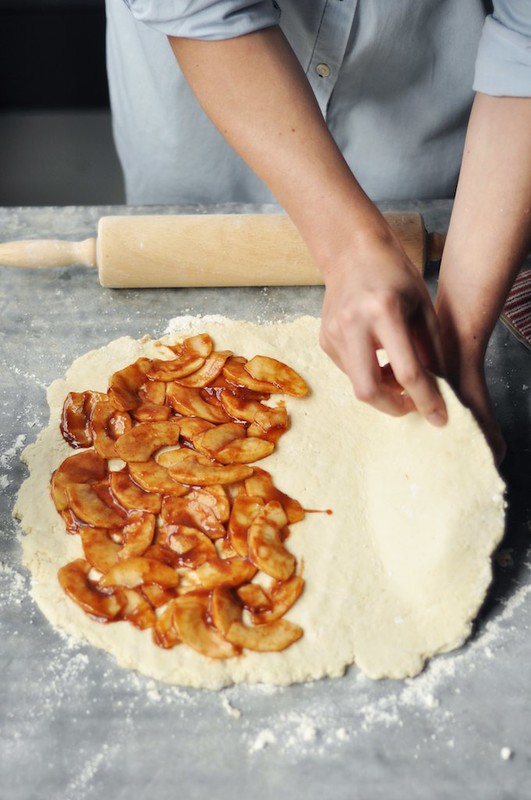
Gently fold the dough over the apples.
Use your hands to gently press the seams together.
Use the palms of your hand to nudge and suggest the filled biscuit dough back into an 8″ x 6″ rectangle rectangle if the edges have rounded a bit.
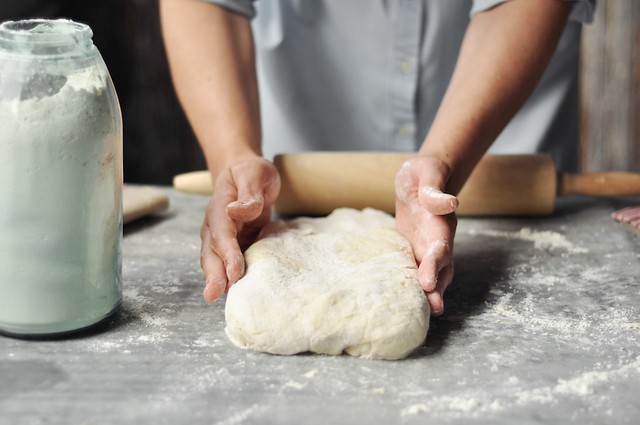
Be the boss.
A friendly boss, but definitely the boss.
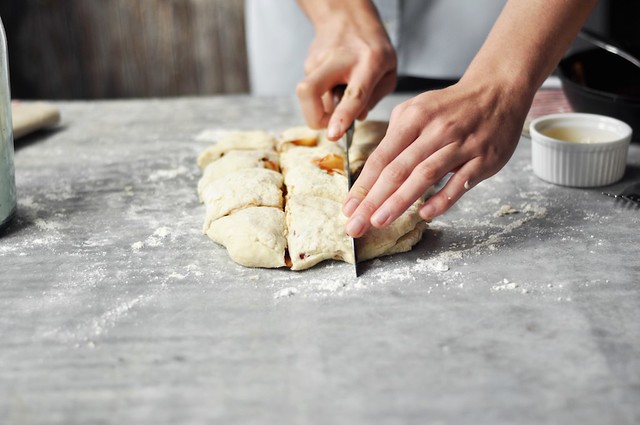
Use a large and sharp knife to cut 12 small biscuits. Flour the knife a bit if it gets too sticky.
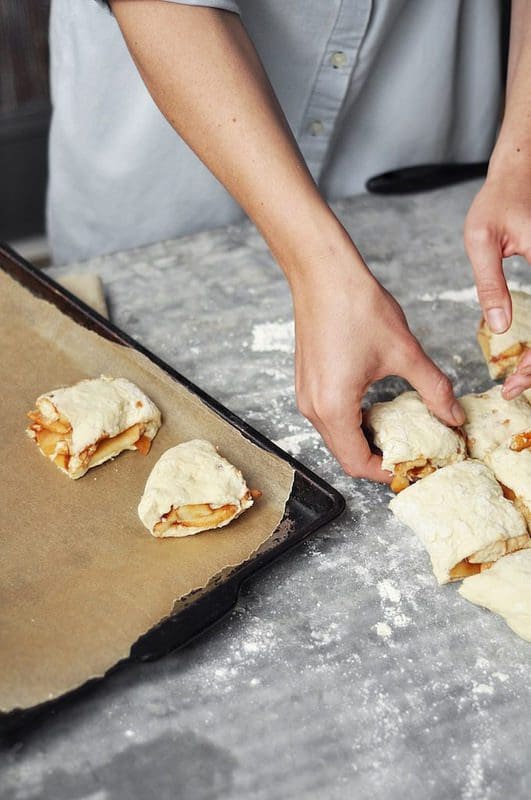
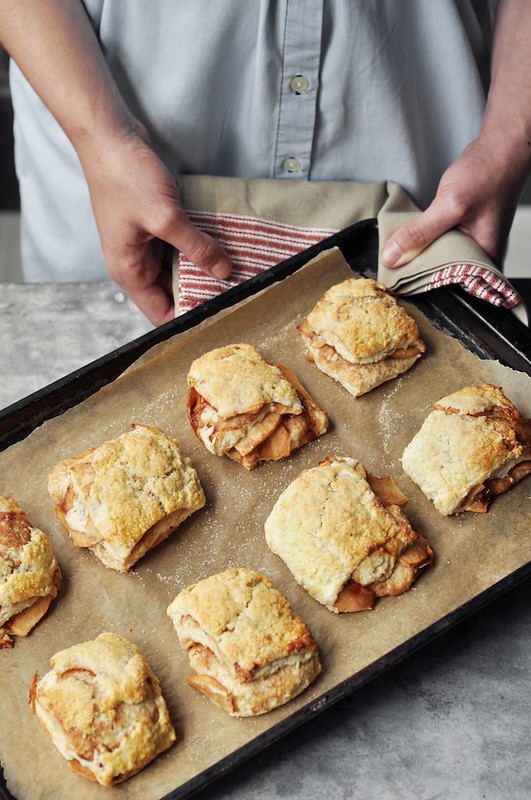
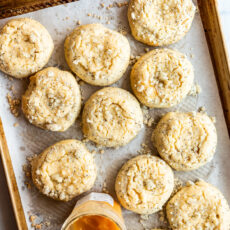
Place the biscuits on a parchment-lined baking sheet.
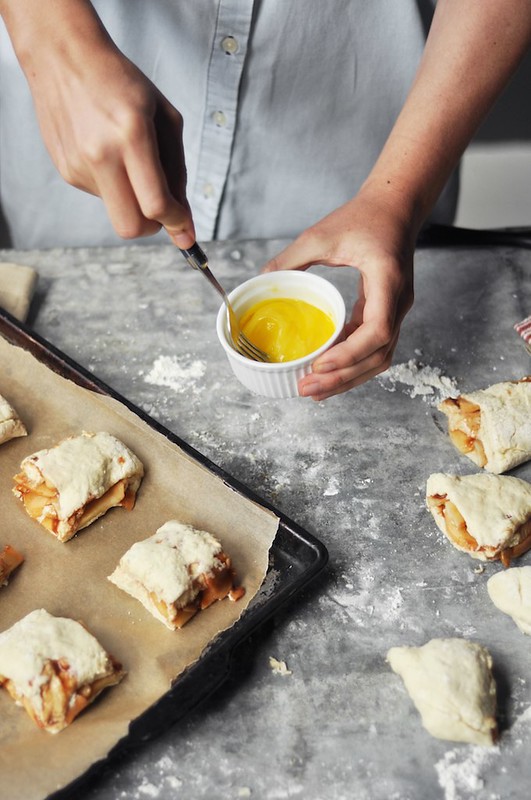
Beat an egg. Lightly brush the tops of each biscuit, for browning.
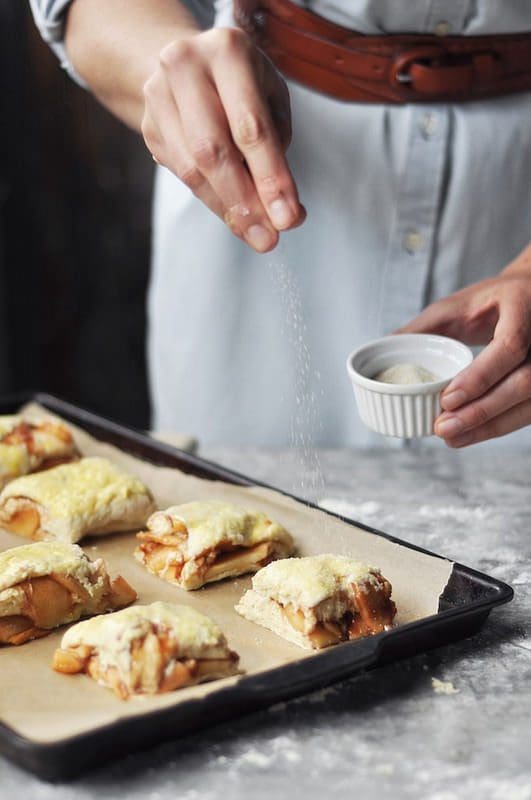
Generously sprinkle with granulated sugar and cinnamon.
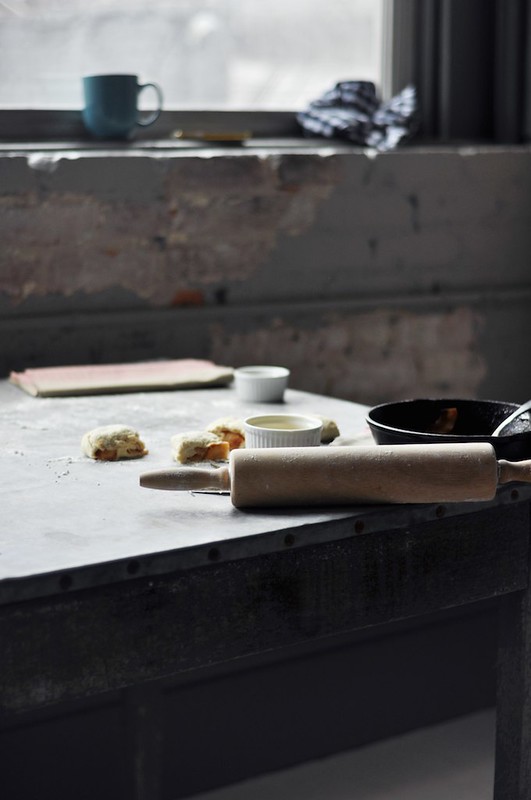
Take a coffee break, but be careful that your rolling pin doesn’t roll right off the table. The biscuits will bake up in about 12 minutes!
Now it’s your turn! Take on the challenge! Share your beautiful biscuits with us on Instagram #bakingbootcamp. You have until October 11th to submit your photos to be entered to win a one-year supply of King Arthur Flour and a Baking Essentials Box valued at $250. Official rules and details here. Leave any questions about the recipe in the comments below and check back here for all of your baking photos!
This post is brought to you by Joy the Baker in partnership with King Arthur Flour.
Print
Baking Bootcamp: Apple Pie Biscuits
- Prep Time: 0 hours
- Cook Time: 0 hours
- Total Time: 0 hours
- Yield: 12 biscuits 1x
Description
Join King Arthur Flour and Joy the Baker for a second baking challenge. Bake these delicious biscuits, post a picture to instagram with the #bakingbootcamp between September 10th – October 10th for a chance to win a year of free flour from King Arthur Flour and a gift basket of prizes worth $250! Thank you for baking along with us!
Ingredients
For the Apples:
- 1 Fuji apple, peeled, cored and sliced very thin
- 2 tablespoons unsalted butter
- 1 teaspoon ground cinnamon
- 2 tablespoons packed brown sugar
For the Biscuits:
- 2 cups King Arthur Unbleached Self-Rising Flour
- 1/4 cup cold unsalted butter, cut into small cubes
- 2 tablespoons granulated sugar
- 2/3 to 3/4 cup cold buttermilk
For the Topping:
- 1 large egg, beaten
- 2 tablespoons granulated sugar
- 1/2 teaspoon ground cinnamon
- pinch of salt
Instructions
- Place a rack in the center of the oven and preheat oven to 425 degrees F. Line a baking sheet with parchment paper and set aside.
- To make the apples, place butter in a medium skilled over medium heat to melt. Add the apples, cinnamon, and brown sugar. Toss with a wooden spoon until all of the apples are coated and the sugar is melted over the apples, about 2 to 4 minutes. The mixture will be warm and glossy, but the apples won’t be cooked through. That’s right! Remove from the heat and set aside.
- To make the biscuit dough, place flour in a medium bowl and add cold butter cubes. Use your fingers to quickly break the butter down into the flour. Some of the butter bits will be the size of oats, some the size of small peas. Stir in the granulated sugar.
- Create a well in the center of the butter and flour mixture and add 2/3 cup buttermilk. Stir the mixture together until it is well moistened and holds together well. Biscuit dough should be soft and moist. Add the remaining buttermilk as needed. If you’re using your own homemade self-rising flour or gluten-free self-rising flour, you’ll want to add the full 3/4 cup of buttermilk.
- Use all-purpose flour to generously dust a clear work surface. Spoon dough onto the floured surface and use your hands to gather it into a ball and gently pat it into a small rectangle. If you’re using gluten-free self-rising flour, the dough will crack a bit as you shape it into a rectangle, and again as you fold it over the apples. That’s OK; just keep patting it back together.
- Use a rolling pin to gently roll the dough into a rectangle 1/2-inch thick, about 7-inches x 10-inches. Arrange cooled apples in a single layer over half of the rolled out biscuit dough. Fold the bare side of the dough over the apples and gently press the edges to seal in the apples. Use the palms of your hand to pat the dough into a 6 x 8-inch rectangle if the edges are looking a bit rounded.
- Use a sharp knife to slice the dough into 12 squares. Use a spatula to place each biscuit onto the prepared baking sheet, about 2-inches apart.
- In a small bowl, whisk together sugar for topping, cinnamon, and salt.
- Brush each biscuit top with beaten egg and sprinkle generously with the cinnamon sugar mixture.
- Bake for 12 to 14 minutes until the biscuits are risen and golden brown. Remove from the oven and serve warm or cool completely before storing in an airtight container. Biscuits are best enjoyed within two days of baking.


Kim
I made these last night. I found these to be easy to make, your directions and pictures made all the difference. Thank you! They look amazing and taste even better!!! I was a little surprised to find them tastier than I even imagined. Thank you for this recipe!
Cara
Just tried these and everything went wrong. My dough was too wet even without the extra milk, but somehow simultaneously falling into bits. The apple filling was also really wet, and even though it was cold, the dough started melting or congealing as soon as the apples hit it. No rise in the oven at all, and the whole thing tasted overwhelmingly of baking powder. Don’t know what all I did wrong, but a morning’s work for some soggy, baking powder-y rock cakes? :(
Lisa
Made these twice over the course of two days! They don’t last long with my family. Thank you for sharing this recipe.
Betty
Only 1 apple?
Deb
Did you actually use 2 pans to bake them? I see 8 on the cookie sheet but the directions say to cut into 12 biscuits. Thanks! :)
Kathleen
This looks super delicious! So if I want to make it —( I’m sure I’m missing something)–where are the quantities and amounts for the ingredients in this recipe? And the oven temperature? Is there a printable recipe? Thanks for your response!
joythebaker
Hello Kathleen, the recipe is now back up! I’m not sure what happened, but you should be able to see it now!
blissmamaof3
These just came out of my oven, wow! Thanks for putting this baking bootcamp together. Olive rolls coming up tomorrow ;)
Laketia
So these look absolutely amazing but I do have a question. ..would you be able to sub almond buttermilk for regular buttermilk?
In Natalie's Shoes
I need to eat these. Thanks for sharing!
Beth
These are a bit of a twist on the Fried Apples and Biscuits my Mama used to make us for breakfast! Love them! And I love the Orange dish in your photos! Who is it by?
Meg
Hey Joy, I have homemade applesauce, do you think that would work rather than doing the apples in a pan? (I realize there may be a little spill and then some).
Kalin
Hi Joy! I’m wondering if the dough could be made the night before? Could I make it, wrap it in plastic and keep it in the fridge? I’m catering a dinner party for 14 people for my brother and I’d love to be able to do part of this ahead of time!
Jessica
wondering if you can make this and freeze it for baking later? if so, how would it change the baking temp and time?
joythebaker
I recommend baking them, allowing them to cool, and then freezing them. Then you can just rewarm them later on when you’re going to serve them!
Daysy
Delicious, could i use can milk and not buttermilk what is the diference
Kate S.
Hi!
I’ve noticed on Instagram that you and King Arthur Flour both have been commenting on people’s entries which is seriously amazing – thanks for taking the time to do that! Is that supposed to indicate that you’ve officially entered? I was worried that my entry might have been missed since I didn’t receive any comments, but I did put the hashtag and tagged you both so I wasn’t sure.
Thanks for your help!
Kate
joythebaker
you’re officially entered whether we comment or not! i still need to go back into the hashtag and look / like / comment on all of the photos. so sorry i missed yours but thank you so much for baking along with us!
a
Well, I will voice my opinion that I dislike Instagram-only contests, because you cannot have an account if you don’t have a smartphone. But I guess that means companies aren’t interested in me at all anyway, so they don’t care that I can’t enter.
Rachel
Can you make and assemble these ahead of time, refrigerate and then bake?
Sasha
These were great fun to make, easy, and super tasty. I used gluten-free flour with no problems at all, except a final rectangle that was maybe a little smaller than it was supposed to be so I got closer to 10 biscuits than 12. Thanks for the spunky post and the great recipe. I didn’t need them but I still enjoyed looking at your step-by-step photos! You have such a lovely aesthetic and presence.
Tracy
I can’t wait to bake my own batch!
Nuria
Hi, lovely blog! Just 1/4 cup of butter? 1/4cup is about 55 grams and it seems more in the pictures.
Robin Taylor
Baked these as a birthday snack/gift! I am now a popular gift giver!
Miky
HI Joy! I’m from Italy and I’ve tried your recipe (converting in grams). Thanks very much, I like it!
I added the link to your and you will find in the next few days on my blog: https://mikyhomemade.blogspot.it/
Cheers, Miky
Steph
These were delicious!!!!!
Carrie
These look delicious and the bootcamp challenge is very tempting! Beautiful photos and had to laugh at your comment about how you slice things — my mom taught me the same way as I’m sure her mother did. It’s just not a habit that can be broken, is it?
Erin @ The Speckled Palate
Oh, Joy. These sound like fall in a biscuit, and I desperately want to give these beauties a shot in my own kitchen sometime soon!
Kristen
I just made these yesterday and they are amazing!! But I was wondering if these can be refrigerated or if I should keep them out? I’m just scared they are going to get hard if I put them in the fridge!
Candace @ Cabot
That sound you hear is me clapping and squeeing. I will be enjoying these very soon!
Meg @ Beard and Bonnet
Your a biscuit making genius!!! This recipe made my inner southern girl squeal and now I have to try an apple pie biscuit for myself. Thank you!
Eve
The recipe asks for only one apple, but the photos suggest more than one apple in the product. Beautiful recipe.
joythebaker
Just one thinly sliced apple in the photos.
RogueMama
Can we use a pastry blender or do you prefer we use our hands?
joythebaker
feel free to use a pastry blender!
Sarah from Soymilk + Honey
These look so good!! And my mom always cut apples like that, so I do the same. I get dirty looks from my husband every time, but I just can’t seem to make it happen any other way!
Isabel
The photographs are beautiful
Ggtinmem
So I had so much fun doing the braided bread on the first installment and was eagerly waiting for the second!! So before I have to annoy you how much longer before the next one?
joythebaker
November and the last challenge in January!
Ryan
hi joy,
i want to make these biscuits for a friend’s birthday gathering but she’s a fan of pecans and chocolate. i noticed that your bourbon pecan pie with dark chocolate has a 45-55 minute bake time and the bake time for these is 12-14 minutes… do you think i can still combine the recipes and make bourbon pecan biscuits? would you change anything?
Ryan
btw- i’m super excited for your book!
joythebaker
That would change everything.
Rachel
I am having so much trouble finding KA Self-rising flour! I can find the store brand and other brands, just not KA.
Amy
These look like Sunday morning happiness :) Have to make them next weekend after a long walk by the water, and then eat them while snuggled up with a book :)
Thanks Joy.
Cristy
I can’t wait to try these. Can you tell me what material the counter is made from? I’m searching for something similar for my kitchen.
Andi Malone
Totally worth the time, I made with Granny Smith and Golden Delicious (double recipe with the apples I had in the fridge). Splendid, great breakfast, some for dessert tonight with whipped cream (ala strawberry shortcakes). I will be making these over and over again for my apple pie freak of a husband. He gives you 10 thumbs up.
Sydney @ Crepes of Wrath
I love that these are made all together and then cut up instead of having to individually load the apple filling in – genius! I can’t wait to make them.
butterandtoasttt
It feels fall-timey and I’m gonna make these today! Beautiful photos – LOVE the belt. Like, a lot.
CG
I will most definitely be making these! Our apple trees are way ahead of us…think I’ll have to double this recipe :)
http://www.farmbrews.blogspot.com
Seanna Lea
I think I will have to add this to my list of things to make. Think they are good enough for breakfast, or is this a dessert biscuit?
Laura (Blogging Over Thyme
Love, love, love, love these x infinity! :)
Rose de Iudicibus
Looks so delicious and also quite easy to do :)
I will give it a try for sure. Also, the color scheme is lovely, it feels very vintage, autumn-like and somehow crispy :)
Hugs, Rose
https://blushingrose.co/
Jen
Hi Joy, these look tasty! Any ideas how much 1/4 cup of butter would weigh? I find cup measurements hard to gauge for butter….
Stefanie @ Sarcastic Cooking
Gaaahhh! PS I played the IG video for my 9 month old and he loved it. He was dancing all about. I smiled because I knew I had passed on my carb love!
Vicki B
Holy smoke! These sound scrumptious! By the way, that is one cute outfit you have on and how do stay so fit conjuring up treats like this?!
Broma Bakery
This recipe makes me so excited for fall. And King Arthur Flour for a year? I’m al over this.
Taylor
Oh, yum! I can practically smell fall in my house already!
xoxo
Taylor
Jana H
Mmmmmm…looks delicious. I might hafta break out the butter for this one.
funny thing abut cutting the apples that way…that’s the way my mama taught me to cut apples, potatoes, etc and I did it that way for YEARS and never thought a thing about it until I started watching food network and saw the way they sliced things. now I use cutting boards for everything. probably safer, but kinda ruins the whole nostalgia thing. ;-)
Agnes Lam
Now I am once again wishing that everything is healthy.
https://lifewithagnes208.blogspot.hk/
shutterbean
I like watching your hands. Creepy? Totally.
Diane Siniscalchi
These look good. Fresh fall apples are my favorite. Can’t wait to try this!
Sara Dunham
A classmate saw me looking at this and begged me to compete….I guess I’m in!
Christina
I love your orange oval dish, where did you get it?
joythebaker
it’s a thrifted thing.
Cindy Pauldine
The step by step pics are so helpful- thanks!
Debbie
I’m thinking of making the bisquits and sandwiching with the sautéed apples a la strawberry shortcake. Whipped cream or vanilla ice cream to finish…
Nicole
Joy, I cannot wait to make these!
Joanna
Loved all the photos! Your photography is great – always an inspiration. This recipe will be a part of my upcoming apple cravings that are starting to kick into high gear now that fall is around the corner!
https://everydaymadefresh.com
Isabelle
So beautiful.
You are definitely making me hungry!
This Baking Boot Camp sounds very fun, you can count me in! I’m not 18 yet but I will be following along on instagram ;)
Isabelle @ Head Red & Blondi
Bryony @ Bryony Cooks
These look great! Can’t wait to get started!
Bryony @ Bryony Cooks
These look great! Can’t wait to get started on this month’s bootcamp.
pastapieandpirouettes
I love the idea of a baking bootcamp and how you posted a picture of every step in the process. Great post!
Laura @ Laura's Culinary Adventures
I don’t know what looks more delicious: the apple filling or the biscuit!
joythebaker
that’s why we’re putting them together!
Stefanie
I love the shirt dress and belt you’re wearing in these photos! Where did you get them?
joythebaker
oh thank you! they’re both from Old Navy a good while ago.
Erin @ The Spiffy Cookie
Those are some awesome biscuits! I want to use them for apple shortcake or just eat them straight up. Or maybe with some honey on top? Yum!
joythebaker
honey on top would be lovely!
ERIN
Joy these treats look amazing! Just in time too…I’m scheduled to bring in treats to our office meeting on Monday. Do you think it would be okay to make the biscuits the evening before and then bake in the morning so I could bring them in fresh?!
Can’t wait to try them…
joythebaker
yes I think that would be cool. you know, you might even assemble the biscuits not slice them until the morning just before you bake them.
Traci
my goodness Joyseph (i really hope you have friends who call you that), those look downright sinful. adding apples (and of course, KA Flour) to the shopping list!
Rebecca
The biscuits look awesome, but I’m really commenting to say you have beautiful hands!
Megan
Questions! I’ve always read to *not* use self-rising flour to roll out biscuits, on the theory that the unreacted baking powder on the surface of the dough will taste bitter. Is this perhaps offset by the cinnamon-sugar mixture? And how important is it to crimp the dough edge after the fold over given that you have a middle row of biscuits without any crimp at all? Perhaps I should try baking the recipe before I ask, my apologies.
Our paring knives often end up in the compost pile. Apparently a forgetful cook (ahem) parks it in the bowl after peeling fruits and veggies, then the bowl gets sent out to the pile by an unwilling child with the knife unnoticed.
joythebaker
I like your thoughts about the self-rising flour in the rolling process. I didn’t notice a bitterness, but I actually think you’re right! Let me tweak the post a bit. Also, crimping does not need to be clear through, but should be deliberate. Let me know how it goes for you and thank you for your comment!
sundiegoeats
Um pie and biscuit love children are just about the best idea I’ve seen all day :)
but i'm hungry
I cannot WAIT to make these! I love apple-pie anything, and biscuit dough make so much sense with this gorgeous, simple filling!
Allison
Those biscuits look lovely! I will have to make them for my man. He is sure to love them knowing that my homemade apple made him tear up from happiness…his words, not mine.
I would love to know though, are you wearing a mans chambray shirt or is it a longer tunic top? I am forever on the hunt for a good chambray!
joythebaker
it’s a shirt-dress from Old Navy!
Trang
I swear I have “apple pie scone” written down in my notebook under “things to make” for a while, and here you are, making apple pie biscuits like a boss! They look awesome! :)
joythebaker
it was meant to be!
Libby
These are so similar to your peach cobbler scones. I can’t wait to make these and take them camping with us this weekend.
And your coffee-break photo is so gorgeous. If you wouldn’t mind sending me a print of that, that’d be greeeeeeeat. :P
Rachel
Heyyyy it’s an apple version of my favorite JTB recipe of all time—peach cobbler scones!!! These look amazing, can’t wait to try them!!! THANKS! You da best.
Jenny @ The Peachy Pair
I am not much of a baker, but I must try this! Looks delicious!
joythebaker
you can do it!
Tamara
This recipe looks amazing! I can’t wait to join in on this challenge! Game on! :-)
Fiona
“Cold butter is cut into small cubes and added to the butter. ” ?? Do you mean Added to the flour as the oicture suggests?? They look yummy. BTW,
joythebaker
you’ve got it right!
Sharana @ Living The Sweet Life
A stuffed biscuit — what a GREAT idea … Mmmm yummm!! sounds like perfection
Abby @ The Frosted Vegan
I can’t wait to dive into these!!
dc
Oh yum! Thanks for sharing these! Also, my grandma taught me the same unsafe way to slice apples for her strudel (not the crispy kind).
Becca
ooo…So excited for this one!! Can’t beat the smell (or taste) of baked apples.
Mallory
Joy, sometimes it is like you are reading my darn mind. kind of weird. just thinking of what i could stuff into scones or biscuits this fall…you are one step ahead!
Lisa
Those look really good. I may have to try them out this weekend. I did want to add that we need a baking challenge with chocolate. I’m not a big fruity baked goods person so chocolate or plain old cinnamon or something would be greatly appreciated. I do think my kids would enjoy the apple thing though. They’re not weird like me.
shelly
…do you think your cat is stealing your knives? running out in the night and getting in fights in the streets of new orleans?
ok, its still early. mind is going to strange places! i need to finish my coffee. those biscuits look taystay!
joythebaker
you really might be on to something…
Akua
Hi Joy the Baker,
Can I replace the butter in the recipe with margarine?
Will it affect the outcome?
joythebaker
i’m not a fan of margarine. i think butter is best for this recipe.
Akua
Thank you :)
Warm Vanilla Sugar
Another fabulous challenge!! SO EXCITING!
Averie @ Averie Cooks
Love the recipe and ALL the photos, whoa. Amazing and thanks for sharing all of these!
I always want to be more badass than 50?s housewife-y in the kitchen. <— who doesn't!! :) I bought that book you recently linked in one of your Sunday posts, the baking with attitude book? I think that's what it's called with the stilettos and huge knife on the cover. Anyway, brought it on vacation and that was my beach read. Thank you!
Lene Svingel
Feel priviliged to be able to watch my baking heroine in action. Lovely color scheme in the photos – the shadowy one is dreamy and moody – love it :-).
Oh, and the biscuits are gorgeous too. Must try soon.
Somebody from Somewhere
Absolutely delicious!
https://somebodyfromsomewhere.blogspot.com/
thefoodieteen
They’re gorgeous, Joy! Love the sautéed cinnamon-butter apples.. yum!