Own your life. Own every last bit of it.
Don’t send your Christmas cards out until you’re good and ready. Wear neon purple tights with a grey dress… why not ? Go heavy on the gold eyeshadow…tis the season. Green nail polish? Go on. Run through the rain… or sleep in and skip exercise class.
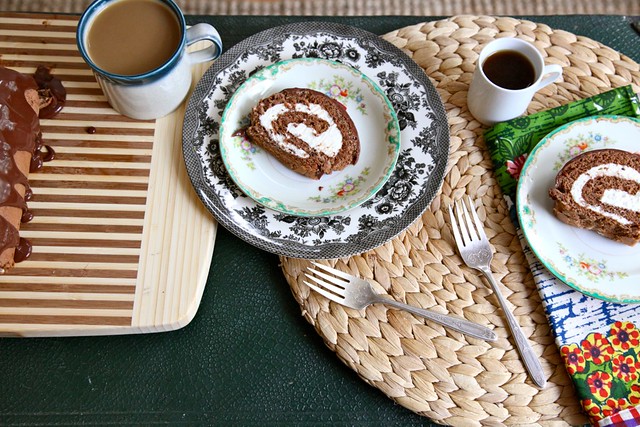
Fashion your cakes into a roll and slice generous portions for yourself, and skinnier portions for other people. Pretend not to notice what you’re doing.
Whatever it is: own it!
Maybe you’re one of those people who thinks that rolling a cake is bonkers crazy and waaaaay too hard for you to do.
I’m hear to change your heart and mind. Ok? Let’s do this!
The secret to this roll cake is its spongy texture.
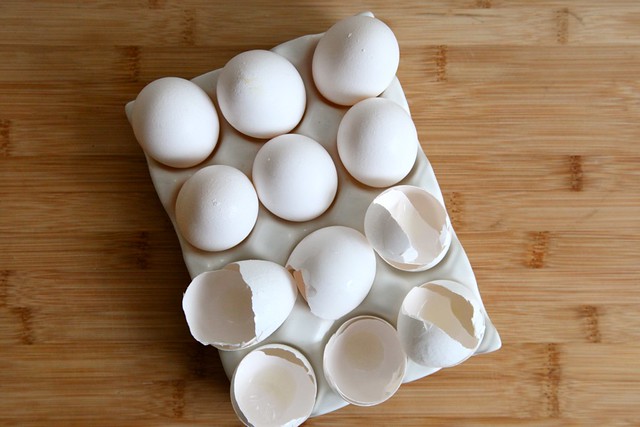
The spongy texture comes from eggs. Egg yolks and egg whites are separated, beaten in a mixer until thick and stiff, then folded back together.
Want to know the other good news about this cake?
It’s GLUTEN FREE! I know… there’s no flour. Plain and simple.
There are some specific things you need to make this cake happen.
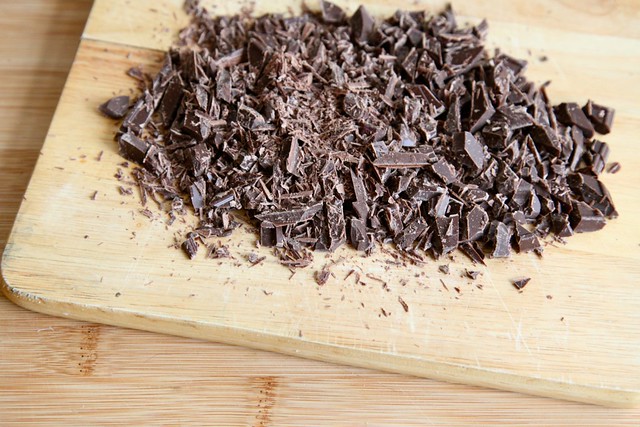
There’s 4 ounces of chocolate. Treat yourself to some fancy chocolate. It’s worth it for this recipe.
You’ll also need parchment paper. Essential. Don’t skip this step.
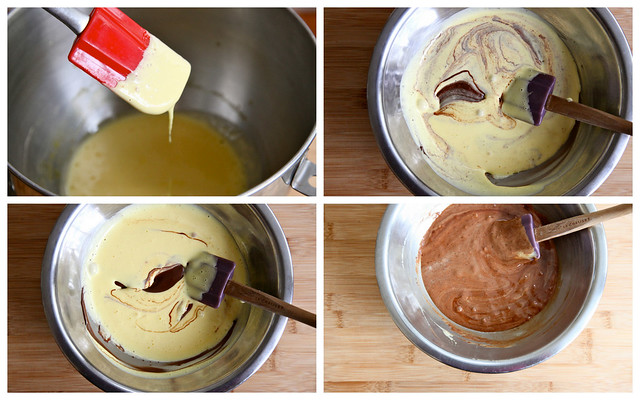
Egg yolks and sugar are beaten until pale and thick then folded with melted chocolate.
Thick and pale yellow egg yolks mixed with glossy brown melted chocolate. The batter will be thick and fluffy. Amen.
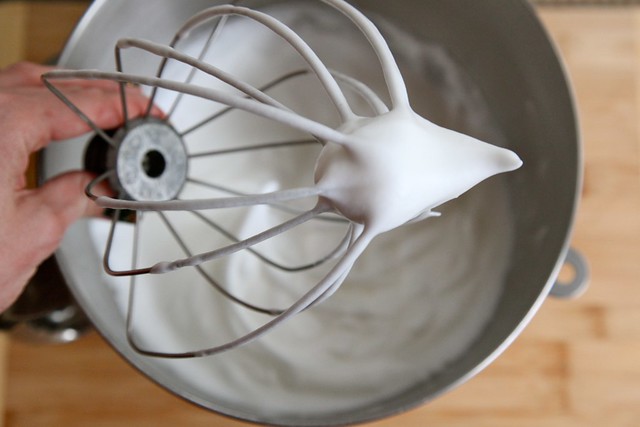
Egg whites are beaten to stiff, slightly glossy peaks. Stiff like this! Egg whites that stand their ground.

The egg whites are folded into the chocolate egg yolk-y mixture. Folded and folded. Bit by bit into a fluffy chocolate batter.
Cake batter. So sweet and innocent. Just waiting to be baked.
The baked cake come out spongy and light. It’s just begging to be spread with whipped cream and rolled into a festive shape.
Are you scared of cake cracks? Sure… this will happen to the best of us. Just remember… this cake was born to be rolled.
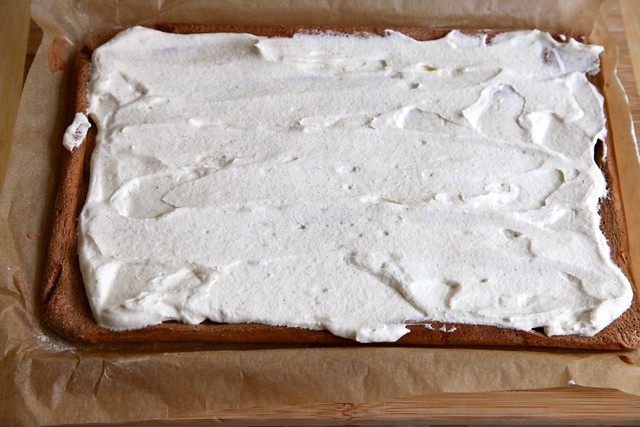
Spread with a thin layer of peppermint, vanilla bean whipped cream.
Or just crazily spoon the whipped cream into you mouth. Whatever works.
This is the part that might make you want to hold your breath.
Ok… it makes me want to hold my breath. Maybe it’s just me.
Let’s roll.
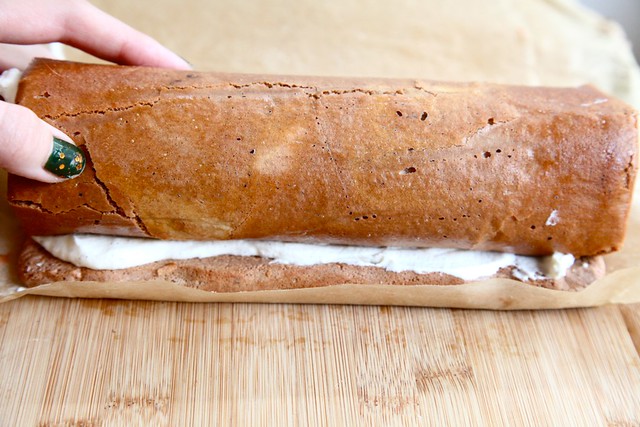
Start rolling the short side of the cake. A loose roll. No biggie.
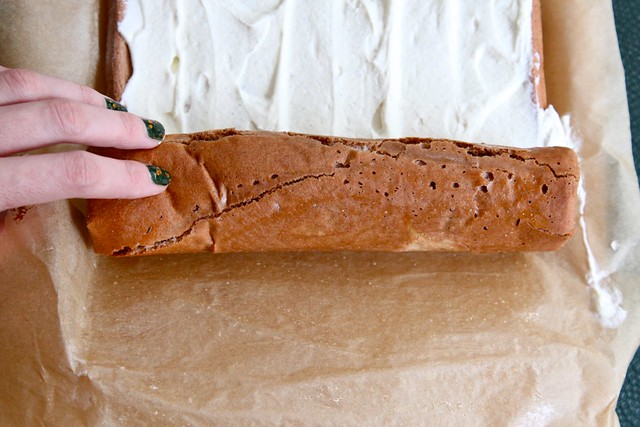
Use the parchment paper to help you roll. Use the parchment paper and peel it away.
See that giant crack through the center of the cake.
No biggie. That’s going to be in the center of the cake. Stay on your roll!
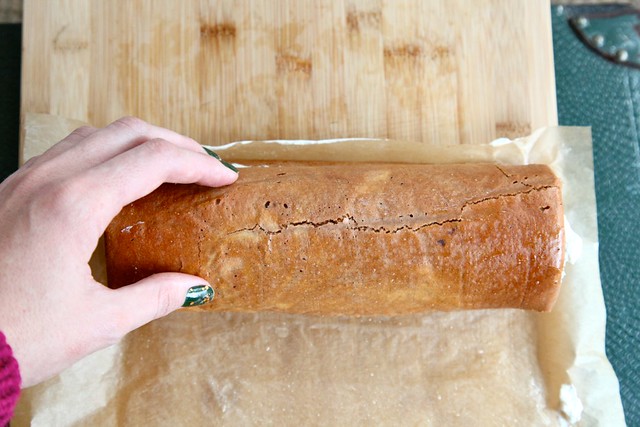
Finish with the cake seam side down.
Nevermind that little crack.
Give yourself, and the cake a little pat on the back.
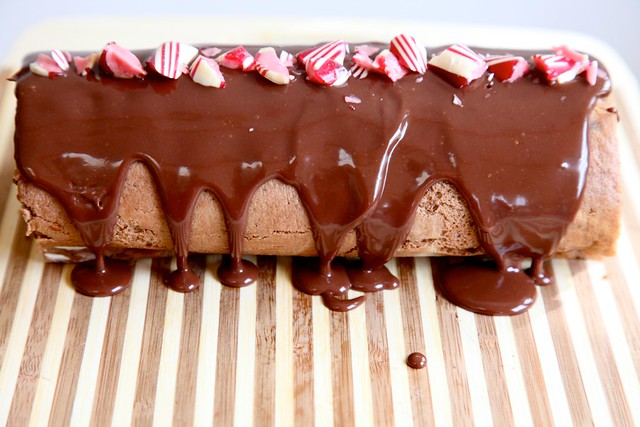
Then pour chocolate all over it… all the heck over it.
Crushed candy canes are a lovely last minute garnish.
Look how pretty you can make life!
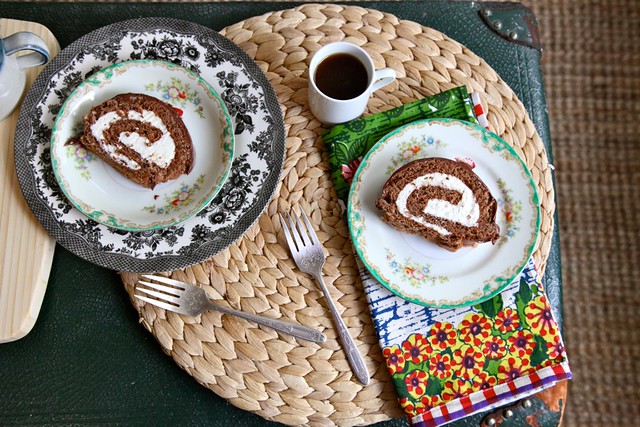
Do you see all those cracks in the cake? Nope… you don’t see em at all. They’re all folded and rolled up… and covered in whipped cream and chocolate. Even when things go cracked… whipped cream heals most wounds.
This cake is such a lovely holiday treat. It’s festive and way way impressive. It’s so light. It’s effortless to eat. It reminds me of fluffy cake ice cream. So so dang yummy!
Don’t like peppermint? Feel free to flavor your whipped cream filling with only pure vanilla, with almond extract, or orange zest and extract.
Make it yours. Own it (then share it)!
Chocolate Peppermint Roll
Makes 1 roll cake, serves about 8
adapted from Joy of Baking
For the Cake:
4 oz semi sweet chocolate, chopped fine
6 large eggs, separated
1/4 cup plus 2 tablespoons granulated sugar
1 teaspoon pure vanilla extract
pinch of salt
3/4 teaspoon cream of tartar
For the Whipped Filling:
1 1/4 cup heavy cream, cold
3 tablespoons granulated sugar
2 teaspoons pure vanilla extract or scrapings from 1 vanilla bean
1-2 teaspoons peppermint extract (start with one teaspoon and add more according to your taste).
For the Ganache:
1 cup semi-sweet chocolate pieces
2/3 cups heavy cream
To make the Cake:
Place a rack in the upper third of the oven and preheat oven to 350 degrees F. Grease a 17×12-inch baking sheet with butter or vegetable spray. Line the baking sheet with parchment paper (not foil… definitely parchment), and grease and flour the paper too. The parchment should overhand the sides of the pan just an inch or so. Let the baking sheet aside.
It’s easiest to separate egg yolks from egg whites when they are cold. After separating, allow them about 20 minutes to come to room temperature.
In the bowl of an electric stand mixer fitted with a whisk attachment, beat together egg yolks and 1/4 cup granulated sugar. Beat the eggs until they are thick and pale in color. This usually takes about 5 to 7 minutes at medium-high speed. The egg yolk mixture will pour in a thick ribbon from the beater, that’s how your know they’ve been beaten enough.
While the eggs are beating, melt the chocolate pieces. You can melt them in the microwave with low heat for a few seconds, stirring every once in a while as it melts. I melt chocolate over a double boiler. Place a few inches of water in a medium pan. Bring to a simmer. Place chocolate pieces in a heatproof bowl, and place the bowl over the boiling water. Stir the chocolate until it is melted completely. Turn off the heat and carefully remove the bowl from the simmering water. Allow the chocolate to cool for just a few minutes.
Add the thickened egg yolk mixture to the chocolate mixture. Gently stir together until just incorporated. Stir in the vanilla. The addition of the chocolate to the egg yolk mixture will thicken the egg yolks further, and make the chocolate appear fluffy in texture. Perfect. Set aside.
Clean the bowl and whisk attachment of your electric mixer well. Dry them to insure that no remaining egg yolk is present. Add the egg whites to the bowl. Using the whisk attachment, beat on medium speed until frothy, about 2 minutes. Add the pinch of salt, and gradually add the cream of tartar. Increase speed to medium-high until soft peaks form. Gradually add the remaining 2 tablespoons of sugar while beating. Allow the mixture to beat until stiff peaks form.
Place the chocolate egg yolk mixture in a large bowl. Place about 1/3 of the stiff egg whites in the bowl and gently fold. Use a light hand to sweep the egg whites through the center of the chocolate mixture, up and under. Fold until just incorporated, but large egg white and chocolate streaks remain. Add another 1/3 of the egg whites and continue to fold. The batter will be glossy and fluffy. This fluff will create the desired sponge texture of the cake, so we want to deflate the egg whites as little as possible. Fold in the remaining egg whites and gently fold together until just about entirely incorporated.
Immediately transfer the batter to the prepared baking sheet. Carefully smooth into the pan creating an even thickness. Don’t fuss with the batter too much. The more fussing, the more the cake deflates. If the cake batter doesn’t easily each end to end, then just try to make a even rectangle. Don’t sweat it.
Bake cake for 15 to 17 minutes. When done the cake will have a dry top and a spongey, bounce back feel.
Remove from the oven and allow to cool completely.
While the cake cools, prepare the whipped cream and ganache.
To make the Whipped Filling:
Place heavy cream in the bowl of an electric stand mixer with the granulated sugar, vanilla and peppermint extract. Beat to soft, whipped cream peaks. The whipped cream should hold its shape but still be velvety and spreadable. Allow to rest in the refrigerator.
To make the Ganache:
Place chocolate pieces in a medium bowl. Heat cream in a small sauce pan to almost boiling. The milk will be steaming hot. Pour the hot cream over the chocolate pieces. Allow to stand for one minute before whisking into a smooth and glossy chocolate sauce. Allow to rest in the fridge until thickened slightly, about 30 minutes.
To Assemble the Cake:
Allow cake to cool completely. Remove the cake, using the overhang of parchment paper, from the baking sheet. Spread with a thin layer of whipped cream filling. This doesn’t need to be a thick later. When the cake is rolled, there will be ample filling.
Place the cake so that the 12-inch side is facing you. We’re going to roll from the short side.
Use the parchment paper to help you. Don’t worry about creating a tight roll. This isn’t like rolling cinnamon rolls. Gently roll the cake, removing the parchment paper as the cake is rolled. The first roll or two will most likely crack and it’s being folded. Don’t let this stop you. This cracking is totally normal. As the cake roll gets larger, the cake will crack less.
Gently lift cake and place on a clean serving board or plate. Allow the cake to rest for about 30 minutes in the fridge.
Remove cake from the fridge and drizzle with chocolate ganache. Allow to chill in the fridge until ready to serve. Just before serving, garnish the cake with crushed candy canes. Garnishing before will make the candy cane pieces ooze just a bit.
Cake will last, wrapped in the fridge, for up to 3 days.


204 Responses
I made this today, but with the candy cane whipped cream inside and chocolate whipped cream on the outside (from the buche de noel that you posted recently). It was SO delicious, and my boyfriend’s family polished the whole thing off in about five minutes flat. I don’t know if I can wait until next Christmas to make it again!
Inspired by your recent cinnamon rolls, I think I am going to try this with an orange filling and sprinkle it with pistachios. I can’t wait!
I make this every year for Yule and just change up the flavor of the peppermint to orange or other complimentary chocolate flavors. This year I have a new challenge, I have a guest that doesnt like chocolate at all. Can I do anything to this cake to make it a vanilla roll? Mind I’ll still be making my chocolate version but would like to also make a vanilla version. PLEASE HELP! Thank you!!!
I think you will have to use a completely different recipe, because the chocolate is a big part of the fat in this recipe
Not even with white chocolate?? Sigh. I have been searching the internet and have yet to find a recipe as enticing as yours. I truly due love this recipe and the treat that it makes.
Also it freezes well and is tasty right out of the freezer.
I wonder if I could just sub out all the chocolate with white chocolate, hmmmm
Very informative