Think you aren’t a bread baker? Let me change your mind! This easy no-knead bread recipe does all the hard work while you sleep, so you can wake up to a gloriously crusty, perfectly imperfect loaf that’s so simple, even the cat could make it (just kidding – if Tron could bake bread I’d always be out of butter).
Y’all, this no-knead overnight bread recipe has been my lifeline over the last few months.
Moving into my new house in Bellville has been a bigger challenge than I ever imagined—think boxes everywhere, tools I can’t find, and “Where did I put that spatula?” moments. But this bread? It’s been my rock. So simple that even when everything else was chaos, I could still pull together a fresh loaf with just a handful of ingredients. I baked one for the previous owners, wrapped it up in a fancy Williams Sonoma kitchen towel, and brought it over during the inspections because, you know, bribery with carbs. And I’ve baked loaves for my new neighbors as a way of saying, “Hi, I come in peace…and with gluten.” There’s something about leaving a loaf of bread on someone’s doorstep that feels extra special, even if it’s really the easiest thing to make.
Sometimes a simple loaf (and the bread smells from the oven) are all I need to feel like I’ve got my life together.
But here’s the kicker: this is the bread recipe that turned my geologist boyfriend into a full-fledged baker. I mean, I always suspected he had an inner baker waiting to emerge, but this no-knead bread really sealed the deal. Of course, he approached it with all the scientific precision you’d expect—he ran the food cost numbers like it was some sort of geological survey and realized that making bread at home was not only delicious but also made the most financial sense. Capricorn, anyone? Now, he’s baking a loaf a week, and you’ll hear no complaints from me.
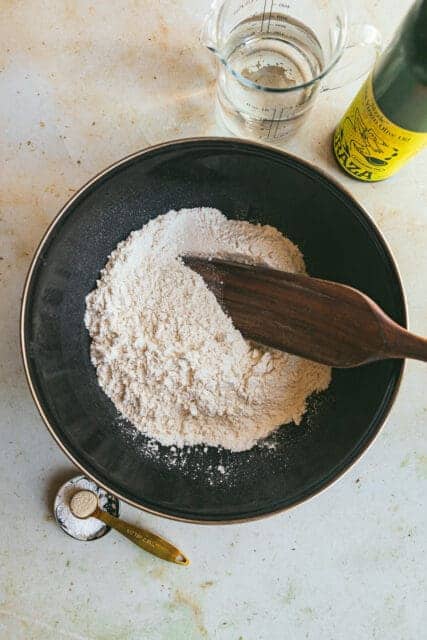
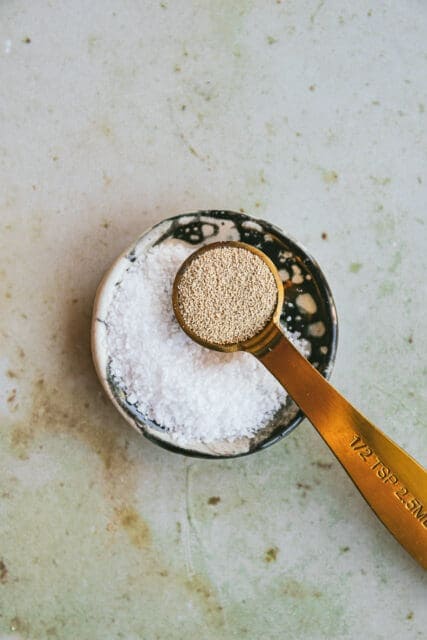
Here are the ingredients you’ll need to make this no-knead bread recipe:
• all-purpose flour (You can also use bread flour with no substitutions. I’ve also substituted up to 1/2 cup of whole wheat flour for the all-purpose flour with no changes to the hydration.)
• kosher salt
• active dry yeast
• warm water
• olive oil
That’s it!
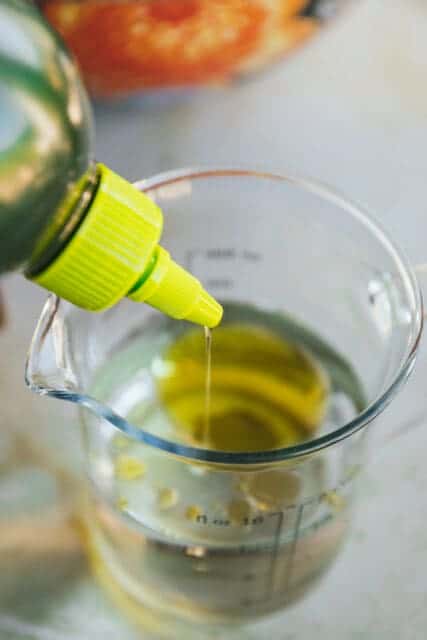
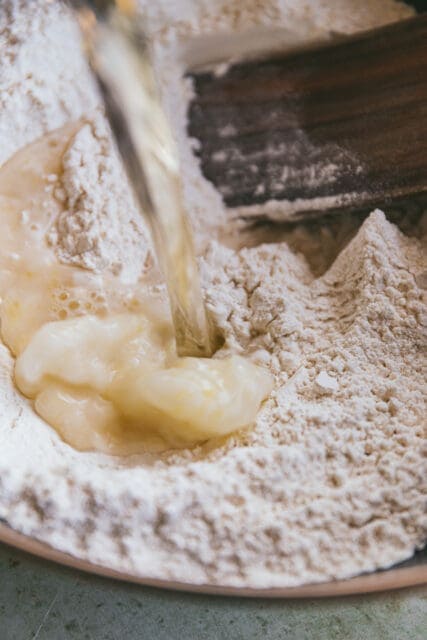
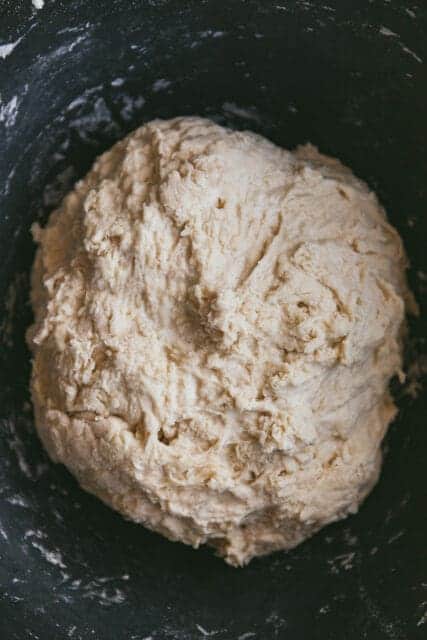
In a measuring cup, combine warm water and a glug of olive oil. Whisk together the flour, yeast, and salt. Add the water to the dry ingredients and use a rubber spatula to stir the ingredients into a wet and shaggy dough. This takes me about 10 minutes from walking over to the pantry cabinets to covering the bowl of shaggy dough with plastic wrap.
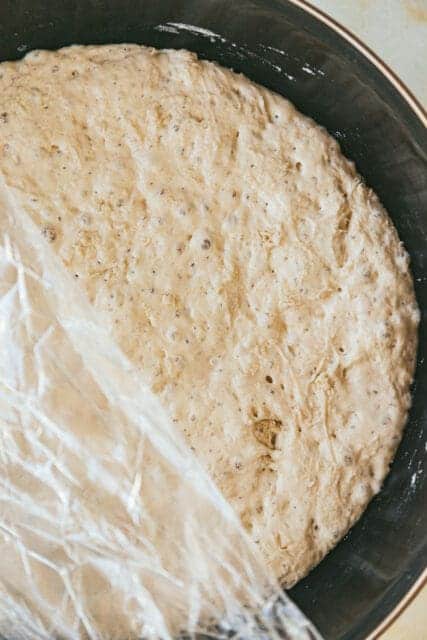
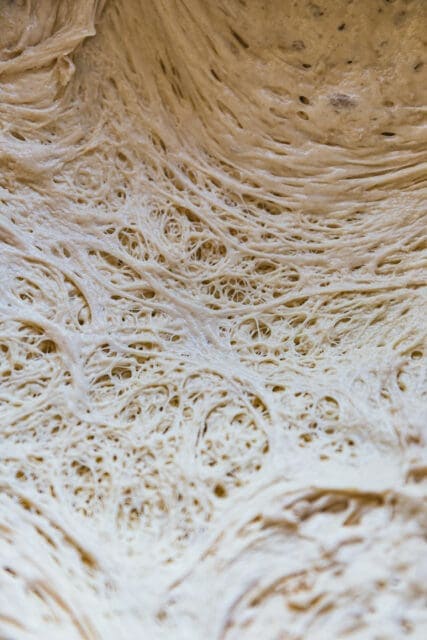
Let’s talk about why letting dough rest overnight (we’re talking 12-18 hours!) is the secret to this no-knead bread’s magic (and why it makes you look like an artisan baker with minimal effort).
When you mix up the ingredients for the no-knead bread and just let them hang out overnight, something amazing happens: gluten development. Now, normally, to develop gluten (that stretchy, elastic network that gives bread its structure), you’d find yourself kneading the dough. But in this case, time does the hard work for you. As the dough sits, the gluten proteins naturally align and form bonds, creating a strong yet flexible dough. This slow fermentation also allows the yeast to work its magic, producing gas bubbles that get trapped in the dough, leading to that airy, open crumb that we all love in a good loaf of bread.
By letting the dough rest overnight, you’re giving it the time it needs to develop into the kind of bread that will make your friends and neighbors wonder if you’ve secretly gone to baking school. Plus, it means you get to wake up to dough that’s ready to bake into a gorgeous loaf— folding but no kneading required!
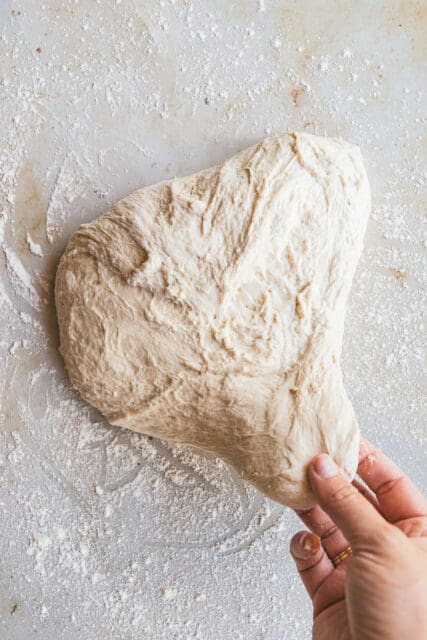
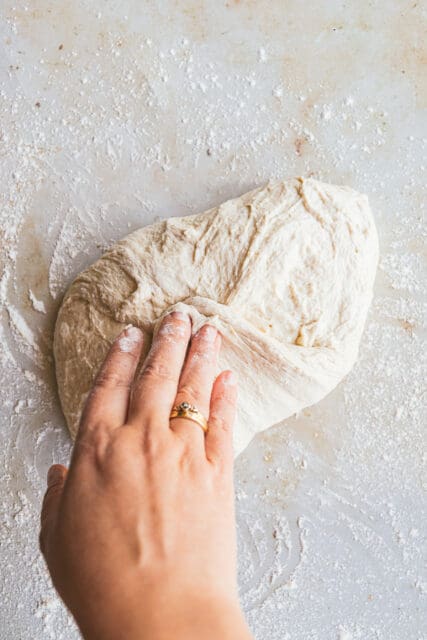
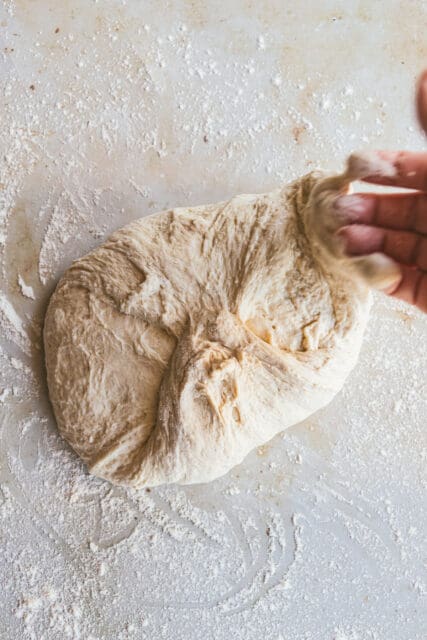
After resting overnight and letting all that gluten magic happen, it’s time to shape our soon-to-be gorgeous loaf. First things first, make sure the work surface is well-floured, like a snowy Texas winter day (if those existed!). Plop that sticky dough right on top and sprinkle a bit more flour on your hands—trust me, you’ll thank me later.
Now, gently fold the dough from north to south, and then from east to west, as if you’re giving it a snug little hug from all directions. Each fold adds a bit more structure and strength to our dough baby. The more folds, the tighter the dough will become. Once you’ve folded to your heart’s content, flip the dough over so the seams are tucked underneath. Using your floured hands, give the dough a little tuck here and there, coaxing it into a nice, tight ball. The dough is all set for its final rise before heading into the oven.
Tips for shaping very sticky dough:
- Flour Your Work Surface and Hands Generously: Sticky dough, by its nature, is, well, sticky. To keep it from adhering to everything, sprinkle a good amount of flour on your work surface and your hands. This will create a barrier and make it easier to handle the dough.
- Use a Bench Scraper: A rubber bench scraper is your best friend when dealing with sticky dough. Use it to help lift and fold the dough without tearing it. It can also be used to scrape up any dough that sticks to the surface.
- Gently Shape the Dough: With floured hands, gently coax the dough into a rough shape—typically a round or oval. To do this, lightly pull and fold the dough edges towards the center, rotating the dough as you go to create a smooth, taut surface on top. The goal is to develop tension in the dough’s surface, which helps it hold its shape during the final rise.
- Don’t Overwork the Dough: Unlike kneaded dough, you don’t want to overhandle sticky dough. The more you work it, the stickier it will become. Be gentle and patient. Please clear your hands of sticky dough if it’s piling up.
- Final Tuck and Rest: Once you’ve folded and shaped the dough into a ball, flip it over so the seams are on the bottom. Tuck the dough edges underneath to form a tight, smooth ball. Then, let it rest and rise according to your recipe’s instructions.
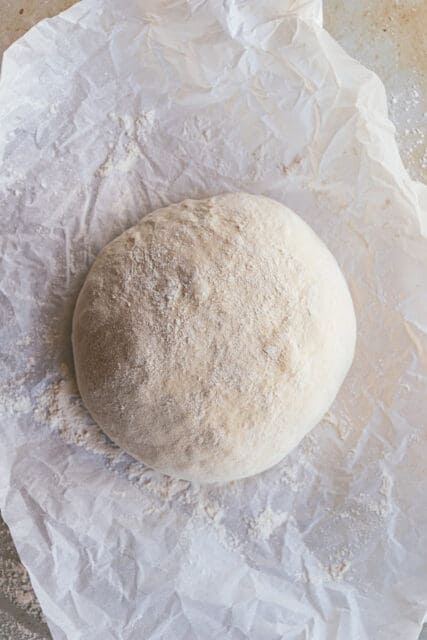
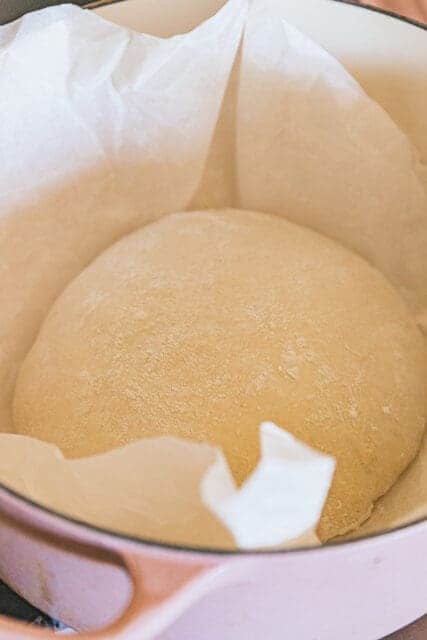
Preheat the oven to 450 degrees F with the Dutch oven and lid warming inside and the oven warm. In the meantime, let the dough rest on a piece of floured parchment paper. This step is crucial because it allows the dough to develop a bit more structure and makes transferring it to the hot Dutch oven much easier. The parchment paper also ensures that the bread won’t stick to the Dutch oven, giving you a beautiful, effortless release. In short: splurge on these parchment paper sheets.
Once the oven and Dutch oven are preheated and piping hot, carefully lift the dough using the parchment paper and place it into the sizzling Dutch oven. Pot holders are key.
The magic of the Dutch oven lies in its ability to create a perfect baking environment for the bread. The heavy cast iron retains and radiates heat evenly, which helps in achieving a crisp, golden crust. Additionally, the enclosed space traps steam released from the dough, which helps to develop a beautifully airy crumb and a crust that’s both crunchy and well-browned. With the lid on for the first part of baking, you’ll get the steam effect, and once removed, you’ll get that perfectly caramelized crust. It’s a wonder, really.

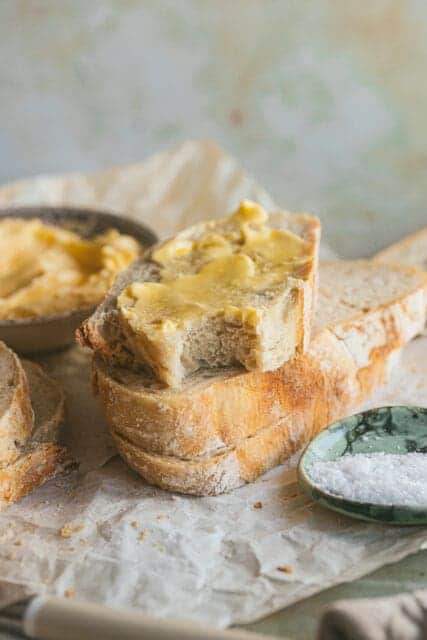
Now the hardest part of baking this loaf is letting it rest just out of the oven. The resting period is actually an extension of the baking as the rest allows the loaf to cool to room temperature, releasing steam and setting the crumb. I know – the worst possible news.
I promise in no time, you can slice into your fresh (and still maybe just slightly warm) loaf and enjoy the fruits of your labor as a baker, scientist, and most recently, chief home bread baker.
NOTE: Key to this bread is an ovenproof pot with a tight-fitting oven-proof lid. I find that my dutch oven is great for this task but I also often bake this bread in my ceramic bread baker (which is at a much more reasonable price than a dutch oven if you plan to bake many loaves of bread).
The Easiest Overnight No-Knead Bread Recipe
- Author: Joy the Baker
- Prep Time: 12-18 hours
- Cook Time: 40-50 minuets
- Total Time: 0 hours
- Yield: 1 large loaf 1x
- Category: bread
- Method: baking
Description
The easiest artisan loaf of bread made with very simple ingredients, time, and a dutch oven.
Ingredients
- 3 1/4 (425 grams) all-purpose flour
- 1 1/2 teaspoons kosher salt
- 1/2 teaspoon active dry yeast
- 1 1/2 cups warm water with a splash of olive oil
Instructions
- In a large mixing bowl, stir together the flour, salt, and yeast until well combined. Add the warm water and stir with a wooden spoon or spatula until the dough is uniformly mixed. The dough will be loose and shaggy, which is exactly how it should look.
- Cover the bowl with plastic wrap or beeswax wrap, and let the dough rest at room temperature for 12 to 18 hours. The dough should rise and develop a slightly bubbly, wet surface.
- After the rise, transfer the dough to a very well-floured surface. Flour your hands as well. Fold the dough onto itself by pulling the outer edges toward the center around the dough a few times until it tightens and forms a ball. If the dough feels sticky or loose, sprinkle more flour as needed. Lightly flour the top of the dough ball, then carefully flip it upside-down onto a piece of parchment paper so that the smooth side is facing up. Use your hands to shape the dough into an even circle. Lightly flour the top again, place on a piece of parchment, and loosely cover the dough with plastic wrap or beeswax wrap while the oven heats.
- Place a Dutch oven (with the lid on) inside your oven and preheat to 450°F. Allow the Dutch oven to heat for 20-30 minutes while the dough continues to rest. If the dough spreads out more than you’d like during this time, you can reshape it into a tighter ball just before baking.
- Using oven mitts, carefully remove the Dutch oven from the oven—be cautious, as it will be extremely hot. Lift the dough ball by the edges of the parchment paper and gently place it into the Dutch oven. Cover with the lid and bake for 30 minutes. Then, remove the lid and bake for an additional 10-20 minutes until the crust reaches your desired level of golden-brown and crispiness. The bottom of the loaf will sound hollow when thumped.
- Remove the Dutch oven from the oven and carefully transfer the bread to a wire cooling rack using the parchment paper. Allow the bread to cool for at least 1 hour before slicing and serving.
Notes
What else can you add? I’ve added 2 tablespoons of cornmeal or two tablespoons of flax seeds , or 1 teaspoon of dried Italian herbs to the flour when making the dough with great success!
I’ve also subbed up to 1/2 cup of whole wheat flour for the all-purpose flour without having to adjust the amount of water.
44 Responses
Hello, I would really like to try this. My Dutch ovens are in terrible shape at the moment – humidity + neglect = rust. Is there another vessel we can cook this in? Also curious what size vessel we should use. Thank you!
I’ve made this bread many times and it’s always awesome and easy. It almost had a sourdough taste. I was thinking could you sub buttermilk for the water (cold fermented obviously)for a taste even closer to sourdough?
Oh that’s an interesting experiment! I think that would be great!
I’m sorry to hear about your Dutch ovens! Sounds like you might need to bring them back to life for soup and bread season! :) To answer your questions, I typically use a pan that’s at least 10-inches in diameter. Another reader mentioned using her cast iron skillet with a well-fitting oven-proof lid. I do worry a bit about having enough room for the bread to rise. This might be a long shot, butt if you have an oven-safe ceramic pot and lid – that would work well too. They sell some specifically for bread baking as seen here: https://shop.kingarthurbaking.com/items/cloche-bread-baker-with-handle
1/2 tsp of yeast does not sound right for this amount of flour? I’ve used other no-knead recipes and the yeast is usually 2.25 tsp or 1 packet.
The amount is correct because this is a no-knead bread with a long ferment (12-18 hrs). The amount of yeast you mention is meant for the usual kneaded dough recipes you bake in a few hours.
Milly has it correct on this one! Yes, the 1/2 teaspoon seems like a small amount for the amount of flour, but it is in fact correct. The long rise time calls for less yeast to develop the structure of the bread.
Have you tried letting this sit for 24 hours with success? Or any amount of time longer than 18?
Great question! 24 hours might be pushing it. If this is your timeframe, I would let the dough first rest in the fridge for 8 hours then on the counter at room temp for the remaining 14-16 hours.
The *very* popular NYT no need recipe only used 1/8 tsp yeast. It works. But you have to let it go that full 12-18 hours.
Yes. That’s always felt like not enough yeast to me. Using 1/2 teaspoon makes the loaf a bit more fool-proof for me. Not that any of us are fools. :)
This sounds so easy! Can I use a traditional loaf pan to bake it in? Thanks!
Great question! I haven’t yet tested this recipe in a loaf pan so I can’t answer you well but my next bake I’ll test it and let you know!
I don’t have a Dutch oven, what other baking pan can I use? Thanks
If you have a baking stone you can place the dough on the stone and cover it with a large bowl, bake for 30 minutes then remove the bowl and bake another 20 minutes or until it’s as brown as you like.if no baking stone a sheet pan may work.
Do you have a recommendation for a good rubber bench scraper? Thank you!
I don’t find myself being suuuuper picky about my rubber bench scrapers, but I do always reach for this one from King Arthur Baking in my drawer: https://shop.kingarthurbaking.com/items/bowl-scraper
How large is your Dutch oven or ceramic bread baker?
I need this answer also. Her link is for the small one, so maybe it is large enough?
Before I got a dutch oven, I used a cast iron skillet with an oven safe lid and it worked.
Oh that’s great to hear Annette! the key is definitely a well-fitting oven-safe lid to trap that moisture! That’s key to the bread rise and development.
Yes, I’m one of those. Words like splash, dollop, smidge all make me nervous. Joy, if you would indulge me a little and lessen my anxiety, I really want to try this but can you guess at how much a splash might be? Truly grateful.
I’ve used 1-2 tablespoons of olive oil to make a splash.
Would I need to make any high-altitude adjustments for baking it in Denver?
This works fine in the Denver area with no adjustments needed.
Love to hear that!
I just made this. I’m in Golden, CO at 6100’. I did not adjust the yeast but I did add additional flour and water per king Arthur’s high altitude directions and it came out perfectly. I’ll be making this again!
That’s fantastic news Mariah! It’s hard for me to know because I’m stuck down here at sea level (and before, BELOW sea level in New Orleans) but King Arthur Baking is such a great resource!
Can you use gluten free ap flour?
Unfortunately gluten free bread won’t create the structure that glutenfull flour does. Whenever I want a proper homemade gluten-free loaf I run over to https://theloopywhisk.com/ you’ll need psyllium husk to mimic the structure of gluten and Katarina can walk you through the science. I’ve made many of her recipes with great success!
Have made sourdough bread for years using various people’s methods, I’m 89 years old, so trust me I’ve tried alot.
Read this recipe, had a spare non productive day ahead of me so I decided to give it a go.
What excitement when things started to bubble with 1/2 teaspoon of yeast. Rushed out in the morning and my dough looked great. Threw it in the oven and hubby and I couldn’t wait to see what it was like.
To say I was impressed is an under statement. No work involved, basic ingredients and a beautiful holey loaf at the end of it. Brilliant. Tenant getting the next one. Thankyou so much to you and your husband for sharing this amazing easy recipe.
Why do you add olive oil?
Just a tough of oil (or any fat – recently I used melted butter) will help the bread stay softer for longer.
I use a clay pot cooker—Schlemmertopf,—a gift from my ex mother-in-law. Works like a charm!
I was so excited to try to read your article but so many ads popped up and it kept jumping around I gave up but was able to post this somehow. I’m using an iPhone 14. Is there a way to read your articles from top to bottom?
Yes, if you hit the little page button in the web address bar when you’re in the Internet it’ll show a reader view and eliminate the ads! Here’s a link for instructions
This is nearly identical to the recipe and method I’ve followed for years. It’s a great recipe and I’ve found that, due to the fermentation process, most people can eat this bread. It’s even been a hit with people who tend to have trouble digesting bread.
Is a splash of olive oil 1 or 2 tbsp?
This recipe is super simple and I find myself coming back to it week after week! Makes a crusty loaf of bread everytime!
“If Tron could bake, I’d always be out of butter.” Yes, fellow cat lady, I look forward to testing your recipe.
I made mine way too wet!! Wah. I’ll fix my proportions next time. This is the perfect recipe though!
Update I don’t know What I originally did (now I think I literally left one cup of flour out)
Tried it again,, used a scale for the flour this time.
Oh my this came out amazing. I have pretzel salt so I threw that on.
Wish I could post my photo here! I’m not on social media
Your recipe doesn’t say cups on the flour, maybe you didn’t notice that. Going to try this, my daughter loves baking bread.
New to baking in a cloche. Have tried several no-knead recipes (following recipe exactly), and dough spreads out such that I get a really flat loaf. Suggestions, please?