There are things I allow myself to buy… things like new jeans, the occasional pair of fancypants shoes, milk, butter, frozen yogurt and a bottle of chocolate syrup. Ok… to be honest, I allow myself to buy a lot of things.
There are things that I do not, under any circumstances, allow myself to buy: Oreos. Double Stuff Oreos. Yes, it may sound silly, but I am not allowed to buy Oreos. It’s a rule. In my brain. That makes it real.
Why the silly strict Oreo rule? About ten years back, when I was the all-knowing eighteen year old that brazenly moved out of my parents’ house and across the country, I realized that I had to find a way to feed myself. Not a problem. Just go to the grocery store, right? Suuure. I took myself to the grocery store and bought every single bit of junk food that my parents’ had (wisely) withheld from me for eighteen years. Chesee puffs, orange soda, fruit roll-ups and Oreos… sooo many Oreos. It turns out, a girl can live on Oreos alone…. for about a week… and then comes an epic Oreo hangover that is not to be forgotten.
So. Fine. No more Oreos.
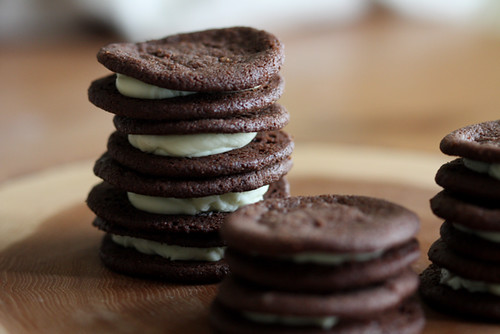
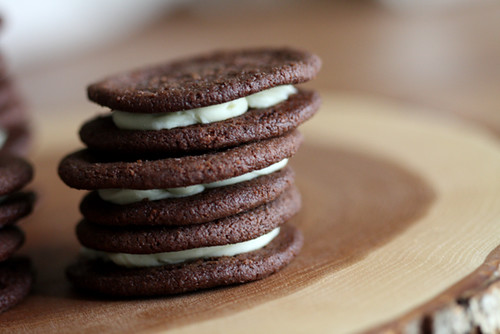
No more store bought Oreos. Homemade Oreos with a touch of peppermint? That’s ok, right? Totally ok! Are you in? Heeeeck yes! It’s December. Let’s milk this chocolate and peppermint thing while we have the chance.
You might remember these cookies. I’ve made them before with an espresso filling. Delicious.
This time around I opted for a lightly pepperminted white chocolate filling. Combined with the salty, crunchy, chocolate cookie… divine.
Here are a few tips when making these cookies:
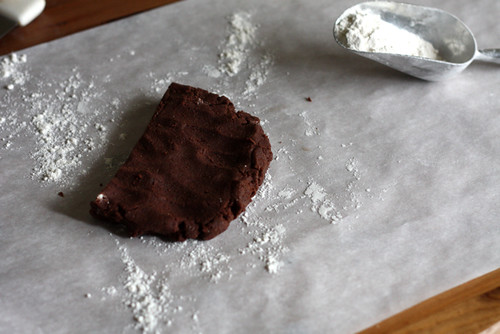
Don’t make the dough until you’re ready to use it. It does not need to be refrigerated. It goes straight from the mixing bowl to the counter to roll out.
Make sure the butter is at room temperature and cut into small chunks to mix into the dry ingredients… otherwise the cookies won’t bake up right. Weird but true.
When making the filling, Chop the chocolate as fine as you can. Even if you’re lazy like me… keep chopping. This will insure that all of the chocolate melts when the hot cream is poured over it. I don’t like lumps. I’m assuming that you don’t like lumps either.
To fill the cookies you can use either a pastry bag or a 1/2 teaspoon. Both work!
Homemade Peppermint Sandwich Cookies
adapted from The Essence of Chocolate
makes about 3 dozen cookies (mine batch came closer to two dozen for some reason)
For the Filling:
1/2 cup heavy cream
8 ounces white chocolate, finely chopped
1/4 to 1/2 teaspoon pure peppermint extract (depending on how strong you want it)
For the Cookies:
3/4 cup granulated sugar
1 1/2 cup plus 3 Tablespoons all-purpose flour
3/4 cup plus 1 Tablespoon unsweetened cocoa powder
1/2 teaspoon baking soda
1 1/2 teaspoons salt
15 Tablespoons (7 1/2 ounces) unsalted butter, but into 3/4-inch cubes, at room temperature (this is important)
For the Filling:
In a small saucepan, bring the cream to boil over medium heat. Remove from the heat and add the finely chopped white chocolate and peppermint extract. Make sure all the chocolate is covered by the cream. Let stand for 1 minute (this is important), then whisk the white chocolate until completely melted.
Transfer the filling to a small bowl and let stand until room temperature. You’
ll need the filling thicker to assemble the cookies, so cover the filling and place it in the refrigerator for 30 minutes or an hour, until a thick consistency is reached. If the filling hardens too much, it can be rewarmed in the microwave for a few seconds. It’s best if left at room temperature until the proper consistency is achieved. This meant leaving it out overnight for me.
For the Cookies:
Position the racks in the lower and upper thirds of the oven and preheat the oven to 350 degrees F. Line two baking sheets with parchment paper.
In the bowl of a stand mixer fitted with a paddle attachment, combine the sugar, flour, cocoa powder, baking soda and salt and mix on low speed. With the mixer running, add the butter a few pieces at a time. The mixture will have a sandy texture at first and then will begin to form peddle-size pieces. As soon as the dough starts to come together, stop the mixer. Make sure all the butter is well incorporated. If there are large butter pockets, mix for a few seconds more.
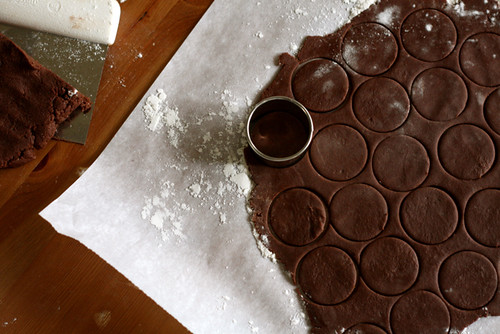
Form and roll the dough straight from the mixer. The dough becomes hard to work with if chilled.
Transfer the dough to a board and use the heel of your hand or a pastry scraper to shape the dough into a block about 5 by 7 inches. Cut the block into two pieces.
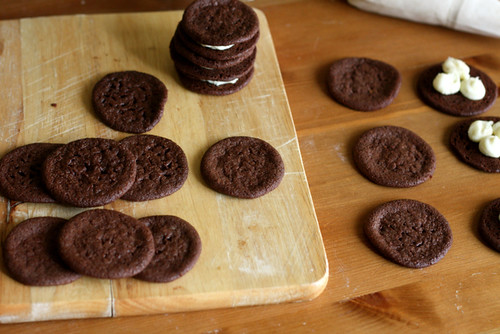
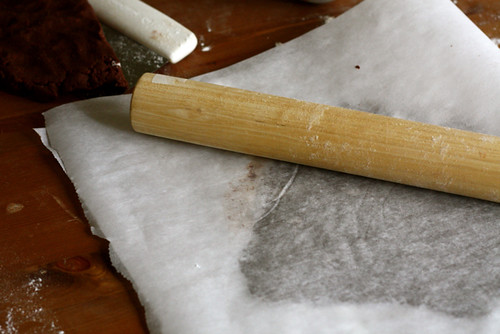
One at a time, roll each block of dough between two pieces of lightly floured parchment paper until about 1/8-inch thick. Using a cookie cutter, cut into 2 inch rounds. Place 1/2 to 1 inch apart on the prepared baking sheet. You can form and roll the dough scraps once after the first roll.
Bake for 12-15 minutes, rotating the sheets halfway through the baking. Remove from the oven and cool on the sheets for 2 to 5 minutes. They’ll be too soft to move straight from the oven. Transfer the cookies to a cooling rack and let cool completely.
To Assemble the Cookies:
Place half of the cookies upside down on a work surface. Whip the filling lightly with a whisk to loosen it. It will lighten in color and fluff up. Don’
t overwhip or the filling may begin to separate.
Transfer the filling to a pastry bag fitted with a 1/4-inch plain tip. You can just scooped the filling out by the half teaspoonful. Pipe or dollop one teaspoon of filling in the center of each upside down cookie. Gently, using your fingers, press the cookies together until the filling comes just to the edges.
The cookies can be stored in an airtight container for up to 3 days.


129 Responses
Joy, thanks for the recipe and all the tips. I made the cookies two days ago and they are just awesome. I don’t have a mixer either and preparing the dough was just a huge act of faith. I followed all the steps and the only way was to get dirty with my hands. It doesn’t seem to work but, just when I finished saying all the ugly words that I know in spanish and english… It worked! Next time: esspresso version.
This one looks awesome.
I was quite worried about my filling when I made these because I didn’t think it would ever be the right consistency, but after leaving it out overnight and then giving it a quick whisk…bingo! I really enjoyed these cookies. Thanks so much:)
Dear Joy,
My 6 year old daughter just asked me if one day we could make homemade Oreos. Of course, I said of course. And, I told her, I knew just who would have a recipe for homemade Oreos, if anyone did. And you do!
Thanks Joy.
while making these, with my grandaughter( from Taylor swift recipe) we noticed the batter would NOT hold together. We added an egg and they turned out fine. Please let me know if u update the recipe to include an egg as I would like to share info that a 10 yr old baker know that her intuition/feedback was helpful.