You know how some people have therapy dogs that they put charming little vests on and cart around to make their world, and really all of the world a better and more peaceful place? I have therapy pie.
No vests. Certainly nowhere near as adorable as a tiny Chihuahua or a friendly-faced labrador… but my goodness, the calm they inspire is second to none.
These pot pies are inspired by a few things (besides my need for therapy):
• Last year’s trip to London has me dreaming every few weeks about warm, savory, meaty pies with flakey pie crust.
• I have a bonkers recipe for a double curst Chicken Pot Pie which miiiight be the best things I’ve ever made, and I’m always trying to out-do myself.
• It’s winter in our world and, admittedly… in New Orleans this week it’s pretty warm… but my mind and body still know that it’s January and it’s time for warmth and carbs and New Year juice cleanse be damned.
Also FANTASTIC: these little dreamers can be made in individual ramekins and can be frozen before or after they’re baked for future Winter company and comforts.
Like all good things, we’ll start with a simple buttermilk pie crust.
You know, I think this dish would also be pretty great with store-bought, all-butter puff pastry. For when you’re feeling both lazy and indulgent. Those two go hand in hand.
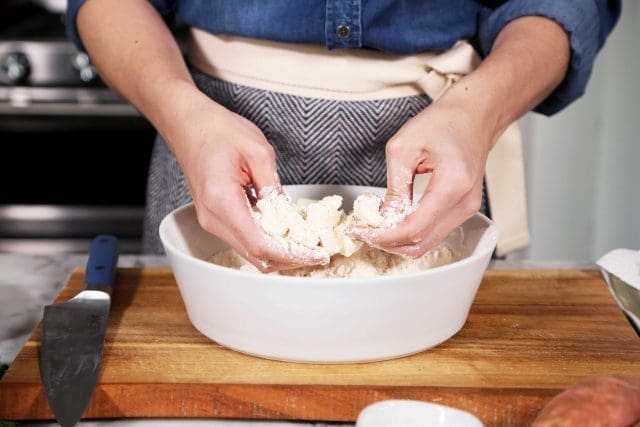
But otherwise, break some cold butter up into some flour. Simple.
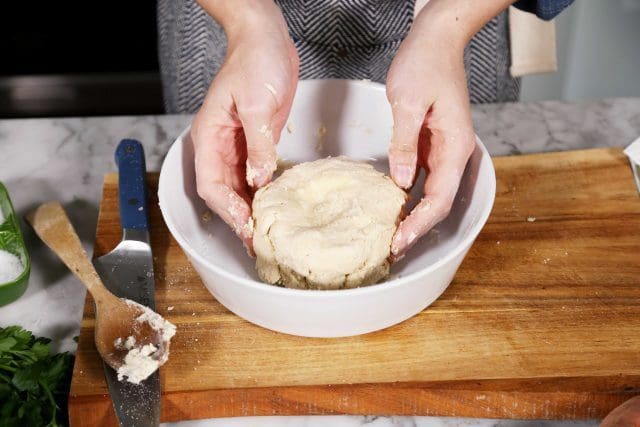
Add some buttermilk and shimmy the flour, butter, sugar, and salt into a round disk.
If you need some more coaching, and that’s totally understandable: Five Tips To Making All-Butter Pie Crust because I believe in you and you believe in you.
Set the pie crust aside in the fridge to chill and rest. While the dough chills… let’s make this filling!
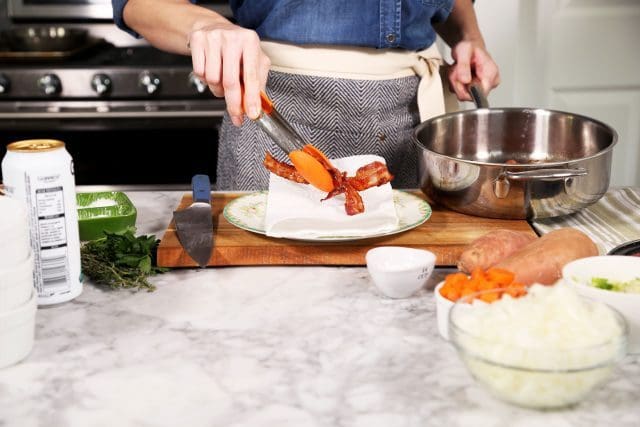
Bacon.
We’ll start this layered and delicious filling by crisping bacon, rendering the fat and adding flavor.
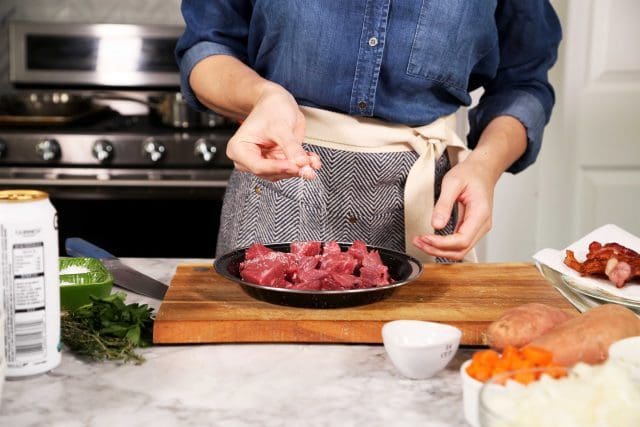
Kosher salt and fresh cracked black pepper coat chuck steak cubes. It’s nice to season every layer as this pie comes together.
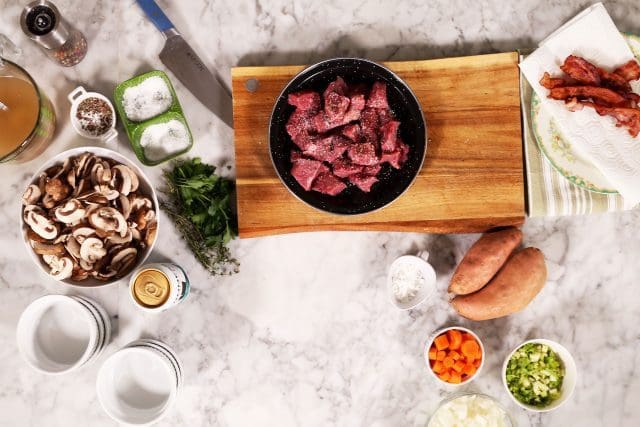
In addition to the steak we’re also working with loads of sliced cremini mushrooms, carrots, celery, onion.
Sweet potatoes, fresh herbs, dark stout beer, and cornstarch for thickening.
The seasoned steak cubes will brown on all sides in the rendered bacon fat. We’re not cooking the steak all the way through, just browning for flavor.
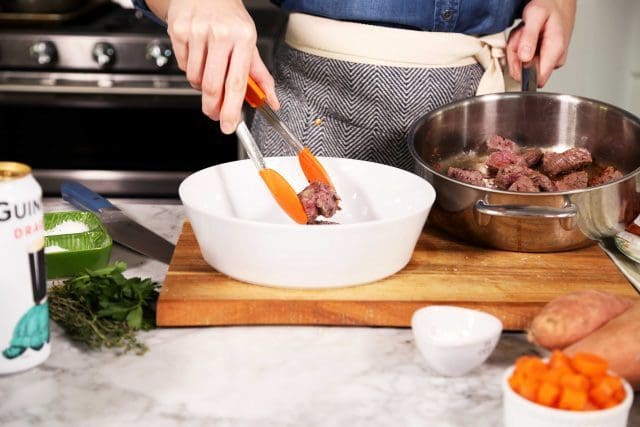
Once browned it’s taken from the pan and placed in a bowl.
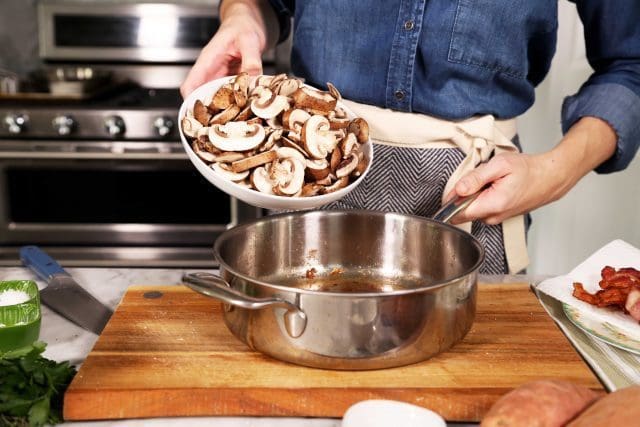
Next up! Mushrooms.
The mushrooms are cooked in the rendered bacon fat that the beef was browned in. High heat, salt and pepper, letting some of the liquid cook out of the mushrooms until they brown to golden.
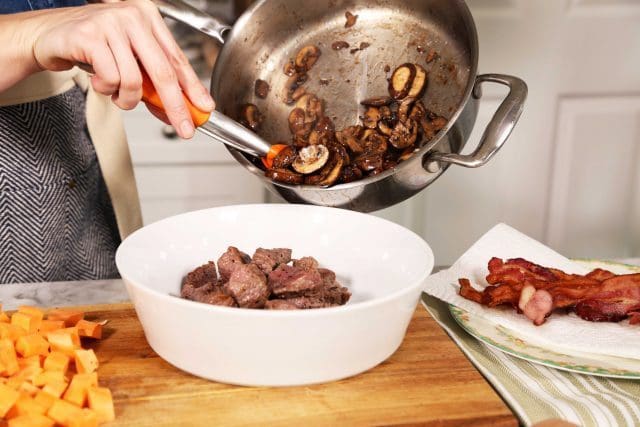
And into the beef they go.
See, not all of these elements brown at the same time, so they each need their own quality time in the pan. It’s worth the effort, I promise I do.
Because the mushroom soak up and then release moisture as they brown, we’re going to add more as we cook our vegetables.
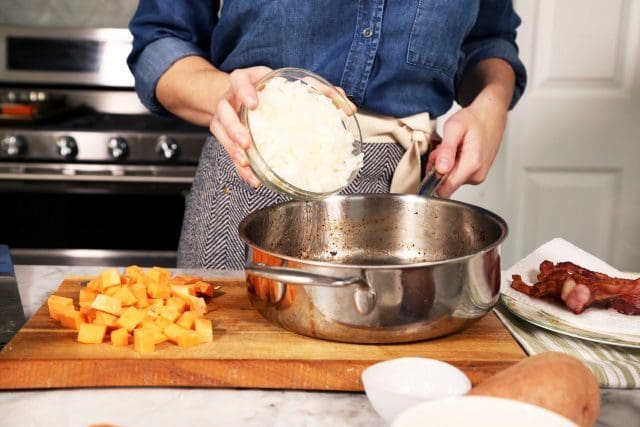
Using the same ol’ dirty pan (it’s flavor, not dirt) we’ll add canola oil and then the chopped onions.
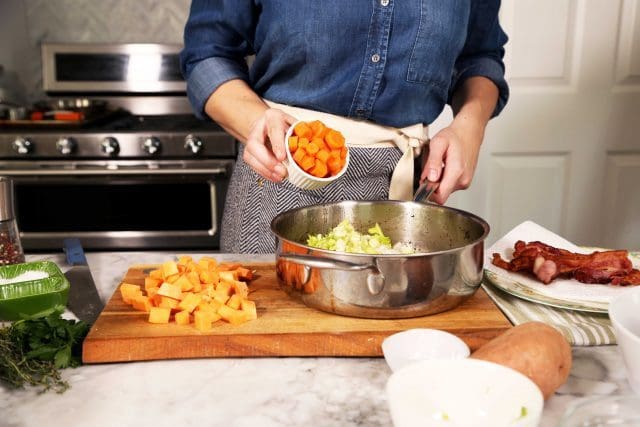
Celery and peeled + sliced carrots, too. The essentials for base flavor and sweetness.
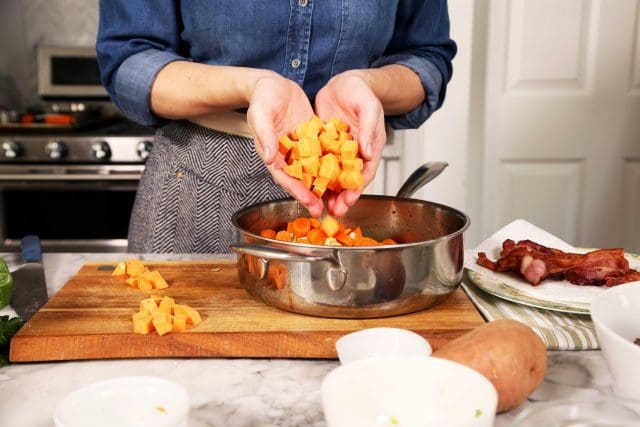
A peeled and cubes sweet potato is added to the mixture and the whole shebang is tossed over heat to combine and soften ever so slightly.

To the softened vegetables we’ll add the browned steak and mushrooms. All is one, plus any of the juices that might have accumulated on the bottom of the beef bowl.
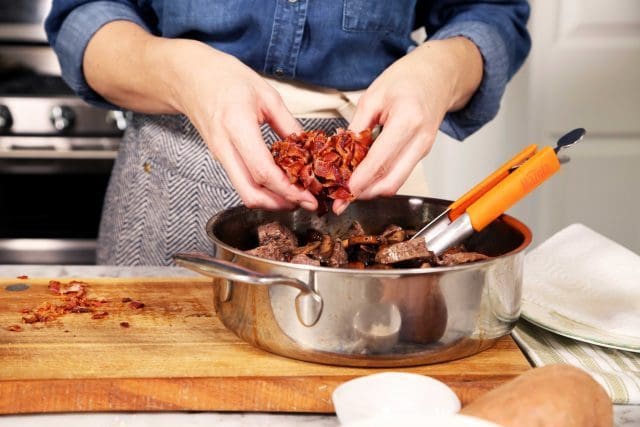
Remember we cooked that bacon?
Let’s get that in the pan too!
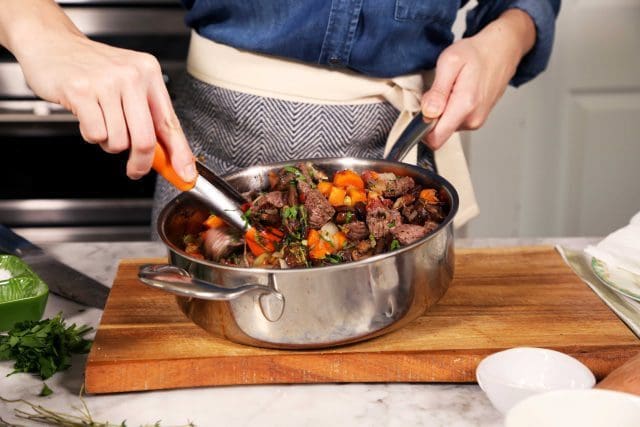
We’ll also stir in chopped fresh thyme and parsley. Toss to incorporate it all.
Remember, at this point, the meat isn’t cooked through and the vegetables are still crisp. That’s right. We’re on the right road (and it smells delicious!).
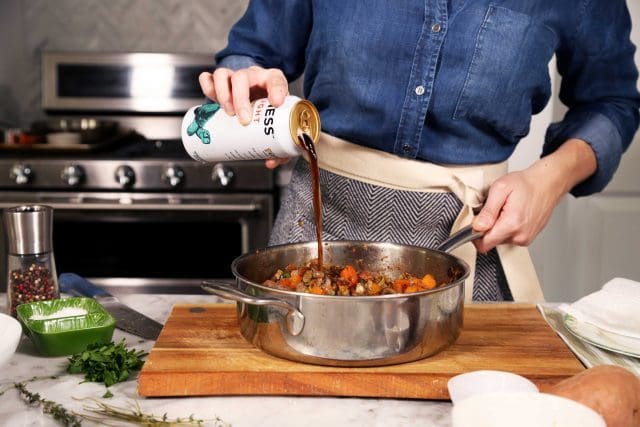
To the hot hot pan we’ll add a good 1/2 cup of dark, frothy beer. I chose Guinness because I think it’s the best+ most delicious choice and the Internet tells me that the other cans of Guinness can be used as a hair rinse and I’m all about it.
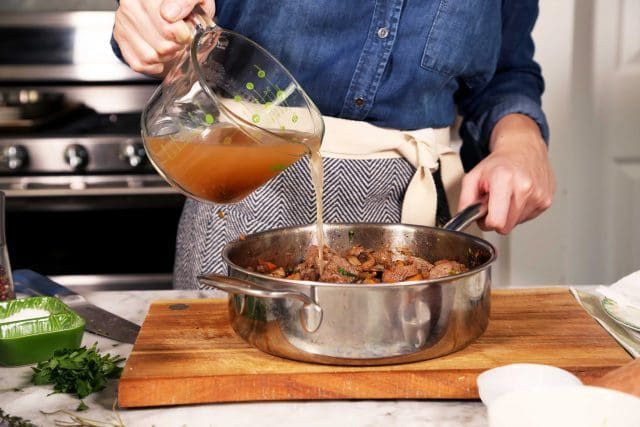
After the beer deglazes the pan, we’ll add the warm beef broth.
We want this to be soupy enough to cover the beef cubes and vegetables and set to simmer, covered, to tenderize the meat and soften the vegetables. Just over an hour.
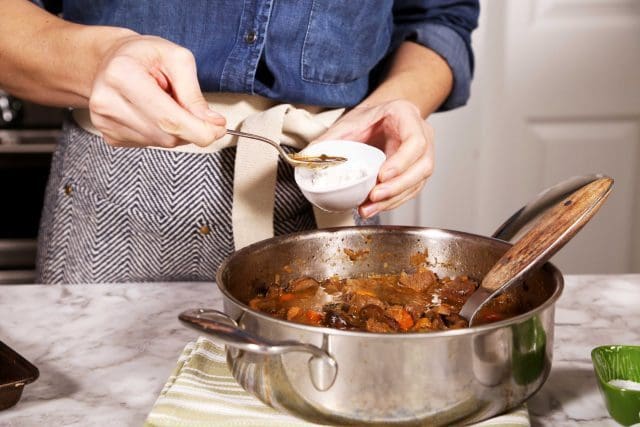
We’ll want to thicken the soupy bits of the stew. Place cornstarch in a small bowl and stir in some of the simmering liquid. Stir away any lumps and return the cornstarch mixture to the whole beef mixture. As the beef stew simmers in the oven, the sauce will thicken slightly.
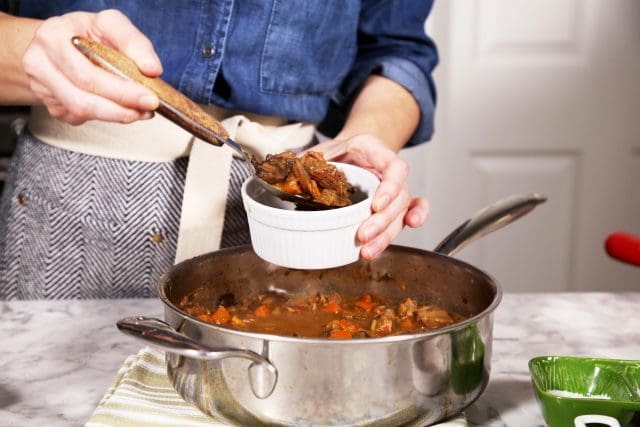
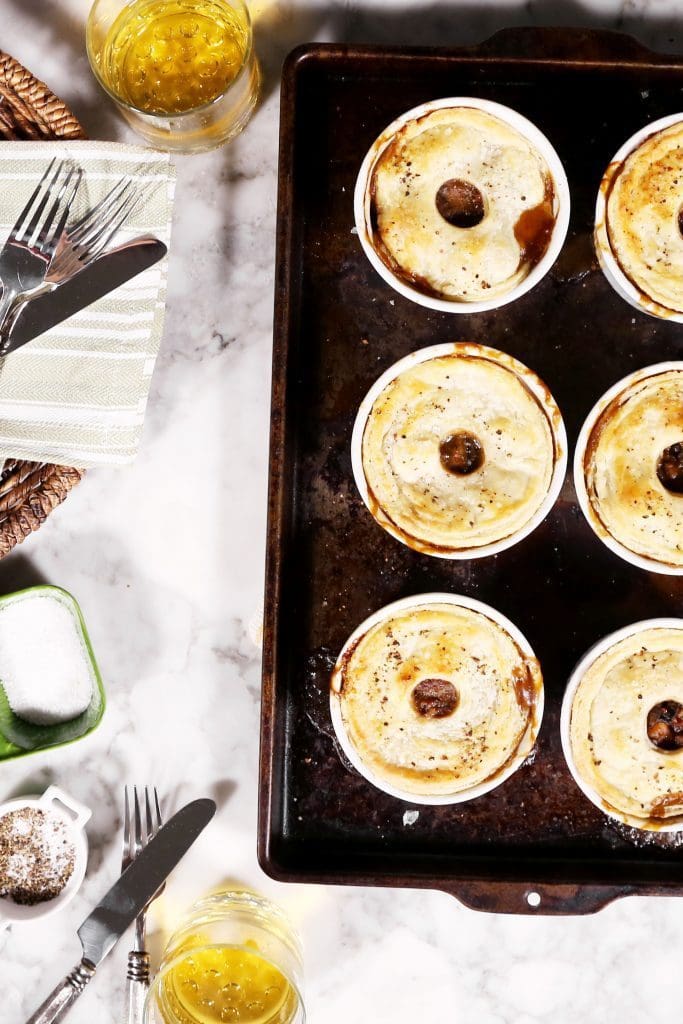
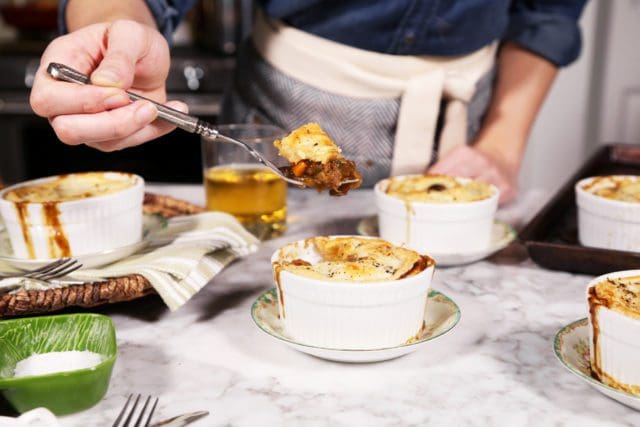
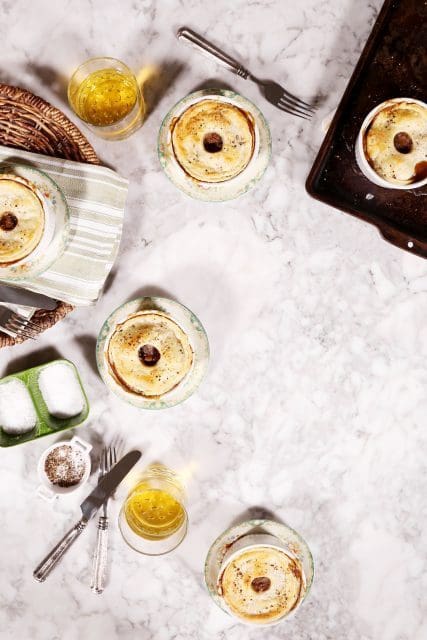
Spoon into large 1-cup ramekins and cool slightly.
You could also add the filling to a pie dish if you don’t want to make individual pies.

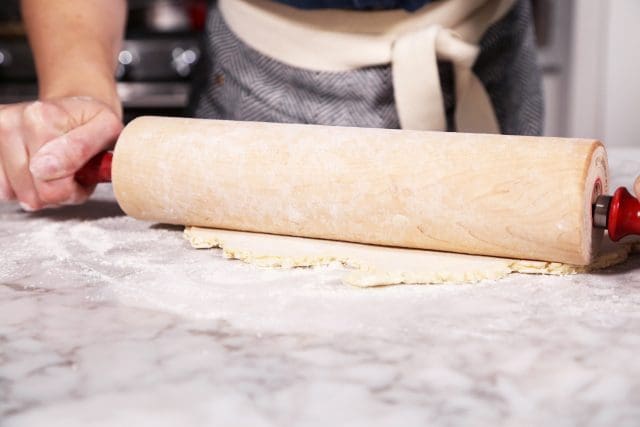
Time for the crust!
After it’s chilled in the fridge for at least an hour, it’s rolled to a 1/4-inch thickness on a lightly floured work surface.

Find a round that fits over your ramekins.
I used large 1-cup oven-safe ramekins. They’re about 5-inches across so I found the lid to my flour jar and used it as a round cutter for my pot pie tops. Pie baking is part creativity. Whatcha got?

I used a small biscuit cutter to cut a small round hole in the center.
This will serve as my vent hole. If you prefer to make small slits across your pot pies, go for it! I’ve found that it’s easiest to do before you place the crust across the ramekins.
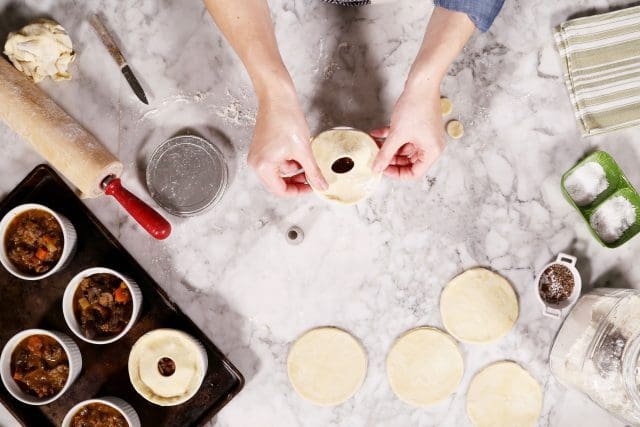
Tuck the crust inside the ramekins. They’re each filled with about 3/4 cup beef stew filling.
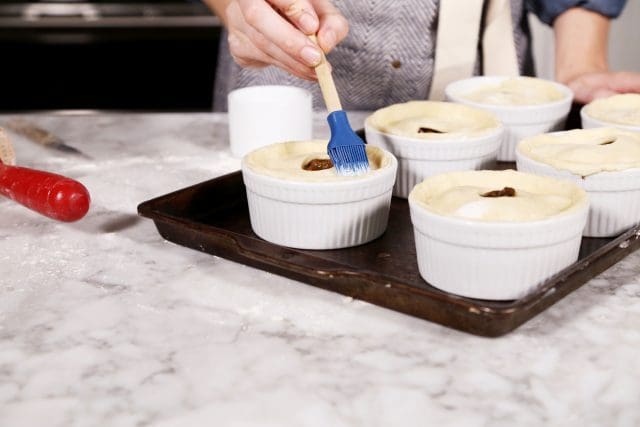
Brush with a bit of buttermilk or a beaten egg to help encourage browning in the oven.
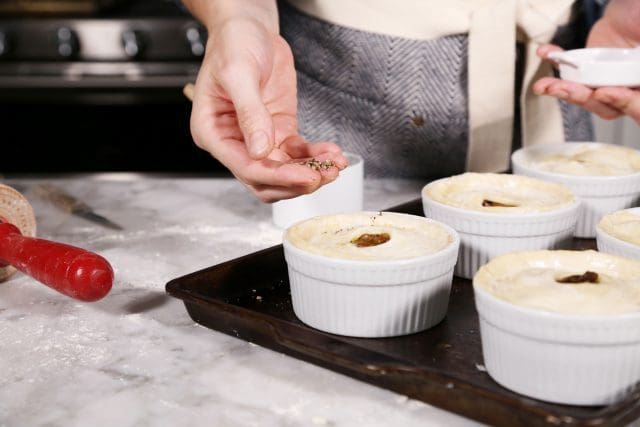
And sprinkle with fresh cracked black pepper.
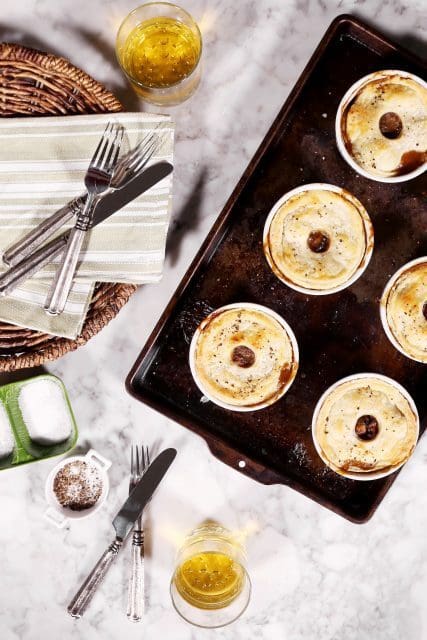
The pies will be baked until the crust is browned and puffed slightly and the insides are lightly simmering.
Basically until your kitchen smells so good you just can’t stand it anymore.
If you’d like to save the pies for a future date, they can easily be frozen assembled, before or after they’re baked.
When baking from the freezer, bake covered with foil until the last 20 minutes be better brown the crust.
Remember, all the insides are cooked, we’re just looking to thaw the insides (if you’re baking from frozen) and brown the crust to delicious.
Photos with Jon Melendez.
Print
Steak and Stout Pot Pies
- Prep Time: about 2 hours
- Cook Time: 25 minutes
- Total Time: about 2 hours 30 minutes
- Yield: 8 1x
Ingredients
For the Crust
- 1/2 cup (4 ounces) cold unsalted butter, cut into small cubes
- 1 1/2 cup all-purpose flour
- 2 teaspoons granulated sugar
- 1/2 teaspoon salt
- 1/3 cup cold buttermilk, plus 1-2 tablespoons if necessary
For the Filling
- 4 thick slices of bacon
- 2 pounds beef chuck, cut into 1-inch pieces
- coarse sea salt and fresh cracked black pepper
- 2 heaping cups sliced cremini mushrooms
- 2 tablespoons canola oil
- 1 large yellow onion, peeled and diced (about 1 1/2 cups diced onion)
- 1 heaping cup peeled and sliced carrots (about 1/2-inch thick rounds)
- 1 heaping cup diced celery
- 2 heaping cups peeled and diced sweet potato (about 3/4-inch pieces)
- 2 teaspoon fresh thyme, coarsely chopped
- 3 tablespoons fresh parsley, coarsely chopped
- 1/2 cup Guinness beer or another stout type beer
- 2 – 2 1/2 cups beef broth
- 2 tablespoons cornstarch
- coarse sea salt and fresh cracked black pepper to taste and buttermilk for brushing the
Instructions
- To make the pie crust, in a medium bowl, whisk together flour, sugar, and salt. Add cold, cubed butter and, using your fingers (or a potato masher), work the butter into the flour mixture. Quickly break the butter down into the flour mixture, some butter pieces will be the size of oat flakes, some will be the size of peas. Create a well in the mixture and pour in the cold buttermilk. Use a fork to bring to dough together. Try to moisten all of the flour bits. Add a bit more buttermilk if necessary, but you want to mixture to be shaggy and not outwardly wet.
- On a lightly floured work surface, dump out the dough mixture.
- It will be moist and shaggy. That’s perfect. Gently knead into a disk. Wrap the disk in plastic wrap and refrigerate for 1 hour. Allowing the dough to rest in the refrigerator will help rechill the butter and distribute the moisture.
- To make the filling, in a medium saucepan over medium heat, cook bacon until browned and crisp on both sides. Once crisp, remove from the pan and place on a few sheets of paper towel leaving the fat that was rendered in the pan.
- Season beef cubes generously with salt and pepper. Add the beef to the pan and brown on all sides, about 6 minutes. This won’t cook the beef all the way through, just brown the edges. Remove from the pan and place in a medium bowl, leaving the fat behind.
- Add the mushrooms to the pan, increase the heat to medium-high and season lightly with salt and pepper. Cook the mushrooms until they release some of their liquid and begin to brown on both sides, about 7 minutes. Once browned, remove from the pan and place atop the beef cubes in the bowl.
- Add 2 tablespoons of oil to the same pan and place over medium heat. Add the onions, celery, carrots, and sweet potato pieces. Toss in the pan and begin to soften and brown, about 4 minutes. Add the thyme and parsley and stir to combine.
- Return the beef and mushrooms to the pot. Coarsely chop the cooked bacon and add it to the pot as well.
- Add the beer to the hot pan. The mixture will sizzle. As the mixture sizzles, scrape any browned bits off the bottom of the pan, allowing the beer to sizzle down for about 3 minutes. Add the beef broth and bring to a simmer.
- Reduce heat to low, cover, and simmer for 1 to 1 1/2 hours until the beef is very tender.
- You’ll want to thicken the sauce of the beef mixture before adding it to the ramekins to bake. Place cornstarch in a small bowl. Spoon a few spoonfuls of the simmering beef liquid into the bowl and stir to smooth. Add the cornstarch mixture to the simmering stew. It will begin to thicken slightly as it simmers. Remove from the heat.
- To assemble the pot pies, roll out the pie crust, on a well floured surface, roll the crust 1/4-inch thick. Use a round lid and large round biscuit cutter to cut rounds that are just slightly larger than your baking ramekins.
- Spoon beef mixture into ramekins (I used 1-cup ramekins) to about 3/4 full. Cut vent slits or place a small hole in the top of each pie crust round and place atop the ramekin. You can either tuck the crust inside the ramekin or leave it hanging over the edge, depending on how large you made your crust round.
- Brush lightly with buttermilk and sprinkle with salt and pepper.
- You can refrigerate the ramekins for baking later or the following day.
- You can also wrap each ramekin in foil and freeze for up to 1 month.
- If baking the pot pies from the refrigerator or fresh, preheat the oven to 400 degrees F and place rack in the center of the oven.
- Bake the pies on a rimmed baking sheet lined with parchment paper. Bake for 20 minutes, until the pastry is puffed and browned.
- Remove from heat and cool slightly before diving in. Serve warm and enjoy!
- If baking the pot pies from frozen, place a rack in the center of the oven and preheat oven to 375 degrees F. Keep pies lightly wrapped in foil and bake until the center is no longer frozen, about 35 minutes. Remove the foil, move the pies to the upper oven rack and bake for another 15 to 20 minutes until well browned and bubbling. Enjoy warm!


21 Responses
WOW – looks so delicious. Lots of steps but all those flavors! My husband loves pot pie and I’m going to try this one for him.
It may be warm in New Orleans but I h my word it is f-f-freezing in London Town right now… beauteous, unctuous, meaty pies is just what is called for. Making these tomorrow!
These look like the ultimate comfort food. I love that they include bacon and mushrooms, delish! Can’t wait to make them. Aaahh that pastry…yum.
Joy, Happy New Year! These looks amazing! I’m a pie fiend too. I was even going to open a business Cyz Piez. Maybe in the future. Have you ever tried hot water crust? I found out about it from The Great British Baking show. It’s a dream to make and great for savory pies.
Making this recipe of your soon!
These look perfect for the January freeze! Yum!!
How can I get this recipe emailed to me? It looks delicious!
I don’t have any ramekins (I know! I should!), what you recommend if I’d like to try this recipe? Can it be used in a regular pie pan, maybe two? I was afraid they wouldn’t be deep enough. This looks great! Can’t wait to try!!
I made it in a regular pie pan with a double crust, and it turned out great. We had about a third of the filling left over. Our plan is to thin it a bit, add some potatoes and make it into some soup!
I love this plan!
THAT is a pot pie fit for royalty… and stout lovers like me! Added it to my @ChewYourBooze Twitter feed.
The pies look absolutely delicious!
Really had a problem getting the crust to finish baking in “20” minutes… more like 35ish plus…I would follow traditional chicken pot pie times in the future…it was amazing…just way under time with the crust and yes, I did do the thin crust
Joy, I made this today for Sunday Dinner. I love that I can use your recipes as a base and easily change/sub items I may or may not have. Tonight I used venison (bc that’s what was in my freezer) and it was a hit! Will definitely make again!
I love it! And you’re right, this recipe is totally flexible to you tastes and what you have in the freezer!
I’m all about this pie, steak pies are just the best and homemade is even better. Going on the list for Sunday lunch and pre-secheduling the post-pie snooze now!
https://victoriaspongepeasepudding.com/
Our family loves every single one of your pie recipes, especially the chicken pot pie. Can’t wait to try this savory pie as well!!!
This looks amazing! Do you think it would work as a stew without the pot pie format?
Yes I think so!
Thank you! Perfect for St Patrick’s day :)
This was hearty and delicious! Using beef chuck was perfect and much better than using precut stew meat. The beef chuck was so tender and fell apart in your mouth! It took a lot of time to prepare, but was so worth it!
Made this with Muskox stew meat and it was incredible! The filling would stand alone as a great stew.