• Skip to primary navigation
  • Skip to main content
  • Skip to primary sidebar
  • Skip to footer
Joy the Baker
Joy the Baker
  • Cookies
  • Bread
  • Cakes
  • Pies
  • Recipes
    • All Recipes
    • Cookies
    • Birthday Cake Recipes
    • Biscuits
    • Muffins
    • Cupcakes
    • Drinks
    • Breakfast
    • Lunch
    • Dinner
    • Fruit
    • Nuts
    • Buttermilk
    • Chocolate
    • Vanilla
    • Holiday
    • Healthy
    • Gluten-Free
    • Vegan
  • Blog
    • Baking 101
    • Tips
    • Beyond the Kitchen
    • Let It Be Sunday!
    • New Orleans
  • Shop

Saltine Cracker-Brownie Ice Cream Sandwiches

June 27, 2017 by Joy the Baker 32 Comments

Jump to Recipe

I just bought a car with seat heaters.

I don’t know.  It’s the middle of summer and I found myself up again the ‘you need to buy a car now’ wall and so I’m working it out, flexing my adult muscles, and troubling every car salesman deeply concerned that I’m approaching car buying without a husband by my side.  It’s ok… I bought a car with seat heaters.  No one talked me into it… but my future self who loves a toasty ass reminded me to get the damn seat heaters.

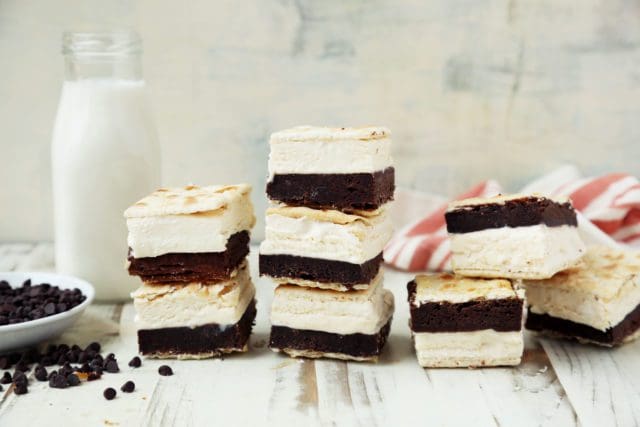
This is the opposite of seat-heater season.  These are the days we’re sweating behind the knees and searching for the nearest pool.  It’s ice cream season and this week we’re making sweet treats to fill our freezer.  First: salty, sweet, brownie-rich ice cream sandwiches thanks to Food52 and their fine food minds. 

Thanks for letting me get that car thing off my chest.  Let’s get to important, seasonally appropriate things like ice cream. 

One of life’s great joys (besides seat heaters)… and stay with me because this is rather specific, is a frozen + under-done brownie.  They’re fudgey, just slightly chewy, cold, densely chocolatey and on the low… as good as a brownie gets (just after warm from the oven).

That brownie, chilled and perfect, is sandwiched between two salty crackers along with a no-churn ice cream made from sweetened condensed milk and whipped cream.   We’re coming strong with our summer dessert game thanks to the Food52’s Ice Cream & Friends.  

And!  No ice cream maker required.  Though I am making Food52’s Olive Oil Gelato this week so if you have an ice cream maker… go ahead and pop that bowl in the freezer because, well… we didn’t come here to get our hair did. 

We’ll start by making brownies!  Here’s all we’ll need.  

  •  sugar, eggs, flour, chocolate, and butter for the brownies
  • cream and condensed milk, rum and vanilla for the ice cream
  • salted crackers for sandwiching

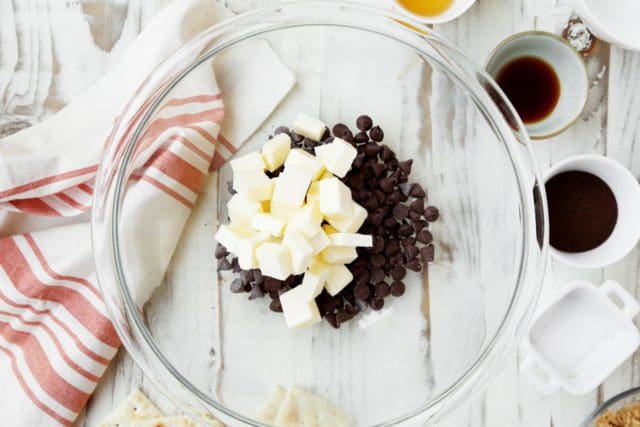
Start by melting chocolate chips and butter in a bowl.  The microwave is an easier melting place than a double-boiler… but do what feels easy for you.  

To the melted chocolate mixture add sugars, eggs, and espresso powder.  Whisk until glossy.  

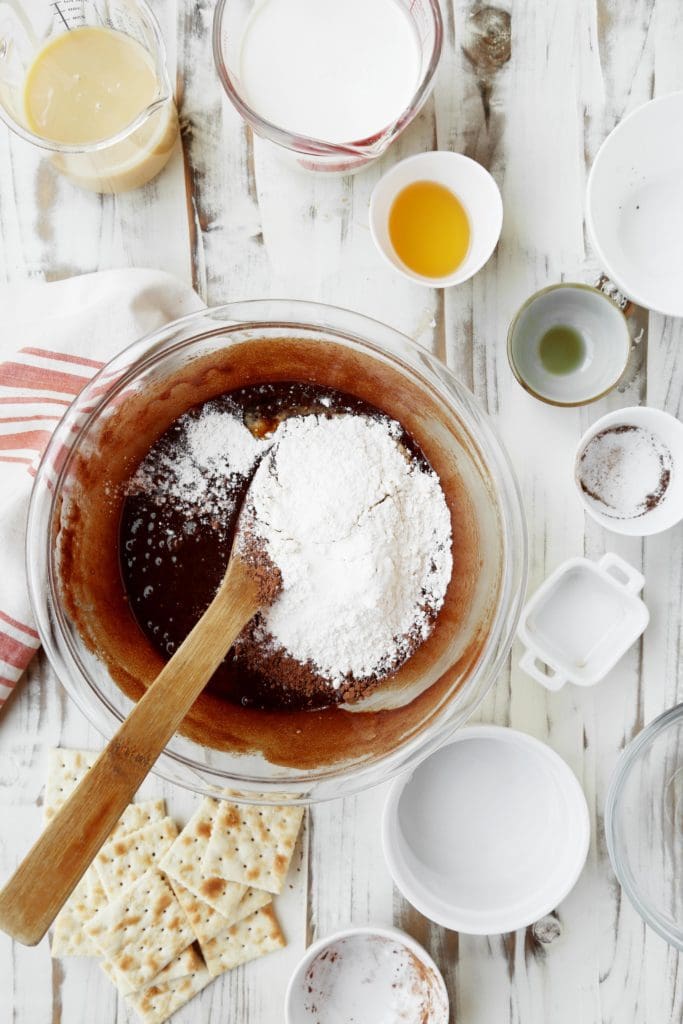
Flour and cocoa powder next, creating a simple and straight-up brownie batter.  

Here’s where things get interesting because we’re about to put crackers in the oven with brownies. 

Line a 9-inch square baking pan with parchment… greased well, you know the drill.

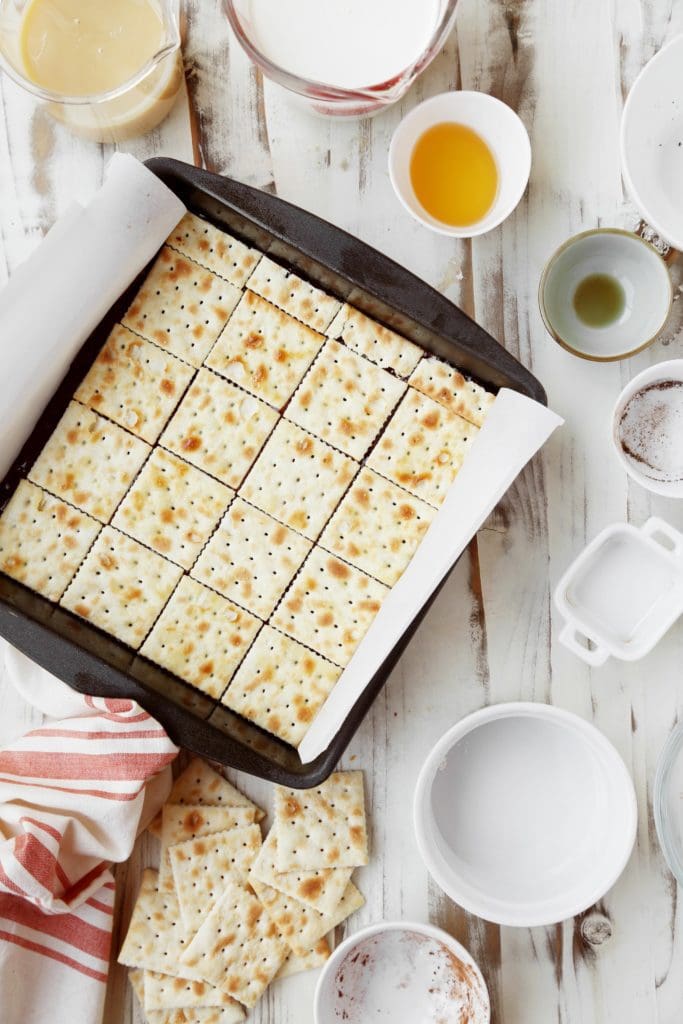
Add the brownie batter and, while the batter is still batter and not yet brownies… top with whole saltine crackers (cutting a few to fit the edges if necessary.  

Throw (gently) the same amount of crackers onto a baking sheet and bake both the cracker-topped brownies and the plain crackers in the oven until the brownies are just cooked through and the crackers are toasted golden. 

This is where things get a little flip-floppy.

Once the brownie-cracker brownies come out of the oven, they’ll cool slightly and then freeze until they firm enough to fuss with… about 30 minutes or so.  Use the edges of the parchment paper to lift the brownie-cracker from the pan and flip it so the cracker side of the brownie is on the bottom of the pan.  Brownie facing up, and back to the freezer we go! 

Let’s talk about how easy the ice cream is! Sweetened condensed milk is whisked with vanilla extract and rum then folded into whipped cream.  What an easy thing to talk ourselves into, right!?

The fluffy ice cream mixture is poured over the pan of brownies and topped with the remaining toasted crackers.  

Would you look at that!  All it needs now is a night in the freezer! 

Salty, sweet, chocolate, vanilla ice cream squares.  Wrap them individually to keep the crackers crisp in the freezer or call your friends because you’ve got freezer treats! 

Print

clock clock iconcutlery cutlery iconflag flag iconfolder folder iconinstagram instagram iconpinterest pinterest iconfacebook facebook iconprint print iconsquares squares iconheart heart iconheart solid heart solid icon

Saltine Cracker-Brownie Ice Cream Sandwich

  • Author: Food52
  • Prep Time: 1440
  • Cook Time: 25
  • Total Time: 24 hours 25 minutes
  • Yield: 16 1x
Pin Recipe
Print Recipe

Ingredients

Scale

Crackers

  • 50 to 60 saltine crackers
  • 2 tablespoons unsalted butter, melted

Brownie

  • 1/2 cup semi-sweet chocolate chips
  • 1/2 cup unsalted butter, cut into cubes
  • 1/2 cup granulated sugar
  • 1/2 cup lightly packed brown sugar
  • 2 large eggs
  • 1 1/2 tablespoons ground espresso beans
  • 1 teaspoon pure vanilla extract
  • 2/3 cups all-purpose flour
  • 2 tablespoons unsweetened cocoa powder
  • 1/2 teaspoon sea salt

No Churn Ice Cream

  • 3/4 cup plus 1 tablespoons sweetened condensed milk
  • 1 1/2 teaspoon pure vanilla extract
  • 1 1/2 tablespoons dark rum
  • 1 1/3 cup heavy cream

Instructions

  1. Layer the bottom of a 9-inch square baking pan with crackers. Count how many you have and multiply by 2. Once you figure out how many crackers you need, brush the crackers on both sides with the melted butter.
  2. To make the brownies, place racks in the middle and lower positions of the oven and preheat the oven to 350 degrees F. Lightly grease the baking pan and line with parchment paper, leaving extra parchment hanging over the sides. Have an extra baking sheet ready too.
  3. In a big bowl, melt the chocolate chips and butter in the microwave in 30-second increments, stirring between each increment until fully melted. Whisk in both sugars, the eggs, ground espresso, and vanilla until smooth and slightly fluffy. Sift in the flour, cocoa powder, and salt. Fold the ingredients together with a spatula or whisk until smooth.
  4. Pour the brownie batter into the prepared pan and smooth the top. Arrange half of the crackers on top of the batter. If a whole cracker doesn’t fit at the edge, just cut a cracker with a sharp knife to fit. Once you have completely covered the brownie batter with crackers, scatter the rest of the crackers on the baking sheet.
  5. Place the brownie-cracker on the oven’s middle rack and the crackers on the lower rack. Bake until the brownie-cracker is slightly underdone, about 25 minutes. A wooden skewer inserted into the center should come out moist with wet crumbs. Take it out of the oven and take the crackers on the baking sheet as well.
  6. Let the brownie-cracker cool for 10 minutes, then transfer the pan to the freezer to cool for 30 minutes. The brownie-cracker should be completely cool before you continue. (This will keep, tightly wrapped in plastic in the freezer for up to 1 week.)
  7. Transfer the brownie-cracker to a work surface. Line the pan with another piece of parchment. Invert the brownie-cracker and remove the first layer of parchment. Place back in the pan, cracker layer facing down. Take note of where the uneven crackers are so you can match that side on top. Return to the freezer while you make the ice cream.
  8. To make the ice cream, in a small bowl combine the condensed milk, vanilla, and rum.
  9. In the bowl of a stand mixer fitted with a whisk attachment (a handheld electric mixer will also work), whisk the heavy cream on medium high until soft peaks form, about 3 minutes. Gently fold the condensed milk mixture into the whipped cream until just combined.
  10. Pour the ice cream on top of the brownie cracker and smoothe the top with a spoon. Arrange the remaining crackers on top, making sure to arrange them so they match the bottom layer for easy cutting. Return the pan to the freezer to harden for at least 8 hours, though overnight is best.
  11. When ready to slice, cut between the crackers to form little sandwiches. Wrap each mini sandwich with plastic wrap and freeze for up to two weeks. Or serve to many and enjoy with sticky fingers.

Did you make this recipe?

Share a photo and tag us — we can't wait to see what you've made!


Photos by the incomparable Jon Melendez. 

Previous PostNext Post

Filed Under: Chocolate, Cookies, Holiday, Recipes, Snacks

Previous Post: « Let It Be Sunday, 125!
Next Post: Notes on Homemade Ice Cream: Make it! »

Reader Interactions

All Comments
I Made This
Questions
  1. Shannon D

    July 2, 2017 at 4:44 pm

    Ok, best thing ever (maybe not the BEST, but we’re all overly dramatic these days) about the age we live in- Carvana. I bought my first car last year totally online (financing and everything) and they delivered it to my house. Cue the praise hands. Plus, when I went to get gas for the first time there was a $25 gift card in the gas door. What? I know we live in an age where face-to-face social interaction is declining, but in this instance, I’m grateful.
    P.S. I’m making these sandwiches right now and I can’t wait until they freeze!

    Reply
  2. Lori

    June 30, 2017 at 10:33 pm

    This is my dad’s dream dessert! I’m going to have to make it sometime. Sounds awesome!

    Reply
  3. Tracy

    June 29, 2017 at 8:52 pm

    Holy toledo those look amazing! Also heated seats are 100% right. Well played

    Reply
  4. Neha

    June 29, 2017 at 11:03 am

    I use my heated seat in the summer time with the AC blasting so ¯\_(?)_/¯

    Reply
  5. David Kimani

    June 29, 2017 at 5:03 am

    Wonderful.

    Reply
  6. MaggieToo

    June 28, 2017 at 1:33 pm

    Seat heaters? In New Orleans? When I lived there, I had a coat that actually mildewed in the closet because it didn’t get used for three years.
    But vented A/C seats? Oh yeah. That would be a thing.

    Reply
  7. Carey

    June 28, 2017 at 11:06 am

    But like, buying a car by yourself is not fun either. I just went through that in January and told myself that even if I have to put an ad on Craigslist, I never want to go through that bullshit again.

    But I do feel a bit more adult now. And I got heated seats too!

    Reply
  8. Jenny

    June 28, 2017 at 10:14 am

    Girl, I love the way you write and your sense of humor. And seat heaters are always a good thing to have *just in case.*

    Reply
  9. Mithra

    June 28, 2017 at 6:20 am

    Looks delicious!Have you always looked at the desserts in a jar and wished you could do that too? click here

    Reply
  10. Nicole

    June 28, 2017 at 4:28 am

    The salt and sweet combination is always to die for. Yum!

    Reply
  11. Gladys

    June 28, 2017 at 4:12 am

    I love brownies and I also love ice cream. Two of my favorite things combined :) Can’t wait to try it !!

    Reply
  12. AJ

    June 27, 2017 at 9:22 pm

    This looks unique and delicious — and I also just bought a car w/ leather, heated seats! Look, it may be 120 degrees in the daytime, but in the mornings, it keeps my toasty bottom quite happy on the drive to work. :)

    Reply
  13. Shareen

    June 27, 2017 at 8:01 pm

    Very interesting recipe! I can tell my family is gonna love it. Thanks Joy!

    Reply
  14. Rita Marlowe

    June 27, 2017 at 4:39 pm

    Now that I live in Hawaii, I don’t need heated seats, but oh..were they wonderful in the damp, cold NW, and coming back from skiing? Heaven!!!

    Reply
  15. ck

    June 27, 2017 at 11:56 am

    Respect. I have deep admiration for your gentle insistence that you are – that each on of us is – HUMAN as much as anyone else, husbands be damned. Bring on the Tron.

    Reply
« Older Comments

Leave a Reply Cancel reply

Your email address will not be published. Required fields are marked *

Recipe rating ★☆ ★☆ ★☆ ★☆ ★☆

This site uses Akismet to reduce spam. Learn how your comment data is processed.

RELATED POSTS IN Chocolate

Chocolate basque cheesecake topped with fruit.
Mini Burnt Chocolate Basque Cheesecake

This refined recipe for chocolate Basque cheesecake is SO SIMPLE with the most impressive results.  Find a detailed step-by-step with tips and tricks below or skip right to the recipe and get baking! This cheesecake does not miss. I’ve always felt like making a cheesecake, at home, from scratch was rather unreasonable.  You mean to…

Read More

Baked Taylor Swift cookies on parchment paper.
Taylor Swift’s Favorite Chocolate Chip Cookies

These are the Taylor Swift cookies you’ll want to bake for your Midnights listening party. Chewy, chocolate centers with crisp edges and a salty, bejeweled top.  They’re the perfect Taylor-inspired bake and midnight snack. This very afternoon, in the year of our lord 2022, I found myself on a Zoom meeting with the uber cool…

Read More

Stack of chocolate brownie cookies with sprinkles.
The Easiest Chewy Chocolate Brownie Cookies

These perfectly gooey and chewy brownie cookies make for the perfect after school snack or last minute housewarming offering.  Grab a box of brownie mix – the road to these delightful chocolate cookies couldn’t be easier. If I were to smack a theme on my kitchen this year it would be this: OK But Can…

Read More

Primary Sidebar

Fresh baked emails, delivered to your inbox

Jump to Recipe

Receive recipes from Joy the Baker and updates on events at The Bakehouse.

HI! I’M JOY!

Jump to Recipe

Welcome! This has been my little corner of the internet since 2008!

I’m a baker, photographer, cookbook author and teacher.  I live laugh love in New Orleans. 

MORE ABOUT JOY AND THE TEAM

BOOKS + Magazines

Jump to Recipe

JOY THE BAKER 2022 SUMMER MAGAZINE

JOY THE BAKER 2021 HOLIDAY MAGAZINE

JOY THE BAKER 2020 HOLIDAY MAGAZINE

HOMEMADE DECADENCE

OVER EASY: SWEET AND SAVORY RECIPES FOR LEISURELY DAYS COOKBOOK

JOY THE BAKER COOKBOOK

Jump to Recipe
joy the baker on facebook joy the baker on twitter pinterest-social instagram-socialbloglovin-social

JOY @ WILLIAMS SONOMA

Jump to Recipe

SHOP THE CAKE LINE OF CAKE MIXES!

DRAKE ON CAKE

Jump to Recipe

Passionate from miles away since 2015.

Check it out on Instagram

Drake on cake instagram.


BREADS YOU’LL LOVE

inside of warm cinnamon roll on plate

How To Make The Best Single Serve Cinnamon Roll

Orange roll on a plate with a fork.

Christmas Morning Orange Rolls

Baked pull apart garlic bread baked in a loaf pan.

Erin’s Roasted Garlic Herb Pull-Apart Bread

LET’S MAKE COOKIES!

Raspberry linzer cookie recipe stacked on baking sheet.

Raspberry Lemon Linzer Cookies

Iced Oatmeal Cookies layered on a cooling rack.

Eggnog Iced Oatmeal Cookies

My 12 Best Christmas Cookie Recipes

Footer

Instagram

joythebaker

📚Baker and author of books and magazines
🎂Creator @drakeoncake
💁🏻‍♀️Classes with me @thebakehousenola
🍰 Products with @williamssonoma

joythebaker
🙋‍♀️ if you buy bananas just so they can 🙋‍♀️ if you buy bananas just so they can languish on the counter long enough to be baked. ⁣
⁣
These Almond Flour Banana Bread cookies are stacked with walnuts and chocolate and one of the best way I know how to celebrate a speckled banana. Find the recipe linked in the profile! xo #bananabread #glutenfreerecipes #joythebaker #cookies #bakingrecipes
Just tryna get the most cheese on my most simple s Just tryna get the most cheese on my most simple small-batch bagel recipe. Get in on this with me: ⁣
⁣
2 Easy No Yeast Bagels⁣
1/2 cup self-rising flour⁣
4 tablespoons greek yogurt (plus a teaspoon or two more if needed)
1 large egg, beaten for egg wash⁣
1/3 - 1/2 cup grated gouda or gruyere⁣
Everything bagel seasoning⁣
3 tablespoons baking soda with 2 cups of boiling water. ⁣
⁣
Place a rack in the upper third of the oven and preheat oven to 375 degrees F.  Line a baking sheet with parchment paper and spray the paper lightly with nonstick spray. ⁣
⁣
In a small bowl, use a firm spatula to work together the flour and yogurt. Add a few teaspoons of yogurt if it feels dry and knead into a cohesive ball for 5 minutes or so. Sprinkle with a bit more flour if it gets overly sticky. Cover with a damp paper towel and gather your toppings. ⁣
⁣
Divide dough in two and roll each piece into a roughly 8-inch rope. Bring the ends around and pinch into a circle. ⁣
⁣
Sprinkle the bottom of the prepared pan with grated cheese in two spots.  Pour boiling water over the baking soda and float each bagel in the water for 20 or so seconds.  Use a slotted spot or spatula to transfer the bagels on top of the cheese.  Brush lightly with egg. Sprinkle with more cheese and everything bagel seasoning. ⁣
⁣
Bake for 20 - 22 minutes until deeply golden and bubbling.  Allow to cool for 10 minutes before slicing and smearing with cream cheese.
Here to remind you that you can mix a few ingredie Here to remind you that you can mix a few ingredients together tonight and have a hot little loaf of bread in the morning. ⁣
⁣
This easy, nearly no-knead Rye Bread is essentially a magic trick. I’ll leave the recipe linked and big love to my friends @lecreuset for the most elite bread pot!
Cinnamon Rolls but make ‘em Mardi Gras. 💜💛 Cinnamon Rolls but make ‘em Mardi Gras. 💜💛💚⁣⁣
⁣⁣
For the rolls: ⁣⁣
• 3/4 cup lukewarm milk⁣⁣⁣
• 1 large egg⁣⁣⁣
• 1 large egg yolk⁣⁣⁣
• 6 tablespoons unsalted butter, softened⁣⁣⁣
• 3 cups all-purpose flour, plus more for dusting⁣⁣⁣
• 2 ¼ teaspoons instant yeast⁣⁣⁣
• 2 tablespoons light brown sugar⁣⁣⁣
• ¾ teaspoon salt⁣⁣⁣
• ½ teaspoon vanilla extract⁣⁣⁣
⁣⁣⁣
For the filling:⁣⁣
• 1/3 cup unsalted butter, softened⁣⁣⁣
• 1 cup brown sugar, packed⁣⁣⁣
• 2 teaspoons ground cinnamon⁣⁣⁣
⁣⁣⁣
For the icing:⁣⁣
• 4 ounces softened cream cheese⁣⁣⁣
• 1 cup confectioners’ sugar or glazing sugar⁣⁣⁣
• 1 tablespoon milk⁣⁣⁣
⁣⁣⁣
1. To make the dough, place all of the dough ingredients in the bowl of a stand mixer fitted with a dough hook. Mix on low until the dough begins to come together. You may want to speed up the process by first mixing all of the ingredients together by hand with a spatula before putting the bowl on the stand mixer. This will help the dough hook work. The dough will come together into a soft, though not too sticky dough ball after several minutes of hand mixing and stand mixer mixing.⁣⁣⁣
2. Place the dough in a lightly greased bowl and lightly dust the top of the dough with flour. Let rise for 60 minutes while you prepare the filling and icing.⁣⁣⁣
3. To make the filling: Combine the butter, brown sugar, and ground cinnamon into a paste. Set aside.⁣⁣⁣
4. To make icing, whisk together cream cheese and sugar. Add the milk and whisk until smooth.  Place in a small bowl and refrigerate. ⁣⁣⁣
5. Roll the dough into a 18 x 12 inch rectangle.⁣⁣⁣
6. Spread the cinnamon filling evenly over the dough.⁣⁣⁣
7. Beginning with one long edge, roll the dough into a log. Cut the log into 8 or 10 equal slices. Place the slices in a greased 9×13-inch baking pan, cover with plastic wrap, and let rise for 30 minutes. ⁣⁣⁣
8. Place a rack in the upper third of the oven and preheat the oven to 375°F.  Bake the rolls for 30 to 35 minutes, until they’re golden brown and bubbling. Remove the rolls from the oven.⁣⁣⁣
9.  Drizzle icing over the warm buns and enjoy! ⁣
I’ve taken these Little Banana Pancakes on as a I’ve taken these Little Banana Pancakes on as a personality trait. ⁣
⁣
Full recipe linked in the bio or just take the concept and a box of pancake mix and I’ll see you at the kitchen table. Xo
This recipe is an essential life skill. Not an und This recipe is an essential life skill. Not an understatement. Two Giant Chocolate Chip Cookies recipe linked in the bio, babes. Xo 🍪
Load More... Follow on Instagram

Copyright © 2023 · Joy the Baker
All rights reserved. Violators will be whupped and sent to bed with no dessert · Privacy Policy

Scroll Up