• Skip to primary navigation
  • Skip to main content
  • Skip to primary sidebar
  • Skip to footer
Joy the Baker
Joy the Baker
  • Cookies
  • Bread
  • Cakes
  • Pies
  • Recipes
    • All Recipes
    • Cookies
    • Birthday Cake Recipes
    • Biscuits
    • Muffins
    • Cupcakes
    • Drinks
    • Breakfast
    • Lunch
    • Dinner
    • Fruit
    • Nuts
    • Buttermilk
    • Chocolate
    • Vanilla
    • Holiday
    • Healthy
    • Gluten-Free
    • Vegan
  • Blog
    • Baking 101
    • Tips
    • Beyond the Kitchen
    • Let It Be Sunday!
    • New Orleans
  • Camp Joy

Orange and Chocolate Conchas (Mexican Sweet Breads)

October 31, 2017 by Joy the Baker 37 Comments

Jump to Recipe

Listen… I LOOOOOVE a baking project.  Catch me on a Saturday morning at 10am and it’s dang possible that I’ll have at least a dozen bagels coming out of the oven  as a result of a wild hair / intense craving that woke me up before the sun.  

The warmer and breadier the project, the better. If there’s butter involved… I’m in.  

While I’m down to weigh and knead and wait and experiment, you should know that not everything is a project in my kitchen.  Out of sheer laziness I eat more scrambled eggs than any grown woman should and for dinner tonight?  One of those pre-chopped, dressing-included salad bags.  FINE.  GREAT, really. Thank you.  

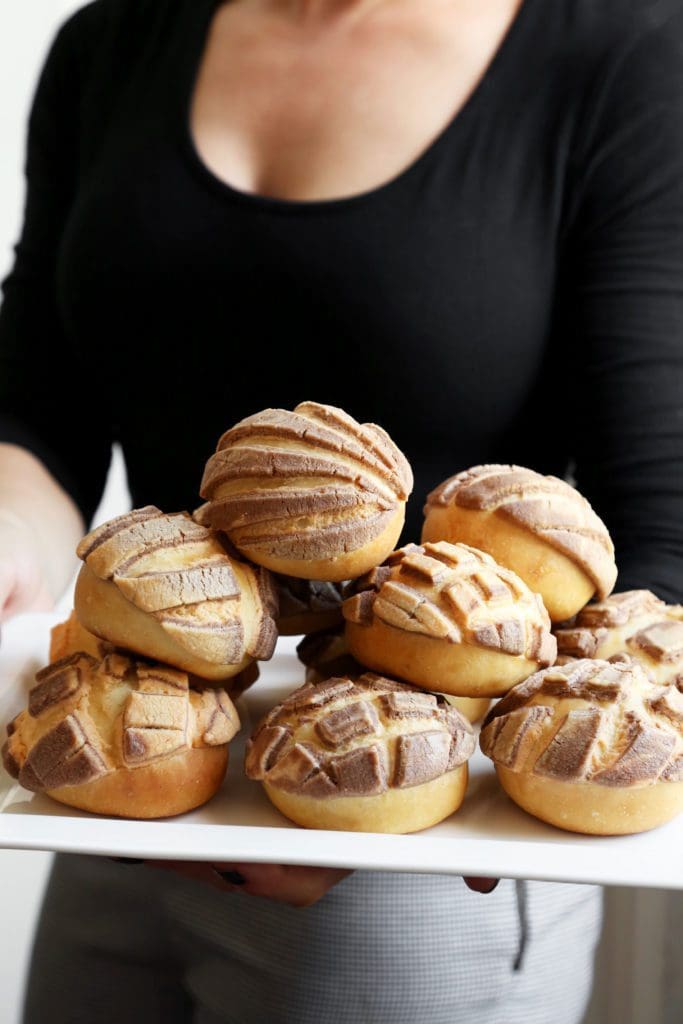
These Mexican Sweet Breads (lovingly called Conchas, the Spanish word for shell) are what you might consider a ‘project’.  There’s an overnight rest, a sweet challah, and a chocolate orange topping we have to prepare.  I’d say, at the store picking up ingredients… let’s also grab one of those salad mixes for peace of mind.  

The project, with time and care, is SO SO worth it.  These buns have a lightness to the crumb and a rich elasticity thanks, in part, to egg yolks and oil.   The topping is a unique blend of flour, butter, and powdered sugar that, when baked, creates a lightly crisp, subtly sweet shell.  

This is a treat.  A real dang treat. 

This recipe is from the Hot Bread Kitchen book which offers some really reliable bread recipes if you’re feeling like you’d like to up your bread game. I’ve also made their focaccia recipe and it’s SPOT ON!

Here’s what you’ll need: 

  • bread flour, yeast, and water to make a pate fermentee.  This is like a starter dough that will rest in the refrigerator, working life, overnight.  A pate fermentee adds flavor to the dough without adding too much yeast. 
  • sugar, eggs, honey, and oil for richness.
  • yeast and salt for rise and balance.
  • orange and chocolate + flour, sugar, and butter for the topping!  You could also just make one flavor for the topping.  Chocolate would be a good way to go.  More on this below!

We’ll start by making the challah dough.  

Technically we started last night by making the pate fermentee, but now we’re werkin’ and twerkin’.  

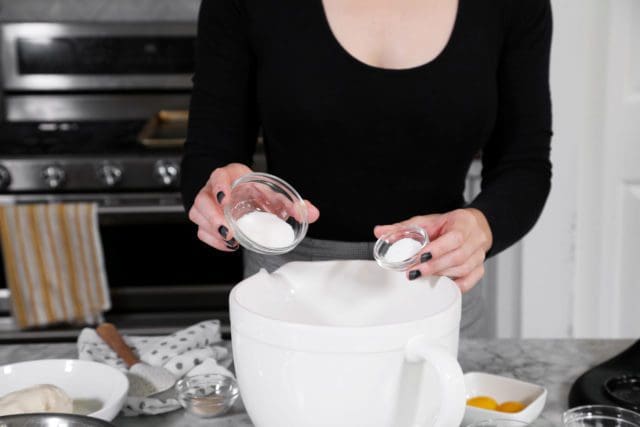
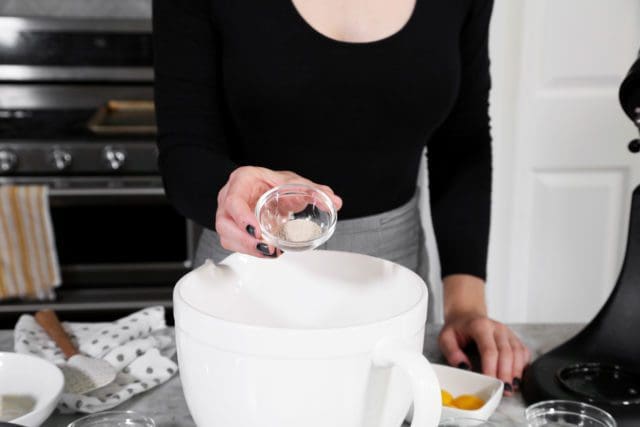
The dry ingredients consist of bread flour, granulated sugar, kosher salt, and yeast. 

In the bowl – whisked up, easy. 

Now for the wet ingredients!

Egg yolks + honey + canola oil + water into the bowl, too! 

Everything, let’s make friends.

The dough looking chunks, that’s the cold pate fermentee we made last night.  Flavor and rise. It worth making the quick night-dough the day before. 

I beat the dough on a stand mixer, starting low then increased to a hearty medium speed.  So much that the gluten starts to develop and hold and the dough literally begins to slap against the side of the dough.  

Out of the mixer and onto the counter, I give it a few kneads for good measure… and just because it feels so good. 

While the dough rests, covered and slightly warm, we’ll make the sweet topping! 

Here’s what we’ll need for the topping dough:

  • softened butter and powdered sugar.  
  • flour, salt, and baking powder (we want a little rise + puff to our topping)
  • orange zest and orange juice + chocolate powder for marbling.  

We’ll start by creaming together the softened butter and powdered sugar until soft and well-combined.  

Adding the flour will create a thick, soft, and pliable dough.  

We’ll split the dough in half and chocolate half of it, and orange the other.  

I mixed both flavors separately on the mixer.  It took a bit to come together and I finished off each dough by kneading it to evenly combined on the counter. 

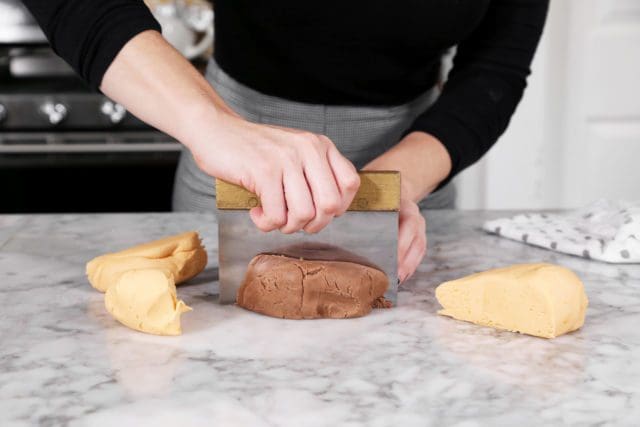
The dough will feel soft and pliable.  The orange might be a bit softer than the chocolate dough, just because it has a bit more moisture in it.  

Divide each flavor into three or four chunks. 

Alternate the colors to get more towards a marble when rolled.  

Let’s give it a smoooosh.  (Technical term)

We’ll roll the topping dough between two large pieces of parchment paper.  

The paper will help to roll the dough smoothly without tears. and make it easy to lift into rounds after rolled. 

We’ll keep our tops thick – about 1/20-inch.  

I cut 2 1/2-inch rounds using a biscuit cutter and left them to rest on the top piece of parchment paper. 

After the dough has rested and puffed, we’ll divide it into 12 even pieces.  

A kitchen scale helps to make things even.  We’ll want 2 1/2 ounces per dough ball. 

Two baking sheets – 6 each.  

Before the topping hits the roll, we’ll use a sharp knife to score the dough – being sure not to slice completely through the topping.  I find it best to keep the scoring simple and geometric.  

Carefully place each topping atop a roll. Give it a simple pinch around the roll, just coaxing it to stay.  

After the rolls and topping have some time to rise together, you’ll find that the topping will have formed well around the rolls.  This is already exciting!  Into the oven we go! 

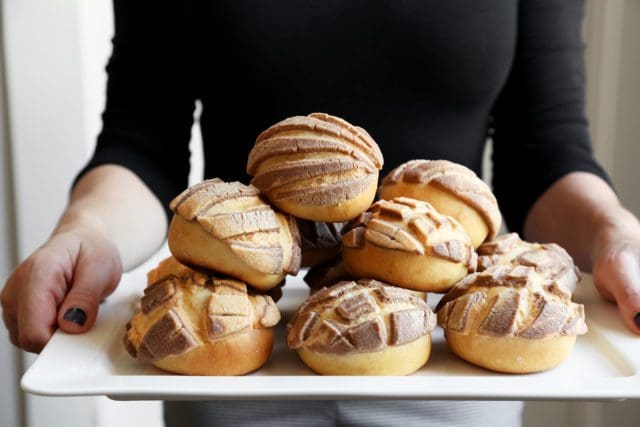
Baked to puffed and golden!

The topping expands as the rolls bake and create a flavorful design.  

Rolls are cooled before serving and, believe it or not, I think these rolls are best eaten the day after they’re made.  The crumb dries out a bit and the topping softens.  These breads are best served with milky coffee.  

Pat on the back to you and us!

Photos with Jon Melendez. 

Print
clock clock iconcutlery cutlery iconflag flag iconfolder folder iconinstagram instagram iconpinterest pinterest iconfacebook facebook iconprint print iconsquares squares iconheart heart iconheart solid heart solid icon

Orange and Chocolate Conchas

★ 5 Stars ☆ ★ 4 Stars ☆ ★ 3 Stars ☆ ★ 2 Stars ☆ ★ 1 Star ☆ No reviews
  • Author: Joy the Baker
  • Prep Time: 720
  • Cook Time: 20
  • Total Time: 12 hours 20 minutes
  • Yield: 12 1x
Pin Recipe
Print Recipe

Ingredients

Scale

For the Pate Fermentee

  • 1/2 cup plus 1 teaspoon lukewarm water
  • 2/3 teaspoon active dry yeast
  • 1 1/3 cups plus 1 tablespoon bread flour
  • 1 teaspoon kosher salt

For the Challah Bread

  • 2 1/2 cups bread flour, plus more for shaping
  • 1 tablespoons plus 2 teaspoons granulated sugar
  • 3 1/4 teaspoon kosher salt
  • 1 1/4 teaspoon active dry yeast
  • 1 1/4 cups (risen and deflated) pate fermente, cut into walnut size pieces
  • 3 large egg yolks, beaten
  • 2 1/2 tablespoons honey
  • 3 tablespoons water, plus more if needed
  • 3 tablespoons canola oil, plus more for coating the bowl

For the Topping

  • 3 1/2 cups bread flour
  • 1/2 teaspoon baking powder
  • 1/2 teaspoon kosher salt
  • 1/2 pound plus 6 tablespoons unsalted butter, at room temperature
  • 2 1/2 cups powdered sugar
  • 2 teaspoons pure vanilla extract
  • 3 tablespoons unsweetened cocoa powder
  • 1 tablespoons orange zest
  • 2 tablespoons orange juice
  • red and yellow food coloring

Instructions

  1. Start by making the Pate Fermentee the night before you’re going to make the bread dough. It will need to rest in the refrigerator for anytime between 8 and 24 hours.
  2. Put the water and yeast in a large bowl. Add the flour and salt. Use a wooden spoon to stir the mixture into a shaggy dough. Cover the dough with plastic wrap and let stand at room temperature for 30 minutes.
  3. Refrigerate the mixture for a minimum of 8 hours and a maximum of 24 hours. There is no need to return it to room temperature before using it. Deflate it with a wooden spoon or floured fingertips before measuring.
  4. To make the challah bread, place the bread flour, sugar, salt, and yeast in the bowl of a stand mixer fitted with a dough hook. Add the pate fermentee, egg yolks, honey, water, and oil and mix on low speed until the dry ingredients are completely incorporated and the yeast has disappeared into the dough. Add a little extra water if this hasn’t happened in 3 minutes. Increase the speed to medium to medium-high and mix until the dough is smooth, pulls away from the sides of the bowl, has a bit of shine, and makes a slapping noise against the sides of the bowl, about 5 minutes. The dough will look smooth and feel slightly tacky.
  5. Coat the inside of a large bowl with oil and transfer the dough to it. Lightly dust the top of the dough with flour and cover the bowl with plastic wrap. Let stand at room temperature until the dough is puffy and supple, about 1 1/2 hours.
  6. While the dough is rising, make the concha topping.
  7. Whisk together the flour, baking powder, and salt in a bowl.
  8. Place the butter and powdered sugar in the bowl of a stand mixer fitted with the paddle attachment and beat on medium speed until creamy, about 4 minutes. Add the vanilla extract. Add the flour mixture and beat until just combined.
  9. Divide the dough in two. Using the mixer, beat the cocoa powder into one half of the dough. You may need to remove the dough and knead on the counter to evenly combine the cocoa powder. Set aside and wipe out the mixing bowl.
  10. Add the remaining half of concha topping to the mixing bowl. Add the orange zest and orange juice and one drop each of yellow and red food coloring, beat until well incorporated. Again, you may want to move this process to a counter to knead until evenly mixed. Add more food coloring to get your desired orange coloring.
  11. Divide each chocolate and orange toping into three or four pieces and put the topping between two large rectangles of parchment paper alternating the pieces in flavor and color. Press the topping together. Between the two pieces of parchment paper, roll the topping to about 1/2-inch thick. Remove the top parchment, and using a 2 1/2-inch round biscuit cutter, cut rounds. You can save the scraps to reroll.
  12. Use a sharp knife to score each round with a hash mark, being sure to not cut through the entire topping. Let rest at room temperature somewhere cool.
  13. Line two rimmed baking sheets with parchment paper.
  14. Tip the dough onto a lightly floured surface and knead to a smooth ball. Divide into 12 equal pieces (2 1/2-ounces or 70g each).
  15. Form each piece into a roll and transfer the rolls to the prepared baking sheets. Gently top each roll with a scored concha topping round and cover the pan loosely with plastic wrap.
  16. Let the conchas stand at room temperature until they puff slightly and the dough holds indentations when pressed lightly, about 1 hour. As they rise, the topping will bend and start to cover the top of the dough.
  17. Place racks in the middle and upper third of the oven and preheat oven to 350 degrees F.
  18. Bake the puffed conchas until the base is golden brown and the topping is firm to the touch, about 18 to 20 minutes.
  19. Transfer to a wire rack to cool completely. Store in plastic bags for up to 4 days. I like these best the day after they’re baked.

Did you make this recipe?

Share a photo and tag us — we can't wait to see what you've made!

Previous PostNext Post

Categories: Bread, Chocolate, Holiday

Previous Post: « Let It Be Sunday, 143!
Next Post: Peanut Butter, Bacon, and Banana French Toast Sandwiches »

Reader Interactions

All Comments
I Made This
Questions
  1. Kristin

    October 10, 2019 at 5:59 am

    Is the amount of salt in the challah an error? I just blindly followed the recipe, and my dough was inedible. We decided not to bake it, because we couldn’t imagine that baking would save it, and we just made cookies with the topping.

    Reply
  2. Gabrielle

    September 25, 2019 at 8:10 am

    Ok update! (Sorry Joy for bombarding your post!) I tried one this morning and the experience was much better. I think you’re right when you say they taste better the next day. They’re still on the salty side for me, and there’s still all that leftover topping I’d rather not just dump in the bin, so I’m going to make another batch and dial it down as planned, but I’m so happy not to have to throw away all of this first batch. Thanks!

    Reply
  3. Gabrielle

    September 24, 2019 at 10:15 pm

    I made these and they are super salty! Actually inedible. I was skeptical about the 3 1/4 tsp in the challah but since I have no idea what these are/how they taste I gave it a go. Not sure if it was because I used (fine) sea salt instead but in case there’s a typo… wanted to let you know. I also have a ton of the topping leftover, enough to cover another batch, so I’ll probably do that and try to balance the salt.

    Reply
  4. Andrea Marshall

    January 20, 2019 at 5:47 pm

    I’m getting stuck on the late Fermentee. It’s staying like a hard ball and not rising at all. Any ideas on what I could be doing wrong??

    Reply
  5. Viet T Nguyen

    January 13, 2019 at 12:59 pm

    There’s something wrong with this recipe. The patee fermented is 1 and 1/3 cups flour for only 1/2 cup water? It’s so dry but I went with it. Now trying to make the challah bread portion and the dough is extremely dry with the measurements you provided. I’ve added almost a ln other cup of water and no where near the elasticity you show in your picture. Can you double check your measurements or provide weight measurements?

    Reply
    • joythebaker

      January 14, 2019 at 9:32 am

      Hi Viet! I’ve double checked my measurments and they’re correct on my end. The pate ferment will be thick but not dry.

      Reply
    • Gabrielle

      September 24, 2019 at 10:19 pm

      I had no issues with the pate fermentee but I also added 1/2 cup of water to my challah dough.

      Reply
  6. AE

    November 5, 2017 at 12:28 pm

    I just made these. Issues with topping: there is too much. 1/2 is more than enough for 12. I have the book this is from and it has the same issue.

    After adding the orange juice, the two parts of the topping end up with very different consistencies. I don’t think there is any need for orange juice.

    I think the topping needs to be added after the buns have been raised for a little while and then pressed onto the buns and cut. That is the technique Nick Malgieri uses. Otherwise, they break and fall off the buns during baking.

    Reply
    • Gabrielle

      September 24, 2019 at 10:24 pm

      I had the same issue with the topping flavours having two consistencies. The chocolate was very dry and crumbly so I ended up adding a splash of water. I thought the orange half was fine and much more pliable.

      I also had trouble with getting them to stay on the buns – Joy yours are so beautiful! How?! I redid some of mine and even still all but 1 look a *hot* mess. I thought about rolling them thinner, so they wouldn’t be so heavy on top, but maybe waiting to place them would help too.

      Reply
  7. Hannah

    November 2, 2017 at 2:26 pm

    OH DANG. Must make these STAT. I don’t own a mixer (I know, I know–tiny kitchen problems) so I figure the workout I’ll get from making them by hand will earn me a couple extra. Right? Right.

    Reply
  8. Norma

    November 2, 2017 at 11:00 am

    Hi Joy! I’m part way through making the concha recipe. There are 2 large eggs at the end of the Challah portion that are not mentioned in the instructions. Not sure if I need to add them. Dough seems wet enough without. Would love some guidance, thanks

    Reply
    • joythebaker

      November 2, 2017 at 10:04 pm

      I’m so sorry about that Norma, you’re right! You don’t need those eggs. Those are for brushing a traditional challah but you won’t need them for these rolls.

      Reply
      • Susan

        November 3, 2017 at 12:59 pm

        Oh dear. Printed the recipe a couple days ago and just made the dough with the two extra eggs in it. Yikes!

        Reply
        • Susan

          November 3, 2017 at 8:40 pm

          The dough is less dense and seems to have had a little trouble holding the topping as a result. (It all kind of slid to the edges leaving the middle of the top bare.) So they aren’t pretty at all, but they actually taste great. Will make them again a few weeks without the extra eggs.

          Reply
  9. Monica

    November 1, 2017 at 5:14 pm

    These are SO pretty! I’ve had these on my list of breads to make for awhile now, and your pictures are making me feel like I’ve got to make some time for them asap!

    Reply
  10. Tracy

    November 1, 2017 at 3:49 pm

    Wow these are beautiful! Also, can we talk about how good you are at explaining each step in your recipes?!

    Reply
  11. Ashlyn @ The Pedantic Foodie

    November 1, 2017 at 1:57 pm

    These are so gorgeous! Definitely on the top of my baking project list right now!!

    Reply
  12. Barbara

    November 1, 2017 at 12:46 pm

    Hi, Joy
    I SO much enjoy your blog and recipes and your Sunday editions!
    With respect to this one though, in the body of the blog, before the recipe you give the thickness of the topping as 1/20 of an inch. I noticed this and I’m looking at the pictures thinking, “hmmm . . . looks thicker” then in the recipe you have 1/2 inch.

    Reply
  13. Avril

    November 1, 2017 at 10:02 am

    These look great – think that might be a project for me one weekend :)

    Reply
« Older Comments

Leave a Reply Cancel reply

Your email address will not be published. Required fields are marked *

Recipe rating ★ 5 Stars ☆ ★ 4 Stars ☆ ★ 3 Stars ☆ ★ 2 Stars ☆ ★ 1 Star ☆

This site uses Akismet to reduce spam. Learn how your comment data is processed.

RELATED POSTS IN Bread

close up of strawberry shortcake recipe with soft whipped cream
Dad’s Biscuits Make The Best Shortcake

The best strawberry shortcake recipe must start with the perfect biscuit.  Tall and golden brown, flaky but cakey and more sweet than salty.  My dad’s *chef’s kiss* biscuit recipe is the perfect base for this classic summer dessert! Can I be the first to admit that this summer hasn’t been my absolute favorite thus far?…

Read More

jambalaya buttermilk biscuits in a row
Smoked Sausage Jambalaya Buttermilk Biscuits

These mile-high jambalaya buttermilk biscuits are stacked with all the savory flavors of New Orleans’ most comforting rice dish.  These tender biscuits are absolutely stacked with Zatarain’s Cajun-Style Smoked Sausage, onions, peppers, and roasted tomatoes. We’re taking big bites of Mardi Gras this year – here’s how! Friends, we have a bonafide tradition in the…

Read More

inside of warm cinnamon roll on plate
How To Make The Best Single Serve Cinnamon Roll

Micro batch baking – the invitation is to get all the way into it with me!  This is all very Kristin Wiig  making herself a single, sad cupcake in the movie Bridesmaids, save for the fact that there is absolutely zero sadness in me eating a single cinnamon roll over the kitchen sink in my…

Read More

Primary Sidebar

Fresh baked emails, delivered to your inbox

Jump to Recipe

Receive recipes from Joy the Baker and updates on events at The Bakehouse.

HI! I’M JOY!

Jump to Recipe

Welcome! This has been my little corner of the internet since 2008!

I’m a baker, photographer, cookbook author and teacher.  I live laugh love in New Orleans. 

MORE ABOUT JOY AND THE TEAM

BOOKS + Magazines

Jump to Recipe

2023 CAMP JOY SUMMER ZINE – get it here!

JOY THE BAKER 2022 SUMMER MAGAZINE

JOY THE BAKER 2021 HOLIDAY MAGAZINE

JOY THE BAKER 2020 HOLIDAY MAGAZINE

HOMEMADE DECADENCE

OVER EASY: SWEET AND SAVORY RECIPES FOR LEISURELY DAYS COOKBOOK

JOY THE BAKER COOKBOOK

MY FAVORITE CAMPING GEAR

Jump to Recipe

SHOP MY FAVORITE GEAR HERE! 

Jump to Recipe
joy the baker on facebook joy the baker on twitter pinterest-social instagram-socialbloglovin-social

DRAKE ON CAKE

Jump to Recipe

Passionate from miles away since 2015.

CHECK IT OUT ON INSTAGRAM

Drake on cake instagram.


BREADS YOU’LL LOVE

close up of strawberry shortcake recipe with soft whipped cream

Dad’s Biscuits Make The Best Shortcake

jambalaya buttermilk biscuits in a row

Smoked Sausage Jambalaya Buttermilk Biscuits

inside of warm cinnamon roll on plate

How To Make The Best Single Serve Cinnamon Roll

LET’S MAKE COOKIES!

a stack of white chocolate macadamia nut cookies with a bite taken out of the top one with milk

Classic White Chocolate Macadamia Nut Cookies

wider shot of lemon bars stacked on a plate with a bite taken out of one lemon bar

My Favorite Classic Lemon Bars Recipe

completed recipe close up shot of a blondie so the toasted almonds, chocolate chips, and sea salt can be seen

My Best Classic Blondie Recipe

Footer

Instagram

joythebaker

📚Baker, author of books, lover of butter
🎂Creator @drakeoncake
📝Inquiries megan@underscoretalent.com

joythebaker
Chai-Spiced Sugar Cookies #taylorsversion made wit Chai-Spiced Sugar Cookies #taylorsversion made with an old sugar cookie recipe I made back in 2009 (like whaaat?) and a boatload of warm autumn spiced @taylorswift added to the dough.⁣
⁣
This cookie recipe explodes on my site every September and for good reason. We’re fall girlies and we love a little nutmeg glaze. ⁣
⁣
Find the full recipe linked in the profile! Xo
I don’t know what it is about this year, but I j I don’t know what it is about this year, but I just need more light-hearted fun, more hugs, more breakfast made by mom, and more coffee walks in the sand. Let’s do autumn now, nice and steady.
🥯🥯 for the weekend, babes! Save this no-yeas 🥯🥯 for the weekend, babes! Save this no-yeast bagel magic for your Sunday morning. ⁣
⁣⁣
Two Easy No-Yeast Bagels⁣⁣
1/2 cup self-rising flour⁣⁣
4 tablespoons greek yogurt (plus a teaspoon or two more if needed)⁣
1 large egg, beaten for egg wash⁣⁣
1/3 - 1/2 cup grated gouda or gruyere⁣⁣
Everything bagel seasoning⁣⁣
3 tablespoons baking soda with 2 cups of boiling water. ⁣⁣
⁣⁣
Place a rack in the upper third of the oven and preheat oven to 375 degrees F.  Line a baking sheet with parchment paper and spray the paper lightly with nonstick spray. ⁣⁣
⁣⁣
In a small bowl, use a firm spatula to work together the flour and yogurt. Add a few teaspoons of yogurt if it feels dry and knead into a cohesive ball for 5 minutes or so. Sprinkle with a bit more flour if it gets overly sticky. Cover with a damp paper towel and gather your toppings. ⁣⁣
⁣⁣
Divide dough in two and roll each piece into a roughly 8-inch rope. Bring the ends around and pinch into a circle. ⁣⁣
⁣⁣
Sprinkle the bottom of the prepared pan with grated cheese in two spots.  Pour boiling water over the baking soda and float each bagel in the water for 20 or so seconds.  Use a slotted spot or spatula to transfer the bagels on top of the cheese.  Brush lightly with egg. Sprinkle with more cheese and everything bagel seasoning. ⁣⁣
⁣⁣
Bake for 20 - 22 minutes until deeply golden and bubbling.  Allow to cool for 10 minutes before slicing and smearing with cream cheese.
The secret to really great muffins is eating them The secret to really great muffins is eating them warm, with a big smear of butter and a sprinkle flakey sea salt. ❇️ This goes for any muffin but is especially delicious on these a Vegan Carrot Zucchini Harvest Muffins because they have so many veggies they’re basically a salad. ❇️ Full recipe linked in the bio! Xo
This fall the ultimate chocolate chip cookie is pa This fall the ultimate chocolate chip cookie is packed with oats, @guittardchocolate baking wafers, and candy coated chocolate pieces from @traderjoes. ✌️ It’s the perfect weekend bake, babes! Full recipe linked in the profile!
Once September hits it’s all cozy couch dinners Once September hits it’s all cozy couch dinners starting with this creamy tomato Marry Me Chicken. Disclaimer: this chicken has yet to get me hitched. Full recipe linked in the bio, bbs! Xo
Load More... Follow on Instagram

Copyright © 2023 · Joy the Baker
All rights reserved. Violators will be whupped and sent to bed with no dessert · Privacy Policy

Scroll Up