Ingredients
Scale
- For the Waffles:
- 1 1/2 cup chickpea flour
- 1/2 cup all-purpose gluten-free flour blend (I used Bob’s Red Mill)
- 2 teaspoons baking powder
- 1/2 teaspoon sea salt
- 1 1/2 cup water
- 2 tablespoons maple syrup
- 1 large egg
For the Chicken:
- 1 1/2 – 2 pounds chicken breast tenders
- 1 1/2 cups buttermilk or yogurt mixed with a bit of milk
- a few good dashes of hot sauce (like Crystal)
- 1 yellow onion, sliced thick
- 2 cups gluten-free flour blend (I like Bob’s Red Mill)
- 1 teaspoon freshly ground black pepper
- 1 1/2 teaspoons sea salt
- 1 teaspoons smoked paprika
- 1/2 teaspoon dried oregano
- 1/2 teaspoon onion powder
- 1/2 teaspoon chili powder
- 1/4 teaspoon ground cumin
- 1/4 teaspoon ground cinnamon
- 1/4 teaspoon garlic powder
- 3 tablespoons granulated sugar
- peanut of vegetable oil for frying
- pure maple syrup + a pinch of salt + a few pinches ofred pepper flakes
- a few tablespoons of honey + a few tablespoons of whole grain mustard
Instructions
- To make the waffles, in a medium bowl whisk together the flours, baking powder, and salt. Create a well in the center of the dry ingredients and pour in the water, maple syrup, and egg. Whisk together the wet and dry ingredients until smooth.
- Set the batter aside and allow the batter to rest for 30 minutes. This will help soften the chickpea flour. It’s an important step.
- To make the chicken, first place the chicken in a large bowl. Season generously with salt and pepper. Add the onion slices to the chicken. Top with buttermilk and lots of hot sauce. Toss to coat everything lightly in buttermilk and let rest at room temperature for about 30 minutes. (You can do this step a day ahead and let it marinate in the refrigerator overnight. Just bring the chicken out of the refrigerator for about 30 minutes before frying.)
- In a medium bowl whisk together flour, pepper and salt, and all the spices and sugar. It’s a lot. Whisk it up!
- Dredge the chicken by pulling it out of the buttermilk, giving it a little shake and coating it well in the flour mixture. Place on a parchment lined baking sheet. Continue with all of the chicken pieces and allow the pieces to sit until the flour has absorbed the some of the liquid from the buttermilk and chicken. This short rest will help the coating stick to the chicken pieces better.
- It’s up to you whether you want to cook the chicken pieces or the waffles first. I fried the chicken first, but the choice is yours.
- Heat about 2-inches of oil in a saute pan. Heat the oil to 360 degrees F. Place 3 to 4 pieces of chicken into the hot oil being sure not to overcrowd the pan. The temperature will drop when you add the chicken so be sure that the chicken isn’t too cold when you add it.
- Cook pieces for about 4 to 5 minutes, depending on the size of your pieces. Cut a piece open to test for doneness so you know what you’r working with. Place fried pieces on a cooling rack over a rimmed baking sheet or on a baking sheet lined with a few paper towels. Allow the chicken to cool slightly before serving. Once you’ve fried all the chicken, fry the onion slices too! Fry until just golden brown and crisp.
- To make the waffles, give the batter a good whisk, heat your waffle iron and spray with nonstick cooking spray. Fill the waffle iron with batter and cook according to your specific waffle iron.
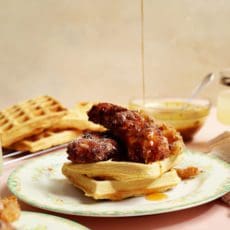
- Serve chicken stacked on top of waffles with spicy maple or honey mustard. Enjoy warm!
- The chicken is also delicious cold and the waffles are good stored in the freezer and reheated in the toaster.