Hi friends! Let me remind you why you’re here. You’re here for the PIE PIE PIE PIE PIE!! (Yes, I’m yelling and flailing my arms in the air – it’s festive). Specifically you’re here for this gluten-free sweet potato pie which also happens to be free of diary and refined sugar!
You know when I bust out the Oprah style volumes to yell PIE I’m screaming about one pie in particular: good ol’, perfect in every way, Dad’s Sweet Potato Pie. It’s the reason for the season, y’all. Did you forget?
I brought my big game this holiday season. First, the magazine I made you. Second, the Cajun Pumpkin Cream Pie I want you to love as much as I do. And here – my third humble offering, a free-of-many-things rendition of my Dad’s family classic. I worked really hard to keep the integrity of my Dad’s pie while keeping out gluten, dairy, and refined sugar. It was also important to me that this didn’t suck and friends – it does not. You could proudly serve this to a crowd of gluten, dairy, and sugar lovers with your head held high (and your gluten-free crust a total secret).
I’ve been experimenting with my diet lately, reducing all of the things this pie is free of in an effort to get a hold of… ya know, this human body. I want to feel happy and healthy and I can’t do that without pie. Firm fact.
What follows is a step-by-step for a gluten-free pie crust and this super smooth sweet potato pie filling. There are plenty of pictures (some might say too many), but if you’re only interested in the recipe you can just scroll right on down to the bottom. That won’t bother me a bit because – I won’t even know. Take what you need, always! I just hope this pie brings you as much joy as it has brought me!
(Dad hasn’t tried this version yet but I’m going to sneak it onto our Thanksgiving table and see if he can spot the difference!) (He’s probably reading this. Hi Dad!)
Here’s what you’ll need to make this Gluten-Free Sweet Potato Pie:
• a gluten-free flour blend. I used Bob’s Red Mill 1-for-1 baking flour and think it’s great.
• white chia seeds (believe it).
• vegan butter. I like Earth Balance for this crust.
• coconut sugar. My sweetener of choice for this pie. If you’d like to substitute for another, you’re welcome to – I just may not know how to guide you for substitutions.
• coconut yogurt or anything thick and tangy.
• sweet potatoes
• spices, and don’t skimp on the ground coriander and fresh grated nutmeg.
• oat milk
• coconut oil
• pie weights and parchment paper
• coconut cream for whipped cream if you’d like.
We’ll start by making the gluten-free and dairy-free pie crust. Because it’s gluten-free, I work this crust a little differently than a gluten-full crust. You’ll see.
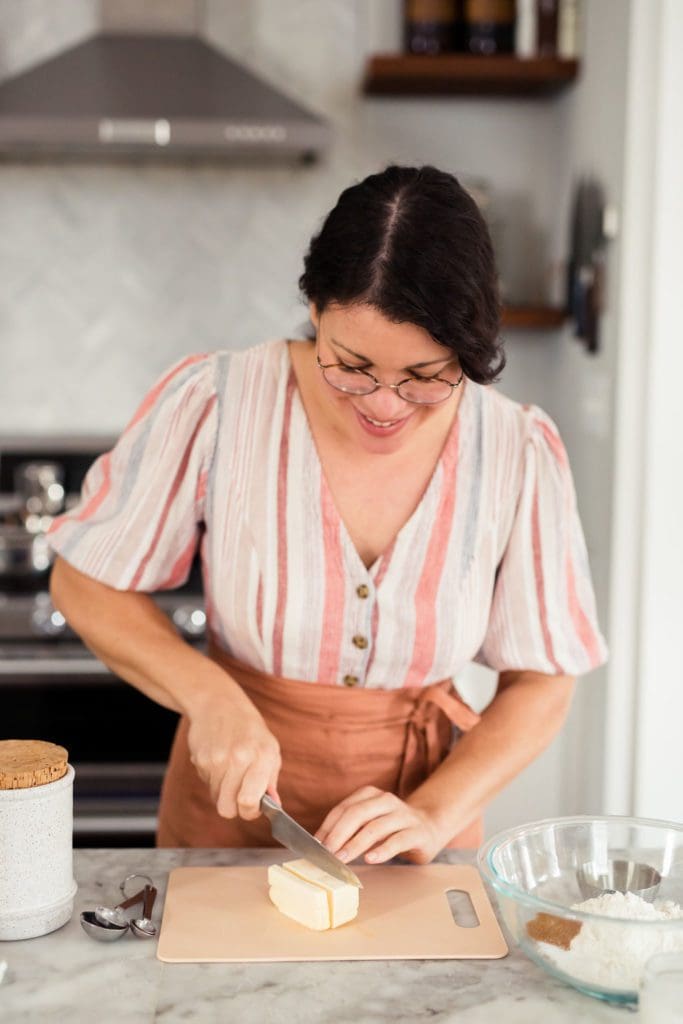
This is a familiar sight but I’m using vegan butter instead of cow’s butter. I’ve tested this recipe with vegetable shortening and was not at all impressed by the flavor. I’ve also tested this recipe with coconut oil and found it a little more difficult to work with.
You can absolutely choose your own adventure. My most successful adventure involves Earth Balance baking sticks.

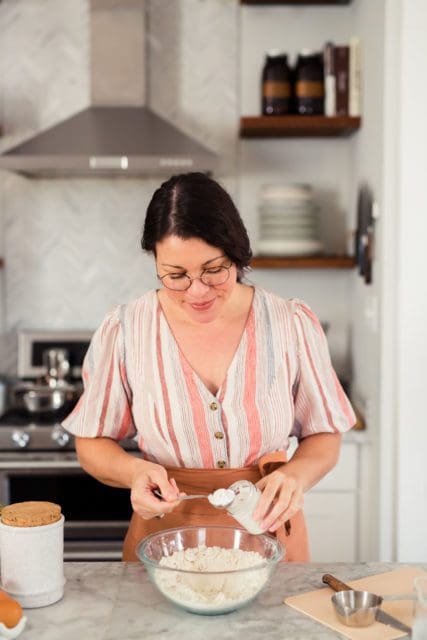
I add ground white chia seeds to the crust dough. It helps to bind the dough together and adds an earthy, nutty flavor.
If you don’t have white chia seeds, the black seeds will do too, they’ll just leave specks through the dough. I’ve also used ground flax seeds with similar success.

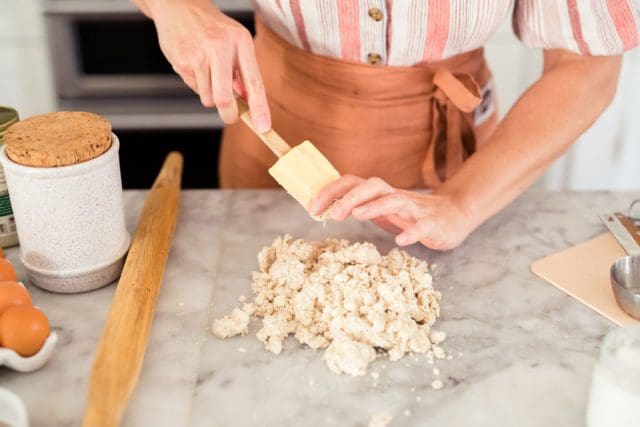
Like we do with our pie crusts, work the butter into the dry ingredients so that some butter pieces are the size of small peas, some are the size of oat flakes. We’ll work fairly quickly as to not warm the cold butter too much with our hands.
After working in the butter we’ll create a well in the center of the dry ingredients.
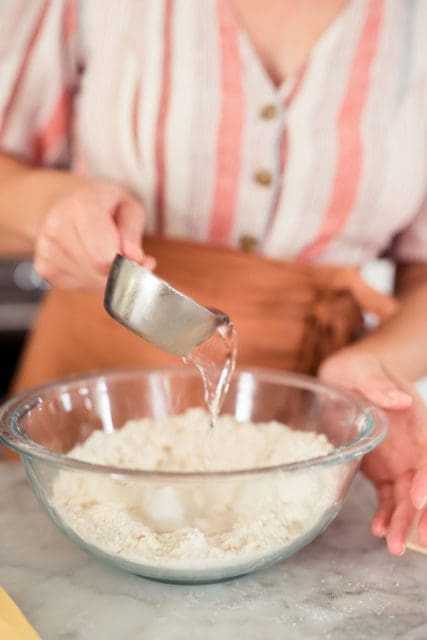
Add a tablespoon of creamy coconut yogurt and most of our 1/3 cup of cold water.
I like to reserve a few tablespoons of water just in case my dough doesn’t ask for it all.
Fluff the wet and dry ingredients together into a shaggy dough and dump onto a clean work surface.
You’ll see some large dough chunks that clump together with lots of moisture and some bits of loose dry flour. Start to gently knead and work the dough together. You can alway add that remaining water if you feel like your dough is too dry.
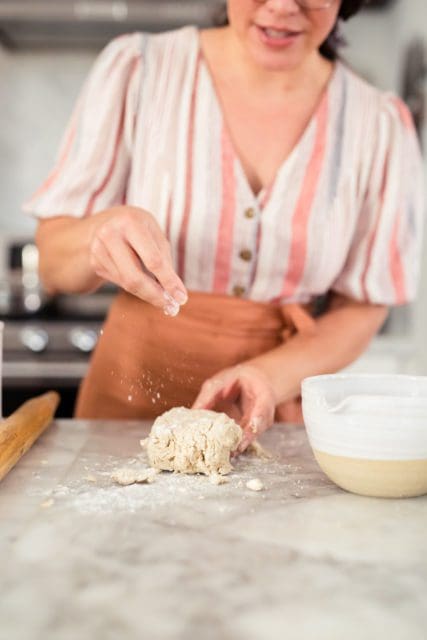

Use your gluten-free flour blend for dusting the work surface and the dough and gently roll it into 10 or so inch rectangle that’s about 1-inch thick.
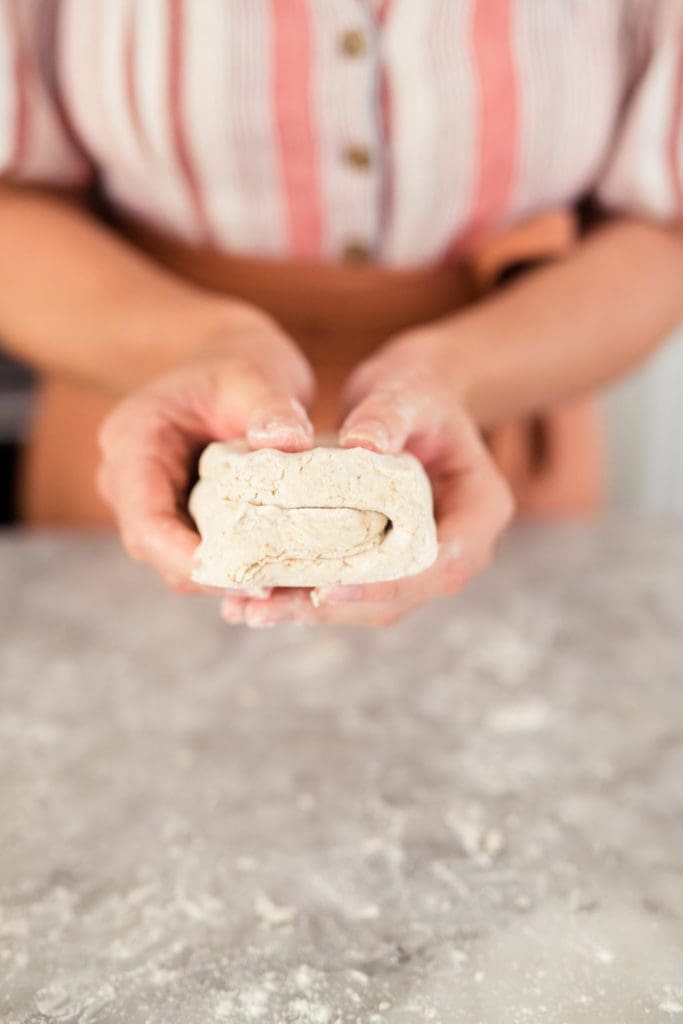
I like to laminate (or fold) my gluten-free pie crust twice before chilling. Laminating will force (or gently suggest) some flake into our pie crust.
To laminate, fold the bottom portion of the dough up two-thirds, then fold the remain dough down over your first fold. Like an envelope. Rotate the dough a quarter turn and roll and fold again.
I talk a lot about lamination here if you’d like more of a visual.
After two laminations, wrap the dough in plastic wrap or waxed paper and refrigerate for 30 minutes.
It’s a shorter chill than our traditional pie crust because I’ve found that this dough is more amiable to roll if it isn’t chilled through.
If you do find that you need to chill the dough longer, or overnight, just let it sit on the counter for 10 minutes or so before rolling.

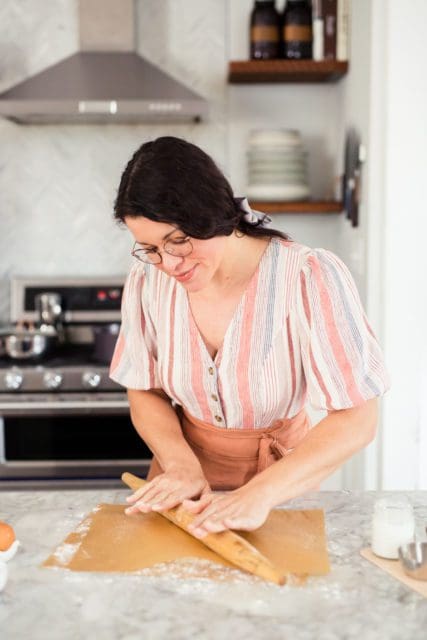
I find gluten-free dough easiest to roll between two pieces of parchment paper.
I generously dust the bottom piece of parchment and the top of the dough, place another piece of parchment atop the dough and roll into a rough circle, about 12-inches round.
Life the paper up and re-flour every few strokes.

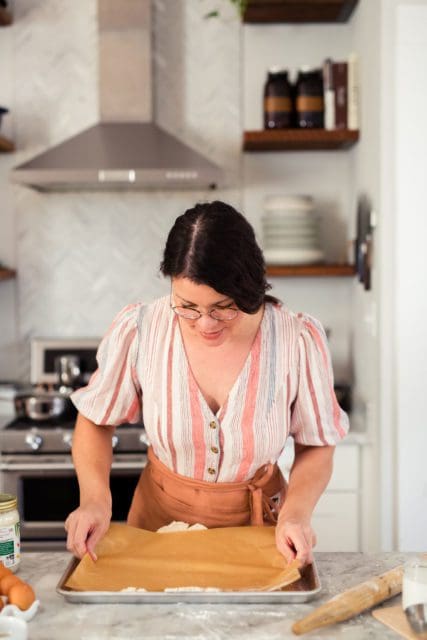
Test to see that the crust round is large enough for the pan and transfer top and bottom parchment (with the dough inside) onto a rimmed baking sheet for a proper chill while we make the pie filling.

While the pie crust chills, let’s make the gluten-free sweet potato pie filling!
I start by peeling, quartering and boiling sweet potatoes.
I like to boil them to avoid any crunchy bits that may result from roasting. I also like the moisture that boiling adds to the potatoes.
Measure two heaping cups of tender sweet potato chunks and place in a saucepan.

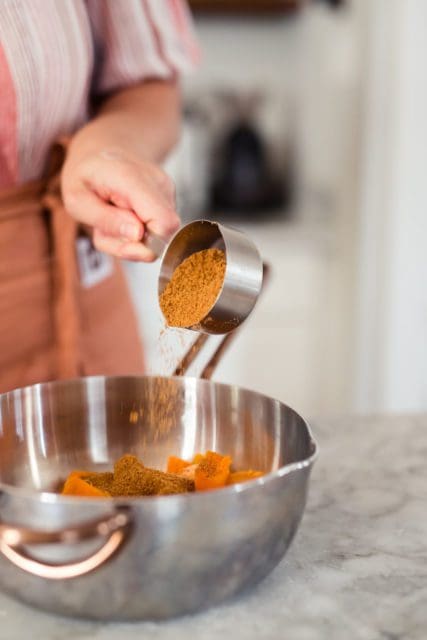
Add half of the oat milk and the coconut sugar.
We’re going to gently cook some of the sugar and spices while we mash the potatoes to get the most flavor into this gluten-free sweet potato pie as possible.
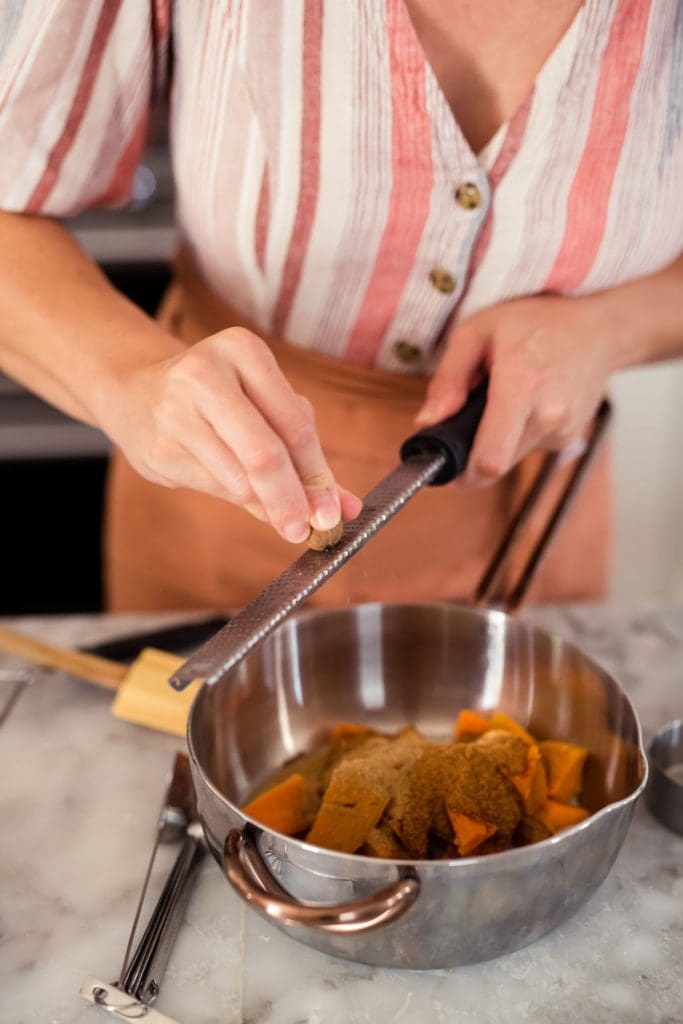
Spices are key to this pie. We’ll add a questionable but correct amount of ground coriander, cinnamon, and nutmeg.
Mash and heat until the mixture is steamy and fragrant, just a few minutes. It’s ok if the potatoes are still a bit lumpy, we’ll smooth them with an immersion blender towards the end.


Transfer the warm, spiced potato mixture to a medium bowl, add the remaining milk and eggs, maple syrup and vanilla extract.
The eggs will smooth and bind the filling. I’ve tried making this pie completely vegan with flax eggs and it just doesn’t have the same effect. Eggs are essential to my rendition of this pie.
To make silky smooth, blend with an immersion blender or transfer the mixture to an upright blender to pulse until smooth.

With the filling done, it’s time to assemble to pie.
Take the pie crust out of the refrigerator and allow it to rest on the counter for 5 or 10 minutes to become pliable.
Peel back the top later of parchment, place the pie pan (I used a thin metal standard 9-inch pie plate) on top of the crust and, with a hand under the bottom parchment, quick flip the whole things over.
It’s chill.

Peel back the top parchment and let’s just pat ourselves on the back here.
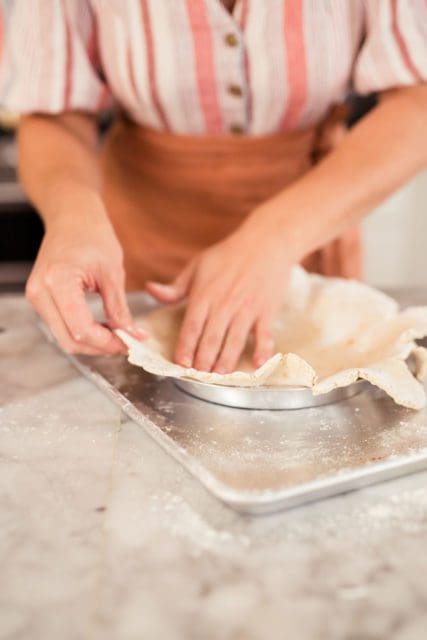

I gently press the chilled crust into the edge of the pie plate.
Using a trick from pie genius Erin McDowell, I use a pair of kitchen sheers (or any pair of scissors you use solely in the kitchen) to snip any extra crust from the dish, leaving just 1-inch overhang.

Fold the overhang under and press to secure. Crimp with your fingers or a fork. Whatever feels fun and easy.
We’re going to par-bake this pie crust so we’ll dock the crust (that means poke the bottom and sides with the tines of a fork all over) and allow it to chill in the fridge while the oven preheats.


We don’t want to loose the shape of our gorgeous pie crust so we’ll use pie weights (in my case a giant jar of dried beans) to hold the crust in place as it bakes.
Line the un-baked pie crust with parchment paper and fill to the absolute brim with dried beans. Bake for 10 minutes. Somehow carefully remove that big load of hot beans (there’s really no easy or graceful way to do it – it’s a wish and a prayer), and return the crust to the oven to crisp just until it appears dry and just begins to brown.

Add the pie filling to the crust (it’s fine if it’s still hot) and bake until the pie filling is set.
You’ll know the pie is done when it has a little jiggle and puff but not a wave-like motion. Waves mean the filling needs more time in the oven.

See that pretty puff around the edges? That’s the sign of a fully baked pie.

Allow the pie to cool. Please.
The pie is still setting when it first comes out of the oven so cooling the pie is actually an important part of the baking process.
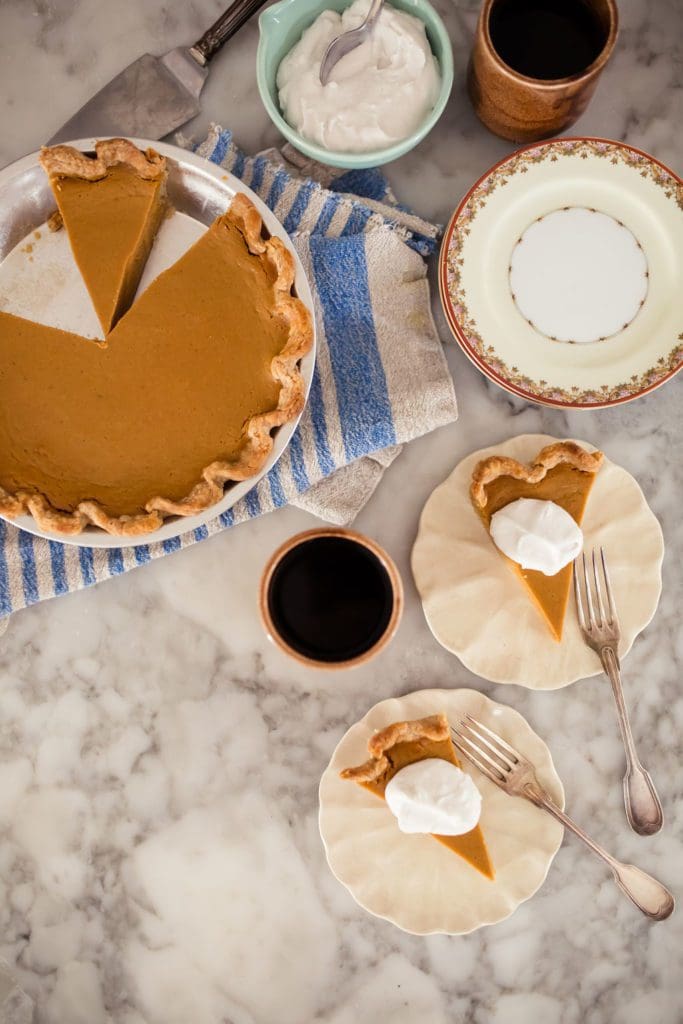
I like this Gluten-Free Sweet Potato Pie best after a rest in the refrigerator overnight which is also ample time to chill a can of coconut cream for coconut whipped cream! See? It’s a win all around.


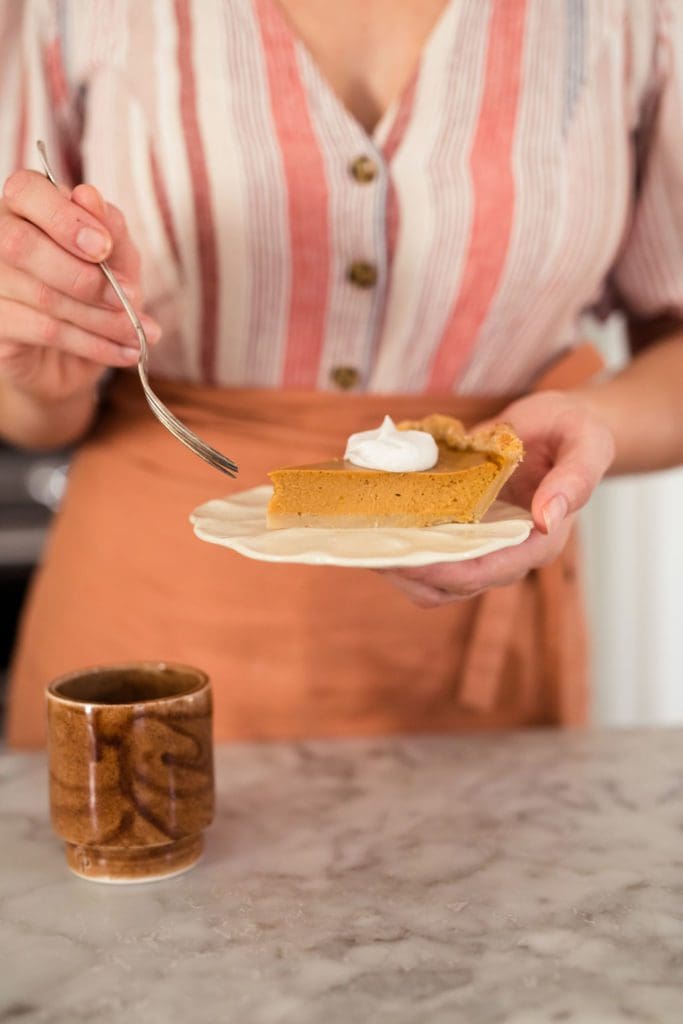
Slice and serve with a sweet dollop of coconut cream and a pot of black coffee.
The flavor is on point, perfectly spiced. The crust is crisp, nutty, and flaky. It tastes like home to me and it’s really such an honor to share that with you.
I hope this Gluten-Free Sweet Potato Pie brings happiness to your holiday season!
xo Joy
Photos with Sarah Becker.
Print
Dad’s Perfect Gluten-Free, Dairy-Free, Refined Sugar-Free Sweet Potato Pie
- Prep Time: 1 hour
- Cook Time: 50-60 minutes
- Total Time: 2 hours
- Yield: 1 9-inch pie 1x
- Category: dessert, holiday
Description
Dad’s classic Thanksgiving pie made even more friendly without gluten, dairy, or refined sugar.
Ingredients
For the Crust:
- 1 1/2 cups (185g) gluten-free flour blend (I used Bob’s Red Mill)
- 1 tablespoon (8g) coconut sugar
- 1/2 teaspoon kosher salt
- 1 tablespoon (5g) ground chia seeds
- 8 tablespoons (1 stick) vegan butter (I used Earth Balance)
- 1 tablespoon coconut yogurt
- 1/3 cup cold water
For the Filling:
- 2 heaping cups (about 385g) peeled, diced, and boiled sweet potato
- 1/2 cup (62g) coconut sugar
- 1 1/4 teaspoon ground coriander
- 1/2 teaspoon freshly grated nutmeg
- 1/2 teaspoon cinnamon
- 1/4 teaspoon salt
- 2 tablespoons coconut oil
- 1 cup plus 2 tablespoons oat milk
- 3 large eggs
- 1/4 cup maple syrup
- 1 teaspoon vanilla extract
Instructions
- To make the pie crust, in a medium bowl, whisk together flour, sugar, salt and chia seeds. Add cold, cubed vegan butter and, using your fingers (or a potato masher), work the butter into the flour mixture. Quickly break the butter down into the flour mixture, some butter pieces will be the size of oat flakes, some will be the size of peas. Create a well in the mixture and spoon in coconut yogurt. Pour in most of the water, leaving behind a tablespoon or two to add later, if necessary. Use a fork to bring to dough together. Try to moisten all of the flour bits. Add the remaining water if necessary, but you want to mixture to be shaggy and not outwardly wet.
- On a lightly floured work surface, dump out the dough mixture. It will be moist and shaggy. That’s perfect. Gently knead into a rectangle.
- We’ll laminate the dough before we chill it. Gently roll the dough into a rectangle about 10 to 12-inches long, 4-inches wide and 1-inch thick. (This doesn’t have to be exact.) Position the dough so that the short side is facing you and the long end extends away from you. Fold the bottom of the dough 1/3 of the way up. Fold the top of the dough 1/3 of the way down creating a letter fold.
- Rotate the dough letter a quarter turn so the folded rough edges are facing you and extending away from you. Roll and fold once more for a total of two laminations.
- Wrap the disk in plastic wrap and refrigerate for 30 minutes. Allowing the dough to rest in the refrigerator will help rechill the butter and distribute the moisture but you don’t want it to be completely chilled through. If you keep your dough in the refrigerator for longer than 30 minutes or overnight, let it rest on the counter for 10 minutes before rolling.
- To roll out the dough, place the dough between two pieces of floured parchment paper (or parchment paper and a Silpat, or two pieces of plastic wrap). Roll the dough out evenly, turning the dough over frequently and lifting and smoothing the paper or plastic so it doesn’t create any creases. You can dust a bit more flour too if you’d like. The circle should be 12-14 inches in diameter and about 1/4-inch thick. Slide the dough (still between the paper or plastic) onto a baking sheet or cutting board and refrigerate for about 1 hours. The dough cal also be refrigerated overnight or well-wrapped and frozen.
- When the dough is thoroughly chilled, place the dough on the counter and let it rest for about 10 minutes or until it’s pliable enough to bend without breaking. Remove one piece of paper or plastic from the dough. Invert it onto the pie plate and remove the second piece of paper or plastic. Gently press the dough into the edges of the pan. It’s ok if the dough tears a bit, just press and tears back together. Allow the excess dough to rest over the sides. Trim so the crust overhangs just 1-inch and fold the excess crust under and crimp with your fingers or a fork. Press the tines of a fork into the bottom and sides of the pie crust to dock it before par-baking. Refrigerate while the oven preheats.
- Place a rack in the upper third of the oven and preheat oven to 375 degrees F. Line the chilled pie with parchment paper and top to the brim with pie weights or dried beans. Bake for 10 minutes. Carefully remove the beans and return the pie shell to the oven. Bake for another 5 to 7 until the pie crust appears dry and is just barely golden.
- To make the filling, first peel the sweet potatoes. Dice the sweet potatoes into large, 3-inch chunks. Place potato pieces in a large pot and cover with cool water. Place over medium high heat and bring to a boil. Reduce heat to medium and simmer until the potatoes are tender throughout, about 20 minutes. Test the doneness of the potatoes using a thin knife. If the knife meets any resistance, simmer the potatoes a bit longer.
- Drain into a colander.
- In the same large pot place cooked potato pieces, the coconut sugar, all of the spices, salt, coconut oil, and half of the oat milk. Cook on low flame, using a potato masher to mash the potatoes and they cook. Allow to cook for about 5 minutes until fragrant. Once mixture fragrant, remove from the stovetop and transfer to a medium bowl.
- Whisk in the remaining oat milk, eggs, maple syrup, and vanilla extract. Whisk until well combined. Make sure that the mixture is as smooth as possible. I used an immersion blender to completely smooth the mixture.
- Pour the prepared filling into the pie crust. Place on a baking sheet and bake for 10 minutes at 375 degrees F. Reduce the heat to 325 degrees F and cook until cooked through, about 45 to 50 minutes.
- To test the pie for doneness lightly shake the baking sheet. If the center of the pie has a wavy jiggle it needs more time in the oven. If the center of the pie has a lighter, more structured jiggle, it’s done!
- Allow to cool to room temperature before serving, or serve chilled from the refrigerator. I like this topped with dollop of coconut whipped cream and black coffee. Pie will last well-wrapped in the refrigerator for up to 4 days.
Notes
I tested this recipe with flax eggs and it’s wasn’t as silky smooth and had trouble setting in the oven. You’re welcome to try it, I just prefer this recipe with eggs.


24 Responses
This looks delicious. Love sweet potato pie, but not the sugar or gluten–at least my body does not. I’m going to be the one to ask it, because someone has to, so here goes: can I use regular butter and cream in lieu of vegan butter and oat milk? I’m not vegan, just gluten and sugar free.
I have loved your site for so long. When I was forced to give up gluten and sugar, I worried I wouldn’t be able to enjoy your fabulous recipes. Thank you for throwing a few our way.
Yes! You can absolutely use regular butter and instead of cream I’d use evaporated milk like my dad’s original recipe (also linked in the post if you need eyes on it)! It’ll be just delicious!
I’m curious about baked goods with that level of coconut subs? Can you actually taste the coconut from the sugar, yogurt and cream??
That’s a great question Kim! So the coconut flavor doesn’t come through with the sugar or yogurt in the pie itself. The most coconut flavor is in the coconut cream if you decide to add that to the top!
This looks awesome. I too am experimenting with my diet and am sad to say eggs are out for now too. I keep trying to bake with flax eggs but have had very little success. I miss sugar, dairy and gluten some, but I really miss eggs the most, especially for the holidays. In any case, thanks for sharing your refined recipes. It’s clear you worked really hard to bring this to the world. As soon as I can add eggs back in the mix, I am going to give this a whirl…even if it’s in July. Happy Thanksgiving and good luck with your food journey.
I totally understand. Eggs are such a wonder in baking and really hard to properly replicate. This recipe will be here when you’re ready for it!
Thank you for this!! I can’t have any dairy, and I’ve been looking for good dairy-free pie crusts for years. I’ll be making yours this year!
What a beautiful recipe! I’m eager to try it! I use almond milk regularly, do you suppose there would be any reason not to sub that for the oat milk? I’d rather not buy a product I don’t have a regular use for.
Do you think I could use purple sweet potatoes instead? May be a silly question :)
Oh I may cry! I cannot wait to make this! I have been gluten-free for many years now. Unfortunately, many pie crusts look very sad. On the other hand, yours looks legit!!!! EEEEEK! So freaking excited!
Hi! I just made a triple batch of this crust for use in my pumpkin pie recipe because I needed a GF crust. My recipe does not typically have a blind bake. Is there any reason I shouldn’t use it without pre baking it? Is there anything about the ingredients or specific recipe that would not work if I just dumped my pie filling in the raw crust and baked it for like 50 min at 350? Thank you!
Awesome, Courtney! No there’s no reason you need to parbake the crust if that’s not your normal baking habit! Let me know how you enjoy the crust!
Thank you! I just rolled it out and it’s chilling in the fridge again. It’s easy to work with following your instructions. Looks like it will be great!
I don’t need adaptations for my diet but reading this convinced me to bake your « Classic » recipe after few years. Currently in the oven with the crust from the blog and the filling from your book ?
love that this is sugar free, and already love sweet potatoes so I’m already in, thank you!
JOY! It was so hard to not dig in after this came out of the oven last night and the house smelled incredible.
Had a slice for breakfast and it’s absolutely perfect. Thank you, friend!
I have my trusty version I used to serve to my roommates with pride, but since I have a celiac friend I absolutely have to try your version of it!
I made this yesterday evening, dropped off pieces at a few family members’ houses, and received rave reviews from adults and kids alike. (My four-year-old nephew said it’s “the best pie [he’s] ever had and [he] may eat it all day.”) I also definitely had a chilled sliver for breakfast, and it was delicious. The deeper, spicier flavor and that crust—perfection. I will definitely make this again!
I’ve been experimenting with gluten-free baking lately after traditionally giving things a go for many years & must admit- this recipe is divine! Honestly, I don’t trust many blogs exclusively paleo, gluten-free, etc because I’m tempted to conclude the creators taste buds must be far off. However, having enjoyed your blog forever & a day, i trust you!! I’d be so excited to see as many of these kinds of recipes as possible. Officially a keeper!
Hi can I ask what is the nutrition content for calories please, this sounds amazing defo hobbs try. Thank you :)
I made this and the filling was great, but my crust turned out kind of tough. I might have added too much water, but it was really dry and crumbly. When I pre-baked it, half of the crust caved in. I did not use pie beads, but I’d never had that happen before. I also used butter that seemed to melt too quickly for pie (Miyokos & Flora). Do you have any thoughts or feedback?
Similar experience with pie – filling was great, crust hard as a brick above the filling! It rolled out fine; used weights when pre-baking. However, I kept adding a few minutes to the pre-baking time, waiting for the “slight golden color”to develop. That never seemed to happen. The filling must have softened the crust it contacted, and the rest of the crust above just continued to harden during the rest of the baking. Could not cut that part with a knife, had to break it by hand in order to get a piece out of the pie tin! Will try again with less time for pre-bake.
Did you mean to put coriander in your sweet potato pie or did you mean Cardamom?
I have been making your Dad’s pie every year for my family at Thanksgiving for the past 5 years. I have been gluten free for a while but recently had to go dairy free.
I made a gluten free / dairy free version for myself this year and it is fantastic! I used Califa Farms vanilla oat creamer as I wanted something a bit closer in texture to evaporated milk. It was incredible! Highly suggest!