Are you ready for it? We’ve entered the downhill slalom towards the holidays and the new year. It’s time for chocolate peppermint cookies!
Despite the year we’ve endured, heck… maybe because of the year we’ve endured, I’m tipping full-body into this holiday season. My mom is sweet enough to craft these ornaments for my Christmas tree (that I’m picking up a few days late this year). I have oranges sliced in the refrigerator for stovetop potpourri, and a separate stash of oranges and cloves to make this festive orange tower. You know I have the pine candle burning and most importantly, this year I’m gearing up to send big lovey holiday care packages to friends and family. No holiday gift package would be complete without cookies, so in the next week I’ll show you how I craft them for mailing.
Now, will TronCat wear a Christmas sweater this year? No. Will he sit under the tree like a Christmas forest cat? Yes – we can count on it.
We’re on our way friends. Let’s just go for it started with this cookie recipe I hold dear to my heart made to taste just right for the holiday season. Thank you, mint!
Here’s what we’ll need for these chocolate peppermint cookies:
We’ll have ingredients ingredients for the little cake cookies, ingredients for the peppermint glaze, and ingredients for the chocolate glaze.
• For the cookies we’ll need flour, baking soda, and salt. We’ll cream together butter, sugar, eggs, and vanilla. Buttermilk, too – for extra tenderness.
• Powdered sugar, corn syrup, peppermint extract, and a pinch of salt for the glaze A few drops of red gel food coloring will make the cookies more candy cane festive.
• Chocolate chips, a few pats of butter, corn syrup, and a pinch of salt for the chocolate glaze. (I find that the corn syrup makes the glazes more spreadable.)
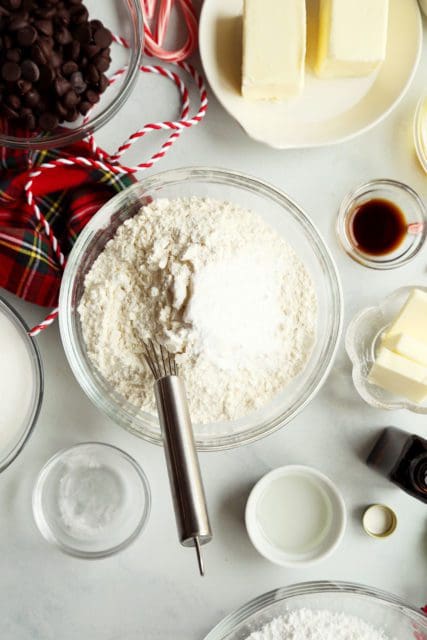

We’ll start by making the cookies, turning Black and White Cookies into Christmas cookies.
I like to whisk together the dry ingredients and whisk together the wet ingredients. Keep it easy. Keep it organized.
Cream together softened butter and granulated sugar using either a stand mixer or electric hand beaters.
You’ll notice the mixture starts to fluff as air is incorporated into the butter and sugar. This air we’re trapping in the fat will help the cookies rise.
Add the eggs and beat until fluffy and glossy.
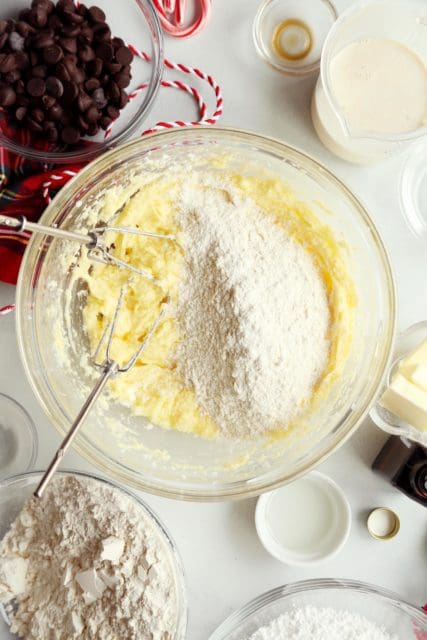
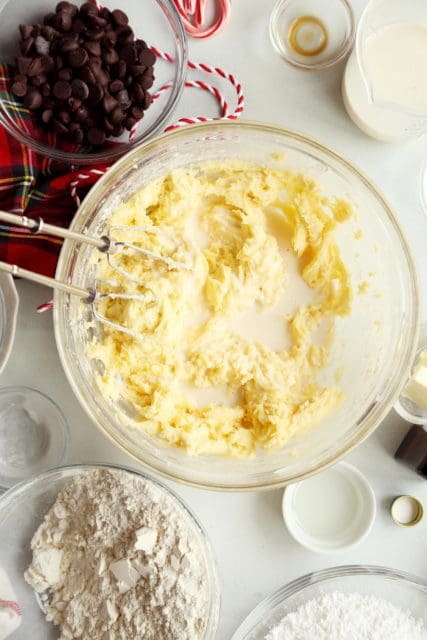
Next comes the dry ingredients and buttermilk in batches.
Add half of the flour mixture, followed by all of the buttermilk, finishing with the last of the flour. It’s like making cake batter! Essentially these cookies are like tiny cakes!
These cookie dough balls really benefit from being baked on a piece of parchment paper. You’ll find that once baked, they’ll peel off perfectly from the paper.
Heap 2 to 3 tablespoons of batter for each cookie, leaving a few inches of space in between the portions for the cookies to spread and settle.
I find that this sort of cookie scoop is great for portioning cookie dough into uniform cookies.
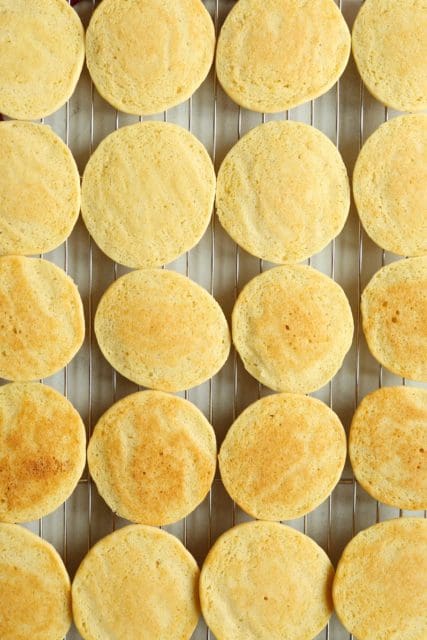
Bake until the little cake cookies are golden brown and springy to the touch.
Allow to cool for a few minutes on the pan before transferring to a wire rack, bottom side up, to cool completely.
While the cookies cool, it’s time to make the glaze.
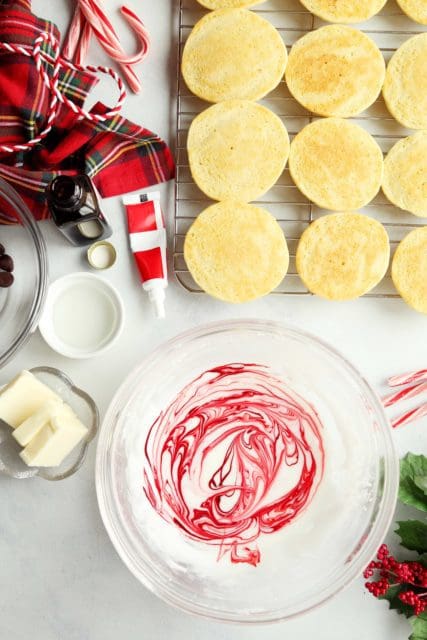
Whisk together powdered sugar, corn syrup, a splash of milk, a pinch of salt, and peppermint extract until smooth and thick but pourable. Add a few drops of red food coloring and swirl to a marble (but not so much that you make pink glaze).
Melt the chocolate glaze ingredients together until glossy smooth and it’s time to swirl the cookies!
The frosting goes on the bottom of each cookie. The bottom give us a flat surface. The top of the cookie is a little cushion for the cookie to sit perched on.
Spread a layer of peppermint glaze across half of the cookie bottom.
Spread with a layer of chocolate glaze across the other half.
Allow the chocolate peppermint cookies to settle (the glaze will set) for about an hour at room temperature. Once set to the light touch, individually wrap each cookie in plastic wrap keeping them fresh longer and making them perfect little cookies for shipping in a cookie tin!
For extra credit you could add crushed candy canes to the cookies for an extra crunch!
Happy holidays, friends!
Photos with Jon Melendez.
PrintChocolate Peppermint Black and Marble Cookies
- Author: Joy the Baker
- Prep Time: 15 minutes
- Cook Time: 17 minutes
- Total Time: 32 minutes
- Yield: 20-22 cookies 1x
Description
Classic and tender Black and White Cookies topped with peppermint and chocolate for holiday cheer! These cookies can be individually wrapped and shipped or taken to a holiday cookie swap!
Ingredients
For the Cookies:
- 2 1/2 (312 grams) cups all-purpose flour
- 1 teaspoon baking soda
- 1 teaspoon kosher salt
- 2/3 cup buttermilk
- 1 teaspoon pure vanilla extract
- 2/3 cup (151 grams) unsalted butter, softened
- 1 cup (200 grams) granulated sugar
- 2 large egg
For the Peppermint Glaze:
- 2 cups (240 grams) powdered sugar
- 1 tablespoon light corn syrup
- pinch of kosher salt
- 1/2 teaspoon peppermint extract
- splash (about 2 tablespoons) of hot water
- 5-7 drops red food coloring
For the Chocolate Glaze:
- 4 ounces semi-sweet chocolate, coarsely chopped
- 3 tablespoons unsalted butter
- pinch of kosher salt
- 1 tablespoon light corn syrup
Instructions
- Place a rack in the upper third of the oven and preheat oven to 350°F.
- In a medium bowl, whisk together flour, baking soda, and salt. In a liquid measuring cup, whisk together buttermilk and vanilla extract. Set both aside.
- In a medium bowl, beat together butter and sugar with an electric mixer until pale and fluffy, about 3 minutes, then add eggs, beating until combined thoroughly. Mix in flour mixture and buttermilk mixture alternately in batches at low speed (scraping down side of bowl occasionally), beginning and ending with flour mixture. Mix until smooth.
- Spoon scant 1/4 cups of batter about 2 inches apart onto a buttered large baking sheet. Bake in the upper third of the oven until tops are puffed and pale golden, and cookies spring back when touched, 15 to 17 minutes. Transfer with a metal spatula to a rack and chill (to cool quickly), about 5 minutes.
- To make the glazes- in a bowl, whisk together the powdered sugar, 1/2 teaspoon peppermint extract, 1 tablespoon of corn syrup, pinch of salt, and 2 tablespoons hot water, until smooth. Drop in 5 drops of red food coloring and swirl with a butterknife until just marbled.
- In a separate bowl, melt the butter and the chocolate in a microwave for about 1 minute. Add the corn syrup and stir until smooth. That’s your chocolate glaze!
- Once the cookies are cooled, face them all bottom side up of a clean surface. Spread half of the cookie with peppermint glaze and the other half with chocolate glaze. Refrigerate for 20 minutes to set or leave at room temperature for 30 minutes to an hour. Wrap individually in plastic wrap and store at room temperature for up to 5 days.
Notes
You can absolutely make these cookies gluten-free with a 1-for-1 flour blend!
7 Responses
These look lovely and I’m happy to hear that 1:1 should make a good swap.
Like you, I’m jumping feet first into the holiday season (for me, it’s Christmas) because…it’s 2020 and I think we’ve all earned it!
I’m trying to better understand if my home baked treats will be received by friends and co-workers as warmly this year as they typically are due to covid concerns. I’ve been very lucky and have stayed healthy this year, but I’m not sure how deep the concern for accepting food gifts (especially not ones that can’t be reheated) outside your own home is. If you have any thoughts on this, one way or the other, I’d love to hear more about it!
I’ve been wondering this, as well! I’m inclined to do small bags alongside a Clorox wipe so they can disinfect the outside of the bags themselves. Food contamination still seems to be pretty low on the risk totem pole.
I am so excited for this cookie. I am going to be giving cookie trays to our neighbors and such for holiday gifts. I wanted something classic but exciting and this fits the bill. Baking these while listening to some holiday music will be magical.
Thank you!!
Cant wait to try this recipe. Can you freeze them? We do a neighbourhood cookie exchange before Christmas and I would love to include these
These look so festive! My daughter loved black and white cookies as a kid, and likes mint, so these should be a home run for her.
Quick question – is there something I can substitute for the corn syrup?
Thanks for the holiday cheer!
These were SO good, I couldn’t stop eating them! My only tip is to remember that the batter spreads A LOT, so go easy on the size of your dough balls and make sure they have plenty of space to spread. My first batch resulted in giant cookies (not a bad thing!)
These cookies are so pretty! Just finished making them and while mine definitely are not as beautiful, they taste delicious. My cookies also baked up massive, but fluffy like cakes. My glazing skills need some work, and by the end my peppermint glaze was not very marbled…but pretty all the same. Perfect for Valentine’s Day! Lol. I definitely need to practice before gifting these, but my family is happy with my project. Thank you Joy for filling our kitchen with fun and love this holiday season. Slowly building up our cookie collection to make your cookie wreath on Christmas Eve.