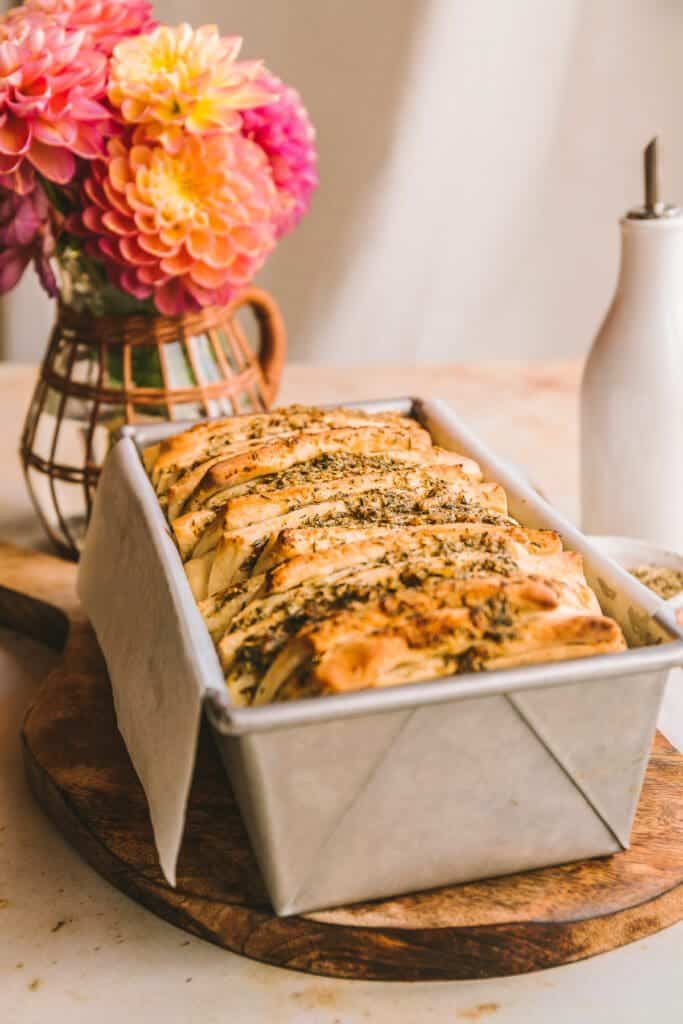
What’s better than a fresh baked loaf of bread? Making that loaf pull-apart in buttery sheets scented with herbs and laden with butter. This pull apart garlic bread is a contender for any dinner table, but would be especialy impressive instead of store bought rolls this Thanksgiving! Let’s bake!
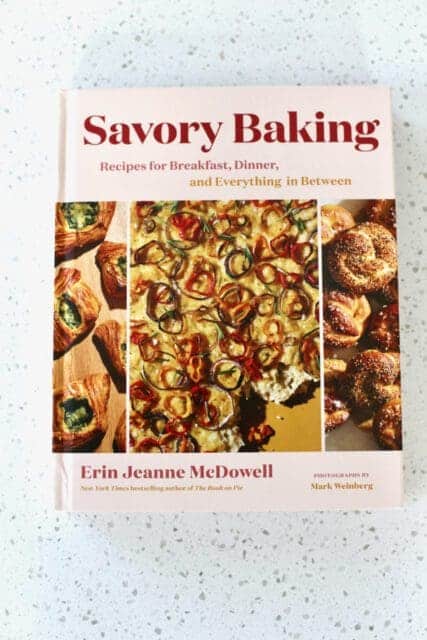
At the Wilson family Thanksgiving table, it’s hard to pick a carb. Dad’s biscuits usually reign supreme, but I try to give them a run for their money with my Sweet Potato Biscuits. There’s also Cordellia Ann’s Potato Rolls which taste like potatoes went to heaven and got their wings – and coated those wings with butter. It was complicated enough and then my favorite baker, Erin McDowell, went and wrote another delicious cookbook, Savory Baking, and now we’re called to eke a bit more room out of the serving table for this loaf of tender, buttery pull-apart bread.
It’s time to start thinking about Thanksgiving. Plan the carbs. Plan the grocery list. Get the pies sorted. Let’s get after it, friends!
You’ll find step-by-step directions below if any part of the bread adventure trips you up, or feel free to jump straight to the recipe to get baking!
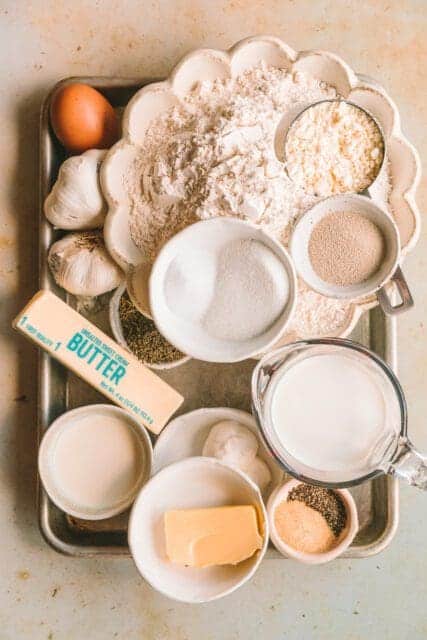
Here are the ingredients you’ll need to make this pull-apart garlic bread:
* This recipe is from Erin McDowell’s latest book Savory Baking. If you, or someone you love LOVES to bake or is curious about yeasted breads – this book is ESSENTIAL. Erin writes incredibly insightful, thorough, fun and absolutely delicious recipes. This book is a treasure and a joy to flip though and bake from!
• instant yeast, though active dry yeast also works in this recipe
• whole milk
• bread flour is best for this recipe because it has a higher protein content than all-purpose flour but all-purpose flour will also work in a pinch!
• dry milk, optional – it just helps the texture of the bread but this loaf will be equally delicious without it.
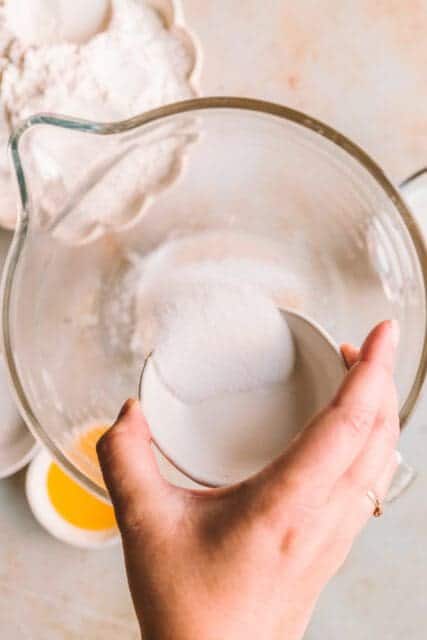
• granulated sugar
• kosher salt or sea salt
• one large egg
• unsalted butter
• sour cream or plain yogurt
• olive oil for greasing the bowl
• a few heads of garlic
• dried herbs like oregano, thyme, and rosemary
• garlic powder
• heavy cream
• fresh cracked black pepper
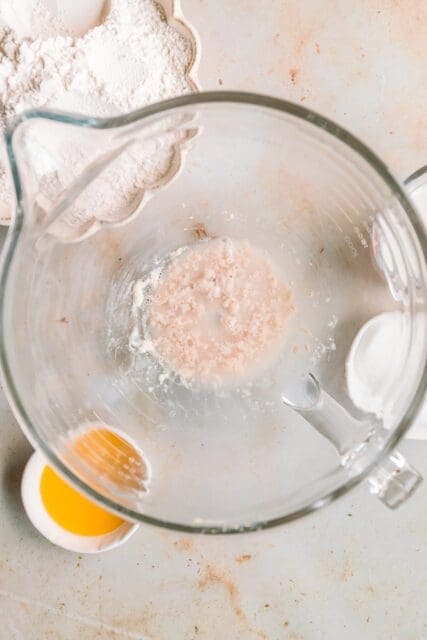
This bread is best made in the bowl of a stand mixer fitted with a dough hook. Add warm water to the bottom of the mixer bowl and sprinkle in yeast. Allow the mixture five minutes to foam and froth, signaling your yeast is alive and ready to work.
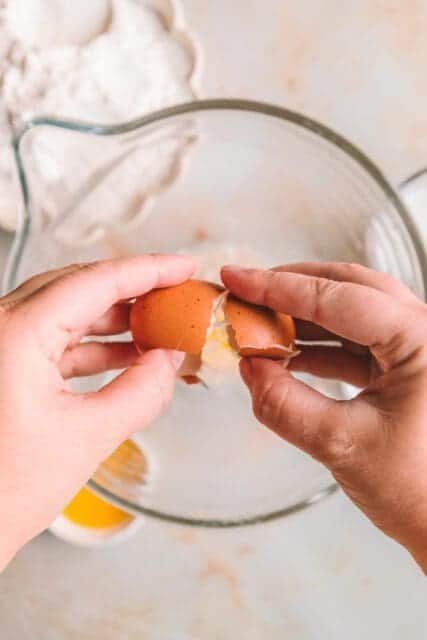
Add the egg and sugar to start though, all of the dough ingredients are going to make their way into the bowl, so the order of incorporation is flexible.
Add the butter and sour cream.
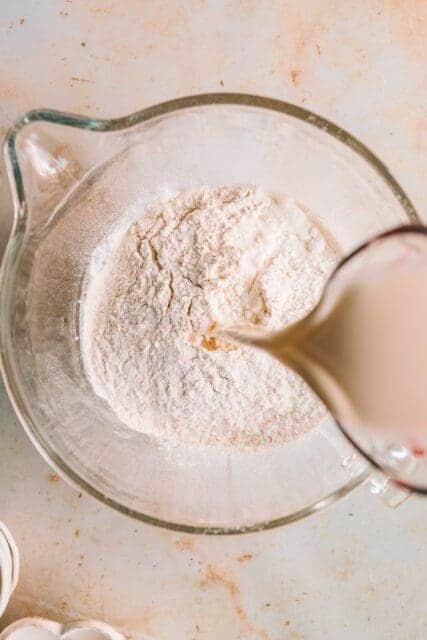
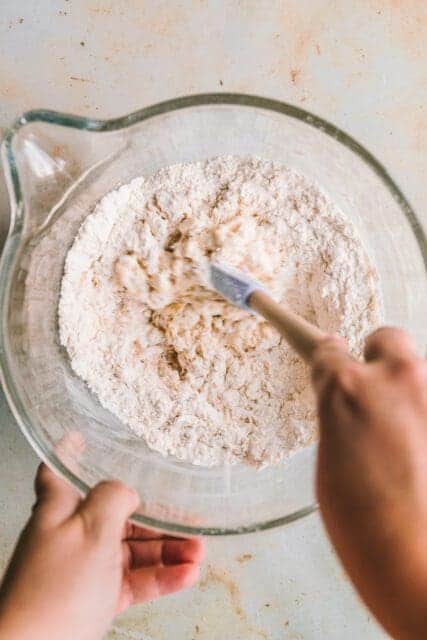

Add the bread flour, milk powder (if using), and salt. I like to incorporate all of the ingredients with a sturdy spatula first, bringing the mixture into a shaggy dough. This will give the dough hook something to hold onto as it kneads around the bowl for 3 minutes.
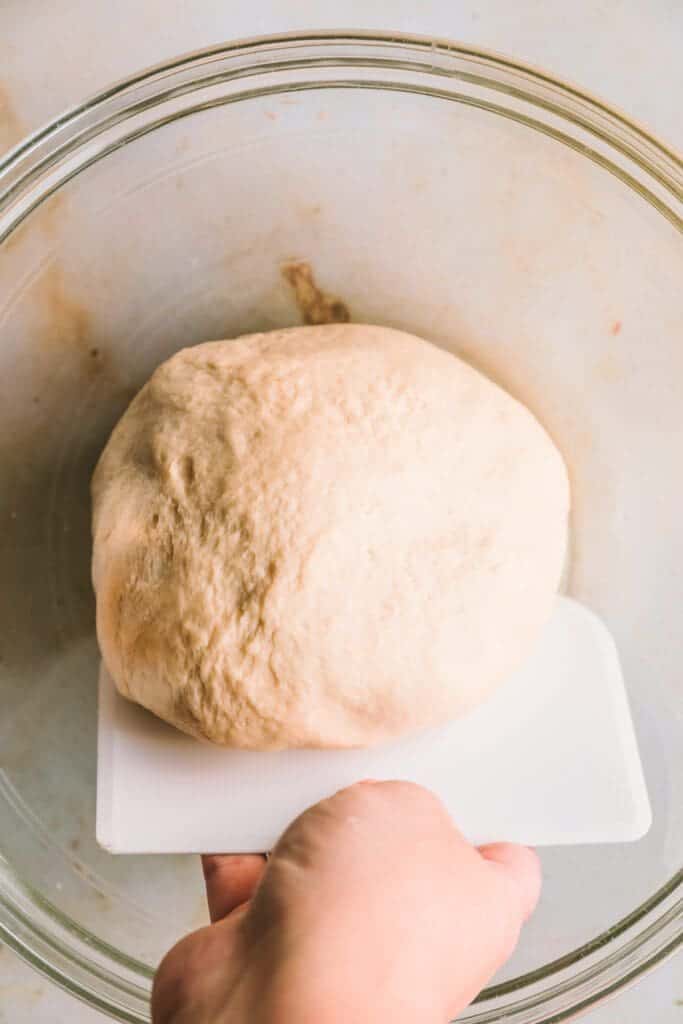
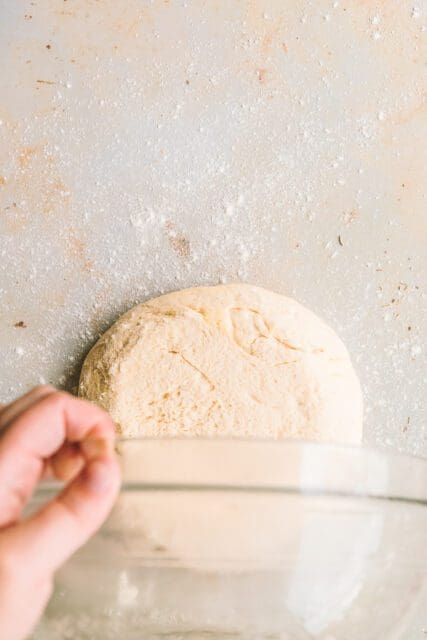
A relatively smooth and tacky (though not stick-to-your-hands sticky) will emerge from the mixing bowl. Grease a large bowl with a splash of olive oil and allow the dough to rest and rise for 45 minutes to 1 hour.
I have a warm spot at the back of my oven I like to use as my proofing spot. Choose a cozy warm place in your kitchen.
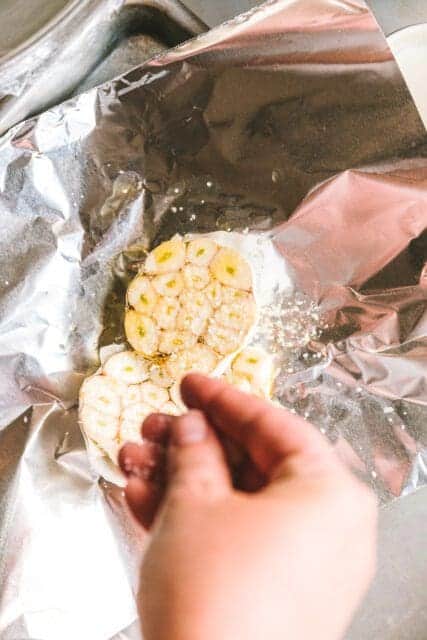

While the bread rises, let’s roast some garlic. Honestly, one of my favorite kitchen comforts.
Slice the top off of two heads of garlic. Nestle in foil and drizzle liberally with olive oil before sprinkling with sea salt. Wrap the foil around the garlic heads and set off to roast until soft and caramelized.
Once the heads are garlic are cool enough to handle, smoosh the garlic into butter. Lordy, it’s getting good.
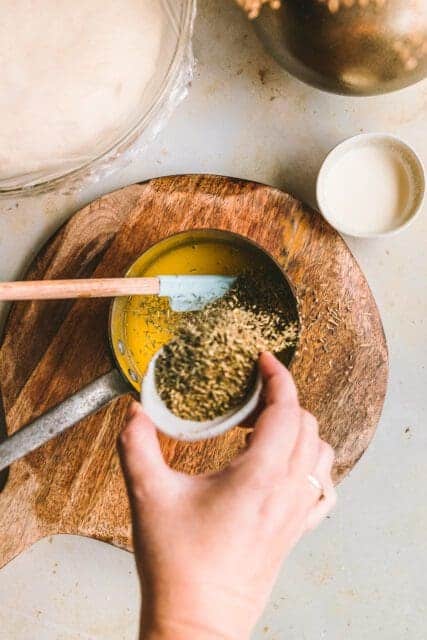
Squeeze the roasted garlic into a small saucepan of melted butter. Add loads of dried oregano, thyme and rosemary though, if that’s not what you have in your pantry right now, feel free to add whatever herbs your heart desires like herbes de provence, chives, basil. It’s all big flavor, made even more delicious in that melted butter.
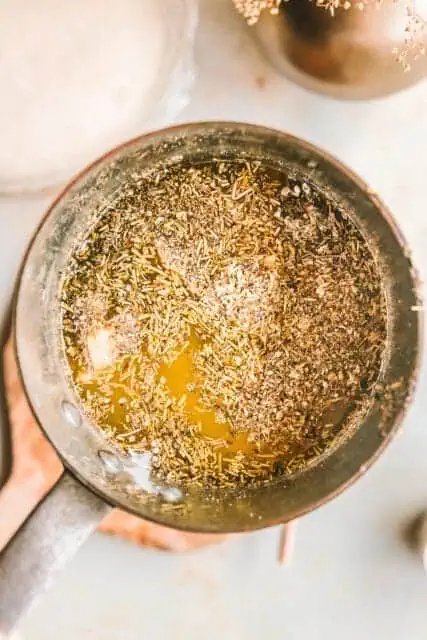
Stir the butter mixture and set it aside while we get back to the dough.
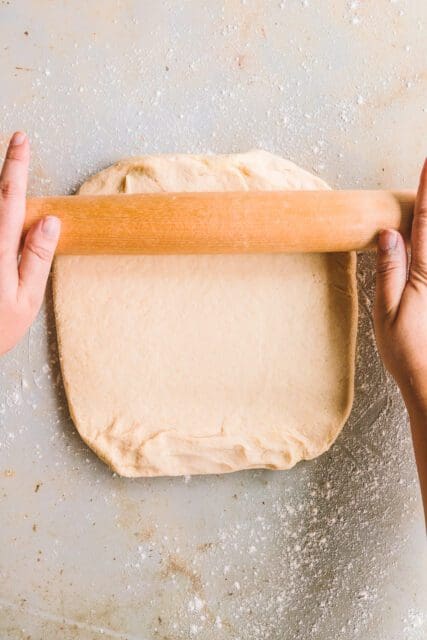
After its first rise, the dough will feel aerated and puffy. Topple it out onto a floured counter and roll into a rectangle roughly 20×12-inches that’s about 1/2-inch thick.
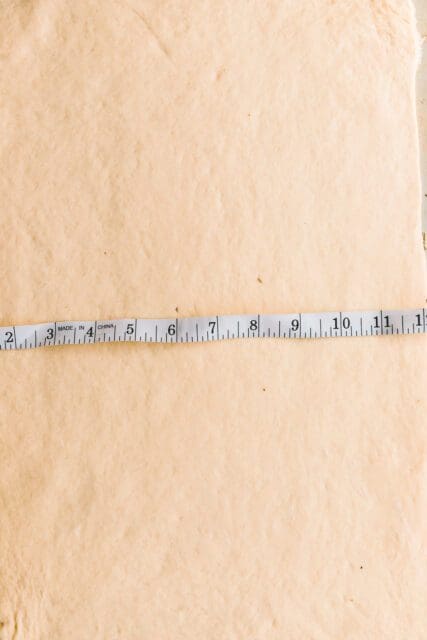
You’ll catch me in the kitchen with a kitchen-specific tape measurer or measuring tape – it really does make a difference!
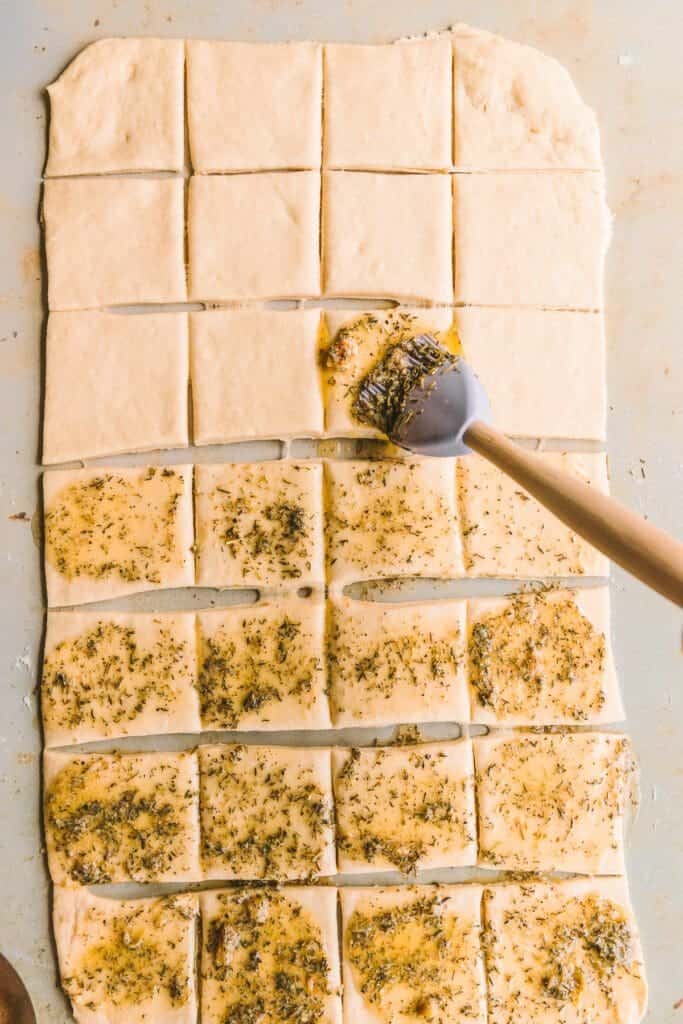
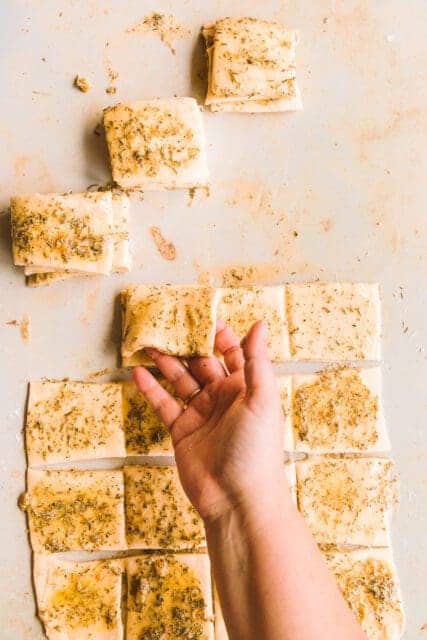
Cut the dough into squares by cutting roughly 6 or 7 strips on the long end of the dough and 3 or 4 strips on the short side of the dough. See above.
Brush with the garlic herb butter we set to the side – generously but expect to have a bit of the mixture left over.
And if your mind goes directly to cheesy garlic bread, sprinkle these pieces with grated parmesan cheese. It’s not a bad idea!
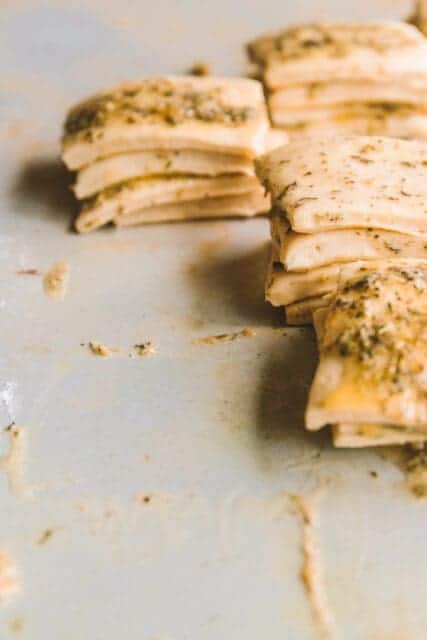
Stack the buttery squares of dough 4 or 5 high. You should have several little towers of dough. Is this a bit messy? Yes – totally worth it.
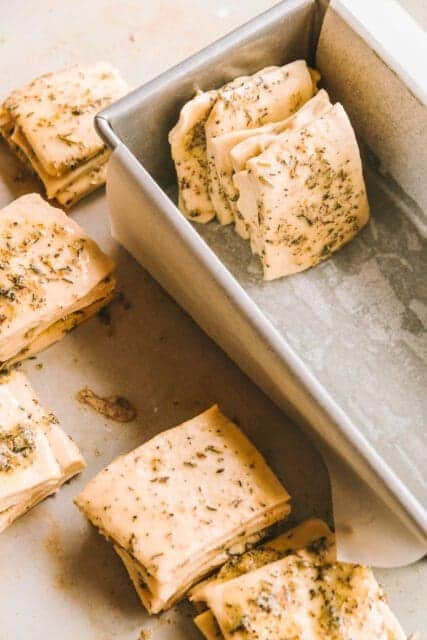
In a parchment lined and lightly greased 9×5-inch loaf pan, stack the towers of dough on their sides in a row.
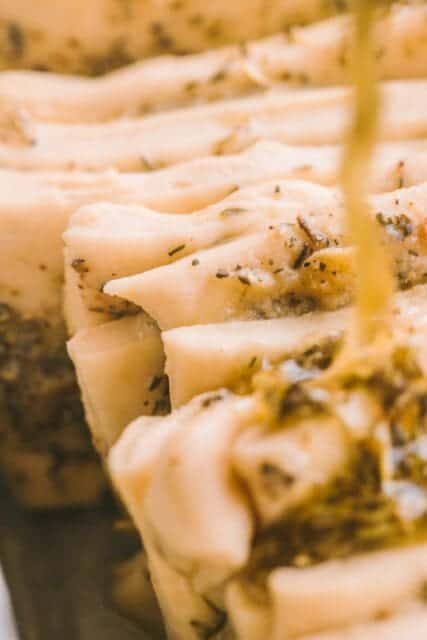
Drizzle top of the bread dough with the remaining herb butter. GUH!

Cover the dough loosely with a kitchen towel and allow it to rise, yet again, until the sheets are noticeably puffed, and begin to fill out the bread pan a bit better. Bake in the upper third of the oven, moving down to the center of the oven towards the end of baking if the top is getting too brown.
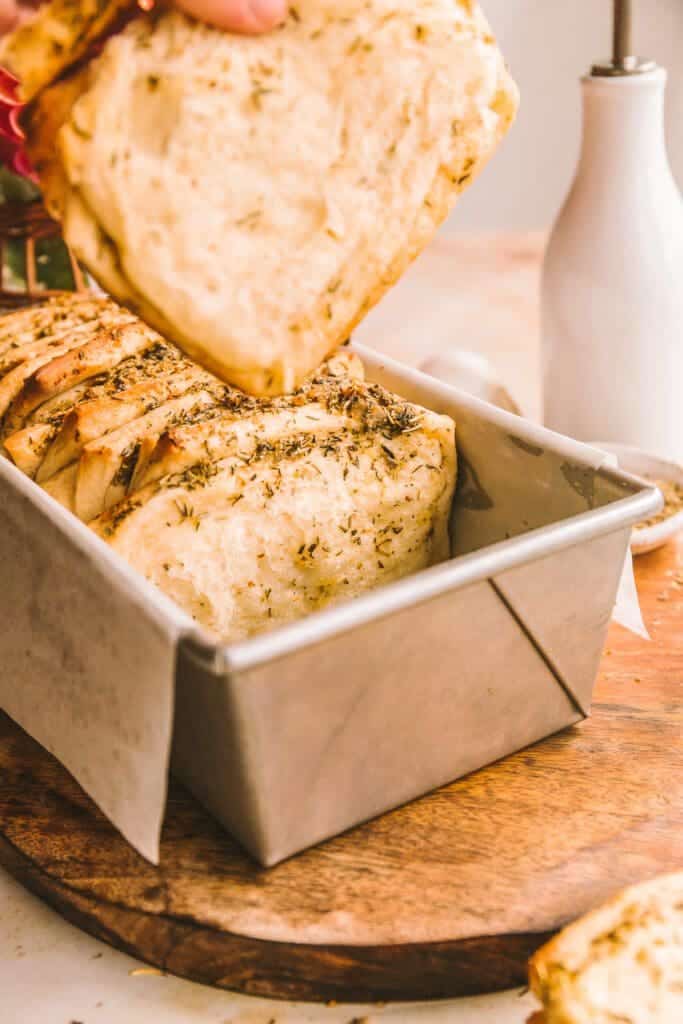
Bake to a deep golden brown. Allow to rest until the pull apart garlic bread is cool enough to peel away and serve!
On the Thanksgiving table, this is best served straight from the pan with the hopes that it crosses paths with the gravy on the plate. Outside of Thanksgiving, this would be delicious served with a small bowl of warm marinara sauce.
Print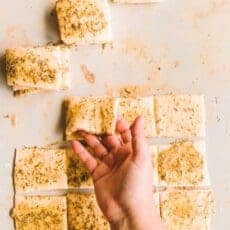
Erin’s Garlic Herb Pull-Apart Bread
- Prep Time: 2 hours 30 minutes
- Cook Time: 40 minutes
- Total Time: 3 hours 10 minutes
- Yield: Serves 4-6 1x
- Category: bread, baking, thanksgiving
Ingredients
For the Dough:
- 1/3 cup water (about 85 degrees F or so)
- 2 1/4 teaspoon instant dry yeast
- 3/4 cup whole milk
- 3 3/4 cup (450 grams) bread flour
- 1/4 cup dry milk (optional)
- 2 tablespoons granulated sugar
- 1 1/2 teaspoons fine sea salt
- 1 large egg, at room temperature
- 2 tablespoons unsalted butter, melted
- 2 tablespoons sour cream or plain yogurt
- Olive oil for greasing the bowl
For the Filling:
- 2 heads of garlic
- 2 teaspoons dried oregano
- 2 teaspoons dried thyme
- 2 teaspoons dried rosemary
- 1/2 cup (1 stick) unsalted butter, melted
- 2 tablespoons heavy cream
- 1 teaspoon garlic powder
- 1/2 teaspoon fresh cracked black pepper
Instructions
- Pour the water into the bowl of a stand mixer fitted with a dough hook. Sprinkle the yeast over the water and mix with a small spatula to combine. It’s ok if it’s a bit clumpy. Let stand for 5 minutes.
- In a liquid measuring cup, heat milk in the microwave until it reaches a warm room temperature (about 110 degrees F)
- Add the bread flour, dry milk, sugar and salt to the mixing bowl. Add the warm milk, egg, butter and sour cream. Bring the ingredients together into a shaggy dough with a rubber spatula before mixing on low speed with the dough hook for 4 minutes or until a soft dough comes together around the dough hook.
- Stop the mixer and scrape the sides of the bowl and beat on medium speed for 3 minutes or until the dough is very smooth.
- Grease a medium bowl lightly with olive oil. Transfer the dough to the bowl and use both hands to gently turn the dough around so it’s coated slightly on all sides. Gently tuck the dough under itself so it’s slightly rounded. Cover the dough with plastic wrap and let rise for 45 minutes to 1 hour until lit’s visibly puffy and almost doubled in size.
- To make the filling, first roast the garlic. Place a rack in the upper third of the oven and preheat oven to 400ºF. Cut the top of both heads of garlic. Place the heads in the center of a generous piece of foil, cut side up. Drizzle each head with a few slugs of olive oil and a generous sprinkle of fine sea salt. Bring the foil up around the garlic to seal and place the heads on a small baking sheet in the oven. Bake until the cloves are tender and caramelized, 35-45 minutes. Let rest until cool enough to hands before squeezing the close into a medium bowl. Turn off the oven.
- Stir the remaining filling ingredients into the garlic and set aside.
- Grease and line a 9×5-inch loaf pan, add a layer of parchment paper that hangs over two edges and grease the parchment paper as well.
- When the dough has risen, turn it out onto a lightly floured surface and roll the dough into a 1/2-thick rectangle. It doesn’t have to be a perfect rectangle. My rectangle of dough was 20-inches long and 12-inches tall. Cut the long side of the dough into 6 equal strips and cut the short side of the dough into 3 or 4 sections, creating squares.
- Spread the squares generously with the roasted garlic butter. Stack the squares side my side in the prepared pan. Pour any remaining filling over the slices within the pan.
- Loosely cover the pan and allow the dough to rise for 1 hour and 15 minutes. 1 hour into the rise time, place a rack in the center of the oven and preheat oven to 350 degrees F. Bake for 35-40 minutes until puffed and golden. Let cool just slightly and serve from the pan.


2 Responses
yummy, a great way to serve garlic bread, love pull apart anything but a savory garlic bread even more, thank you!
Most delicious garlic bread ever! Can’t stop picking at it….