The baking world is a pretty friendly place. We bakers generally fill our days with butter, flour, sugar, chocolate, and high-five one another from afar.
The pastry chefs generally take themselves more seriously than the bread bakers. The wedding cake bakers might occasionally scoff at the cupcake bakers. The gluten-free bakers usually like to talk about flour mixtures far longer than wheat flour bakers. For a group of people that wakes up at 3am every morning, it’s surprisingly friendly… until we start talking about one thing: measuring cups or scale baking, volume vs. weight.
Those are fighting words.
Let’s break down the difference between baking using measuring cups and baking using a kitchen scale. Let’s talk about how either way, it’s cool. Yea… it really is.
The Kitchen Scale
The kitchen scale is an amazing tool. Truly. With a digital kitchen scale you can place a bowl on the scale, zero out the weight, and measure your ingredients in grams and milliliters. You can easily read the number of grams and milliliters as they accumulate in the bowl as flour is tossed in. Scoop in 180 grams of flour and 110 grams of sugar. No problem at all! Most European recipes are written in grams and milliliters, making the kitchen scale a necessity. Professional bakeries also use kitchen scales. They’re often baking on such a large scale that using anything other than a kitchen scale would be too time-consuming and inconsistent.
Kitchen scales are accurate and reliable. When properly calibrated, which they usually are, kitchen scales make measuring ingredients pretty fool-proof. A gram is a gram and a milliliter is a milliliter, making international recipes totally accessible.
Baking is a science as much as it is a home-cooking adventure. Part of that science is accurately measuring ingredients and kitchen scales are one of the best ways to ensure that ingredients are properly measured.
The only problem with the kitchen scale is… well, it’s just not my tool of choice in the kitchen. That… well, maybe that’s more of a personal problem.
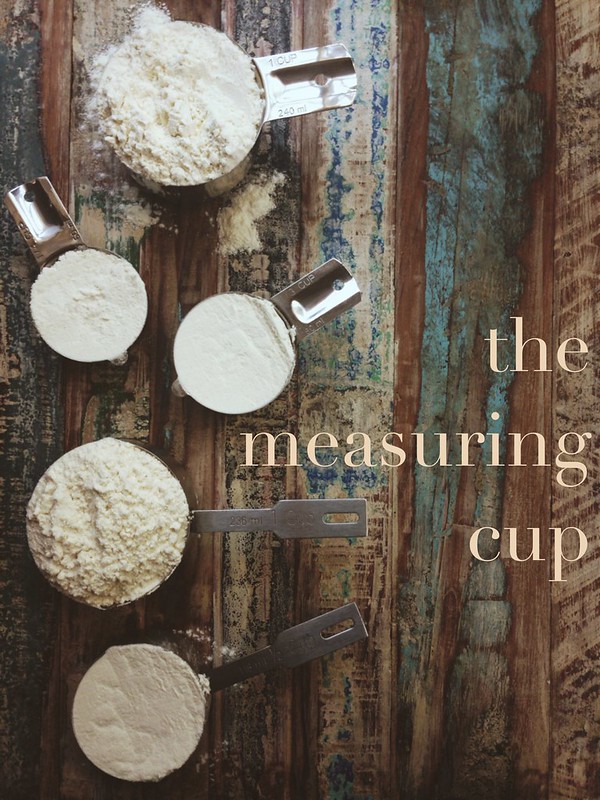
The Measuring Cup
While kitchen scales measure by weight, measuring cups measure by volume. We fill the space inside of a 1 cup measuring vessel (intended for dry ingredients), and do so as consistently and deliberately as possible. Dry measuring cups (not to be confused with liquid measuring cups) usually come in increments of 1/4, 1/3, 1/2, and 1 cup measurements. You may recognize cup measurements from most American recipes. We sure do love our cups.
Measuring cups can be a great kitchen tool… if you know how to use them.
Let’s talk about measuring a cup of flour. One cup of all-purpose flour by volume should be about 4 ounces of all-purpose flour by weight. Well… 4 ounces if your flour is well sifted and measured with a tender hand. If you’ve measured your flour by plunging your measuring cup into the sack of flour, packing the white powder into the cup, you’re more likely to emerge with nearly 6 ounces of flour, rather than the intended 4 ounces. Generally speaking, one cup of all-purpose flour, sifted lightly with a whisk is about 4 1/4 ounces by weight.
We talked about how to store, sift and measure flour in Baking 101: Must We Sift This Flour. Those notes are important if you’re as stubborn about your measuring cups as I am.
How To Measure Flour With Measuring Cups
– Use a large spoon or whisk to fluff the flour in its storage container. It’s great to aerate the flour slightly before it is measured because flour tends to settle as it sits.
– Use a large spoon to lightly sprinkle flour into the measuring cup. Depending on the size of your spoon, it could take several dips into the flour container to fill the measuring cup.
– When the sprinkled flour reaches just above the edge of the measuring cup, use a straight edge to sweep off the excess flour, so that the flour is flush with the top edges of the measuring cup.
– Repeat with more flour as necessary.
So…
In my home kitchen I use measuring cups. Since I learned how to bake using measuring cups, it’s what makes me the most comfortable in the kitchen. When I work in professional kitchens and make enormous batches of scone dough, I use a scale… because no one should ever attempt measuring 32 cups of flour by volume.
If your takeaway from this post is that I’m stubborn and unwilling to do what’s right and just use a kitchen scale, I wouldn’t disagree with you. I am stubborn. I’m also a sore loser. You should see me lose at Uno. Not cute.
I think that stepping into my kitchen should feel good. Part of those feel-good feelings involve measuring cups for me. My dad taught me how to bake with measuring cups. When I reach in the cupboard to pull out those big jars of flour and sugar, I’m basically just trying to recreate every good smell that ever came out of my kitchen when I was growing up. Part of those memories involve measuring cups. Maybe that feels like an inconsequential thing from a professional baker… but actually, it’s everything.
Resources
King Arthur Flour has some great tips on flour conversions and how to consistently measure flour by volume. It’s a great place to start!
The Kitchn has helpful baking ingredient conversions.
I’ve spent a lot of time teaching myself how to bake. When looking for super reliable baking proportions, I always consult the book Professional Baking. It is an encyclopedia of every classic base and dough. Remember encyclopedias? Me neither.
Ratios by Michael Ruhlman is a simple book, but totally transforms the way you approach the kitchen. Everything from pancakes to mayonnaise is broken down into a simple ratio. Kitchen scale recommended.
Whether your preference is the almighty kitchen scales or a trusty set of measuring cups, just make sure you have something super functional that makes you want to step into the kitchen and make a big ol’ mess. It’s worth it.


110 Responses
I have quite a slapdash approach to baking, 90% of the time it turns out fine, 100% of the time i have fun and the food tastes delish!
Measuring cups fit in to my personal baking philosophy, of the easier the better. I’ve only just started to use them, since i’ve been following more American recipies, but i do love them.
The only problem i’ve ever had was the butter problem, but i worked out that a ‘stick’ or 1/2 cup is about half a British block of butter, so now i’m golden.
Go Team Cups!
Cate, x
My only question/problem is how do we know that the recipe came from someone who properly measured their flour? What if their recipe is a “scoop and plop into bowl” kind of method? In this age of pinterest and food blogs, its hard for me to tell what kind of baker the author of the recipe is. I usually error on the side of “scoop and plop into bowl” because I think too much flour is better than too little. But I really want to know, what do we do?
Where are your measuring cups from? They’re perfect. I’m really sorry if someone already asked but you have a lot of comments to scan :p
Thanks!!
I’m a Norwegian myself and use both a scale and measuring cups. It depends on what the recipe asks for. But this I don’t really get: Why would you use a scale to measure milliliters? Milliliters (and deciliter which are even more common) are measures by volume. 200 milliliters will therefor weigh completely different depending on what it is…
I’m a Canadian living in the Netherlands for many years. I use measuring cups for all my dry ingredients and for butter (water plus butter of course) We don’t have sticks in Europe. But for the wet or sticky stuff I use a scale, because it’s a big mess and a lot more work, plus clean up to measure peanut butter, honey etc. into a cup!
Hi a lot of recipes I use are American based on cups but you just can’t buy them in the Uk and our cup sizes are totally different; it makes baking difficult trying to convert everything! glyn
That’s what computers are for ;-) there are lots of converters for cooking also international measurements, even for cutting a recipe in 1/2 or 1/3. Plus I think you might find an american measuring cup in one of those expensive kitchen stores.
Thank you so much for taking a stand and standing up for measuring cups and the people who use them. Like me!
Remember those Tupperware ham containers? They’re great for storing various bread flours and easy to label and stack if you have the space. I keep chopsticks handy for leveling. Yeah, I like cups too.