Hi friends! Just wanted to put this back at the top of your inbox. It’s Baking Szn babes, and I only want the best for us. I’m revamping and resurrecting some of my Baking 101 posts just to refresh our baking skills. Last week we learned how to read a recipe, this week we get to know our ovens. Here’s how!
Before we formally set off on all of our festive fall and holiday baking, let’s take a minute to talk about one of the baking questions I’m asked most frequently. The question is simple but the answer might surprise and can improve your home baking really quite a lot.
Q: What’s the best oven for baking?
A: I think the best oven for baking is the oven you know.
That’s it! It’s not a matter of gas versus electric, convection versus conventional. The best oven for baking is the oven you know the quirks of. Maybe you know it’s hot in the back left corner, or that your cookies bake best on the middle rack not the upper third of the oven. That’s oven knowledge and your key to success far beyond the given baking directions in a recipe.
Your gas oven could be 100 years old and heat to 400 degrees F when the dial says 350 degrees F but if you know that, maybe you prop the door open with a towel for the first 10 minutes of baking. I know with my oven in New Orleans, I need to turn the oven off and on, resetting it to 350 degrees F after I put in a tray of cookies. I know that oven loses heat really quickly and turning the oven off and on hard starts the fan and heat element to get the oven back to temperature quickly.
Back when I worked as a professional bakers, so much of the new baker training was just about… the oven! Its name, its quirks, its likes, dislikes, its random aggressions. Knowing and learning how to work with the quirks of the oven you bake with most often is your key to success.
So, how do you get to know your oven?
To start, of course, you’ll bake in it a lot. You’ve probably done that. Think about what you notice in baking. One side of your cake more browned than the other? A burnt cookie bottom? Think about what your oven has told you from your past baking adventures.
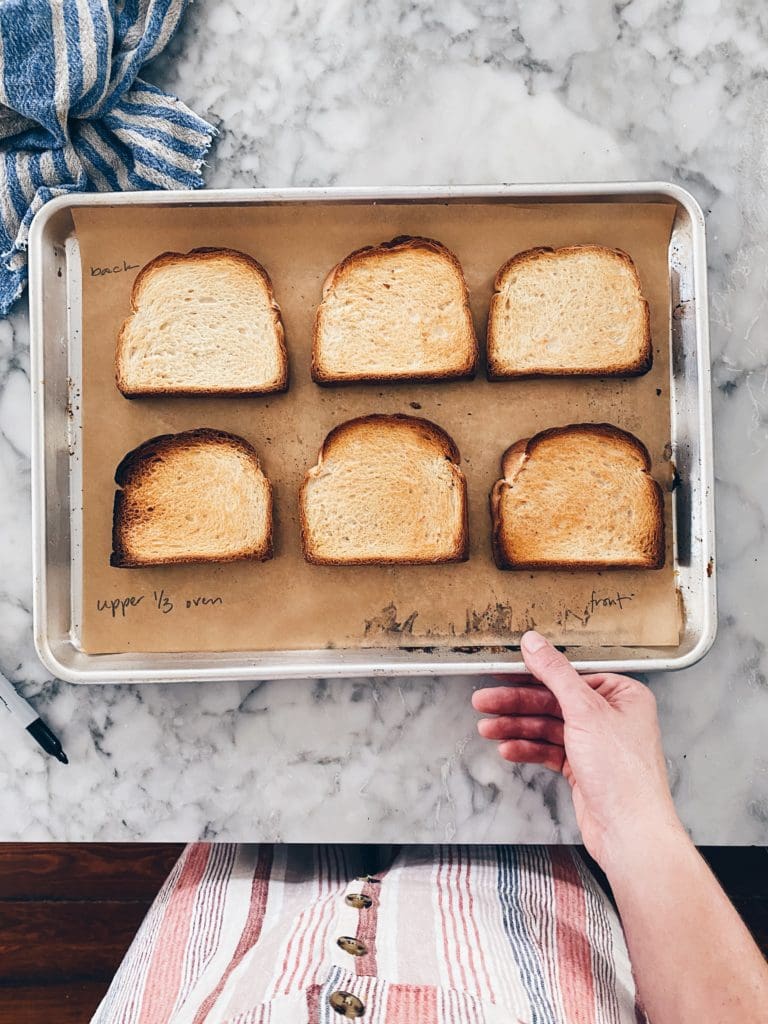
One easy, old school way to test your oven is with slices of plain ol’ white bread. Kate McDermott, one of my favorite bakers, reminded me of this incredible baking hack and wow – the toast you’ll make!
Here’s how the sliced bread oven test works:
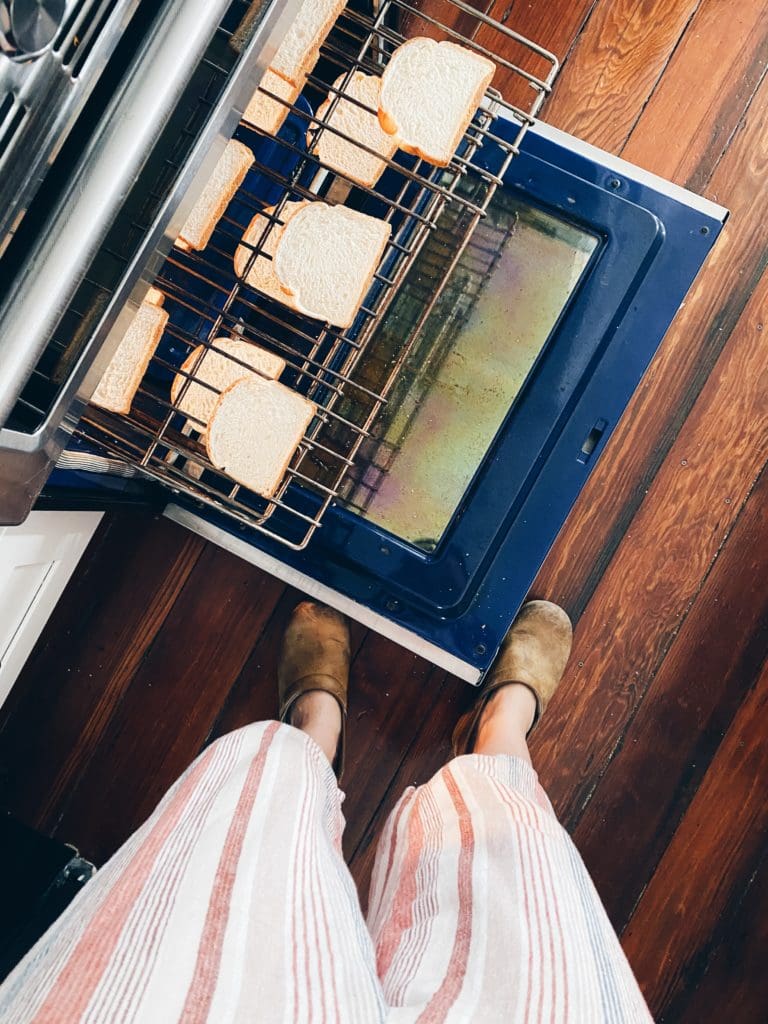
• In a cold oven, place six slices of plain white bread (the cheap stuff) on each rack you’re testing. Push the racks into the oven and close the oven door.
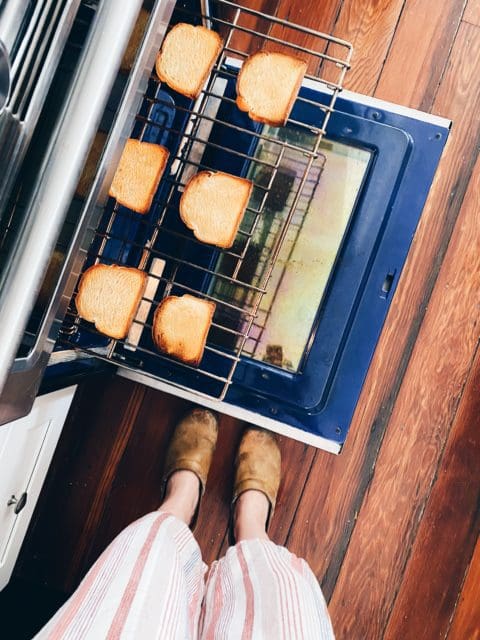
• Turn the oven on and preheat to 350 degrees. Check the bread pieces at 12 minutes, 18 minutes, and 20 minutes.
• After 18 to 20 take the bread out of the oven and place on a baking sheet on the counter in the same configuration as the oven shelf. Take a good look. What pieces of bread have more browning?
• I like to place my toasted bread slices the baking sheet in their same shelf configuration, write the shelf they were on and photograph it for my reference… but I’m crazy. You can just take mental notes.
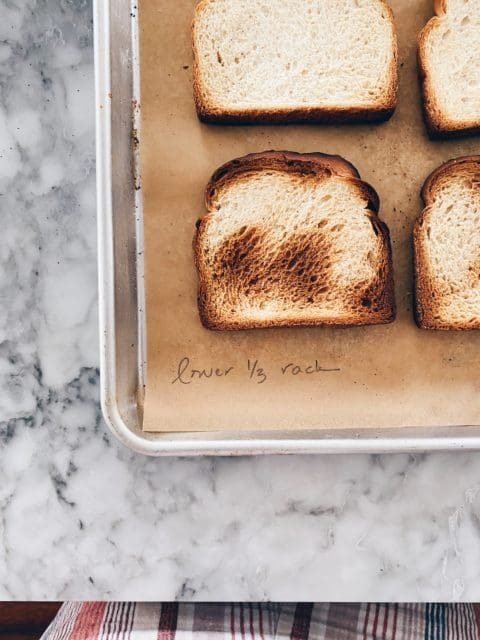
I can tell from my oven tests that the left side of my oven is a hot spot. The center bakes up fairly evenly. This seems in line with my baking because I often have to rotate half sheet pans once during a short bake and several times during a longer bake (like for a pie or quick bread).
Here are three other tricks I use to regulate and check my oven temperature:
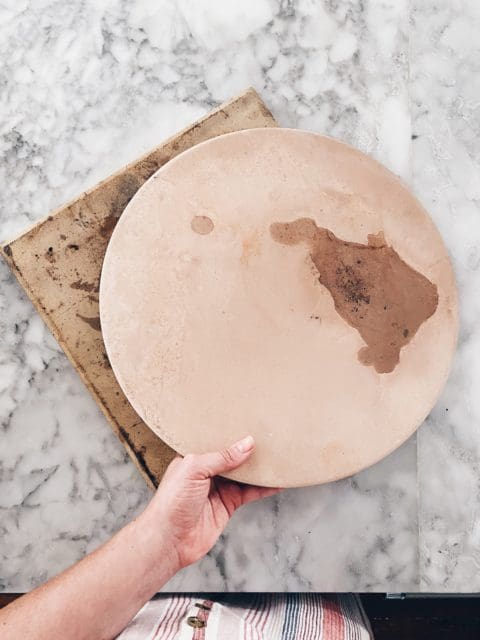
• Place a pizza stone on the bottom rack of the oven. Not the heating element at the bottom of the oven, but rather, the lowest oven rack. A pizza or clay stone absorbs the heat and helps disperse it evenly across the oven. (Mine are a little stained because they work hard in the oven, ok?)
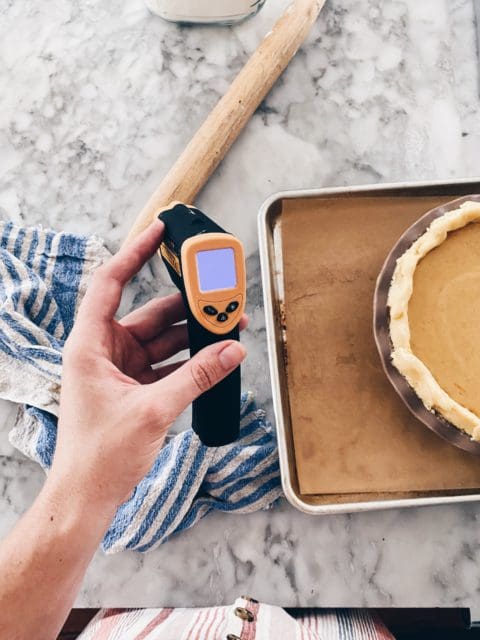
• Check your oven temperature with an infrared thermometer. This has become easier for me than fussing with an oven thermometer. It’s great to quickly check the temperature just before setting something in the oven. Sometimes that preheat chime can be deceiving and the oven isn’t up to temperature yet.
• Get your oven calibrated once a year. Yea I know soooo boring who does this? Bakers… and if you’ve read this far – you’re one of us. Have someone come out and calibrate the temperature, maybe replace the seal, and check the clay piece that starts the gas. Now, I obviously don’t know how to fix an oven but I know it’s important to call someone who knows how.
Something else that might be helpful:
This Baking 101 article from a few years back: Which oven rack should I use?
I hope this is helpful! Get to know your oven and happy baking friends!
xo


18 Responses
Um Joy, this post was so helpful! I just moved to Tanzania, yeah, for real, there’s no corona here! Not true, also not why I moved, another story for another day. I am SO happy there is an oven in my new apartment but know temperature will be an issue. This will be one of my first kitchen adventures in the new spot, excited to get to know my oven :)
OH MY! This is GENIUS! I am embarrassed to say how many decades I have been cooking for a large family, yet still frustrated my oven temperature fluctuations! So glad you posted this on a Friday–this will be on my weekend “to do” list for sure! Thank you. Have a wonderful weekend! :)
Wow. Just moved into my partner’s studio in NYC and not only do I not have storage or counter space, but my baking projects haven’t loved his oven. Tbh my sheet pans barely fit. Looks like a helpful weekend project! We can make it work for some fresh brown butter chocolate chip cookies!
Also lol that’s not my name. Must’ve typed too quickly. But not far off from how I’m feeling!!
HAHAHAHAHA. What a time to be alive, truly.
Thanks for sharing this, Joy! I’m still getting used to my new gas stove (I’ve only had electric up until this summer) and this is v helpful <3
I had no idea you could have your oven calibrated. Good info. We just yesterday got an infrared thermometer for our pizza oven. Will try it out on. I know there’s definitely a hot spot on the right side.
Super super helpful, thank you! I love all the baking and cooking tips you share, they make me a better cook!
Well, what a truly helpful article. Thanks for the information. I’m definitely going to do this!
At the risk of stating the obvious ovens cycle on and off to maintain heat, and the temperature variation will be greater at the start, which is why you should wait a while for things to stabilise not jump in as soon as the temperature light goes out.
PaulF
Thanks Joy. I need this! I am pretty sure that my oven is not as hot as the temperature says it is. I’ve been planning to buy a cheap thermometer to put inside and check it. You are inspiring to do to this soon!
Thankyou. Very helpful. I have lived in rental properties all my life & the ovens that I’ve had have left a lot to be desired. My current one isn’t any better than my last. I hope to have some successful baking with this information.
This is so smart! I will definitely try this.
Thank you for this advice, as in a couple months I’ll be moving out and I’ll have to test my brand new oven!
Just found this article while researching how to check my oven. I have read on Thermopro website. that you cannot check oven temperature with an infrared thermometer. How do you achieve this?
wow, what a clever way to check for hot/cold spots, thank you!
Howdy. Appreciate these tips – to incl how to read a recipe – as I’ve learned some from just learning to bake bread to incl sourdough.
Now off to read which shelf I should use and look into infared therms.
BTW, as my wife is the cook here – I’m just the sourdough bread guy – I do NOT tell her what to do w/the oven when she bakes just as she does not tell me about bread baking which she rarely ever does.
She brought the new oven (Profile brand) which opens to the left to complement the new house’s existing oven. This oven does stuff via wifi/internet and while I used to do IT spt/programming I stay way from that stuff.
If you have additional tips for guys by all means pls publish them. My mom taught me how to level the measuring cups and pack the brown sugar but it wasn’t til I got into bread baking that I learned a bunch more. I definitely like using grams vs cups and I have a Salter scale.
Prefer baking bread, cookies and cheesecake to cooking which is to me mucho messy besides I’m vegetarian which keeps it simple.
Thanks and sorry to ramble on. Rey
Thanks for the tip about getting your oven calibrated yearly, Joy! Who/what kind of service would I call to get that done?
Thanks!