Hello friends!
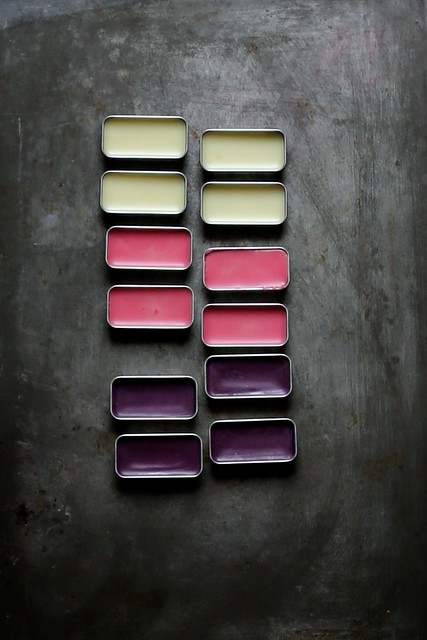
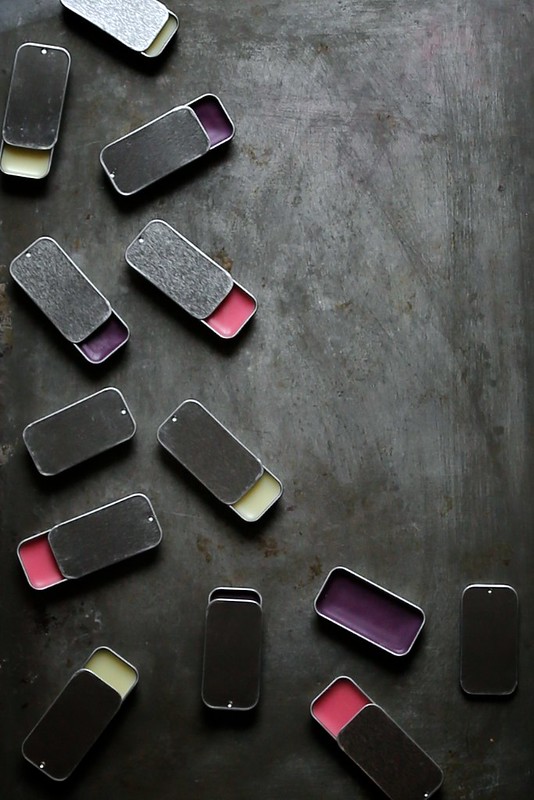
We’re totally making our own lip gloss! We’re scenting them. We’re tinting them. We’re putting them in little rectangular metal containers with sliding lids!
I’m not very crafty. I can latch-hook (three of you know what that is), and make a pretty amazing lanyard keychain. That’s about it for my craft skills. Luckily, making lip balm is more like stirring together a recipe than it is like doing complicated things with yarn.
I’m pretty proud of these lip glosses. I’ve already taken the liberty of patting myself on the back several times. Really all I did was stir together oils and beeswax over simmering water. With some bold colors, pretty smells, and clever packaging, these lip glosses are totally part of my gifting repertoire this year. Let me show you how easy it is! For real.

I used some pretty simple ingredients: organic beeswax pastilles (pictured in the middle), sweet almond oil, olive oil (the deep green kind straight from the kitchen), coconut oil (also from the kitchen), essential oils for fragrance, powdered pink blush for color, and deep purple lipstick (that I totally can’t wear on its own) for bold color.
Helpful links and recipe instructions to follow.
Here’s what you’ll need!
The Basics:
Organic White Beeswax Pastilles
Sweet Almond Oil
Olive Oil
Coconut Oil
Optional add-ins:
Eucalyptus Essential Oil – Herby and head clearing
Peppermint Essential Oil – Enlivening and expected
Sweet Orange Essential Oil – Happiness inducing
(I used a mixture of all three essential oils for my lip gloss)
Powdered Pink Blush – Heck yea, we can! You might consider any sort of brightly colored drugstore powdered blush.
Deep Purple Lipstick – Oh you know it! You might also consider a big, bright drugstore lip shade.
Lip Gloss Vessels:
Clear Round Containers
Classic Round Chapstick Tubes in gold
Helpful additions:
Metal Bowls – We’re mixing all of our ingredients in a metal bowl over a double boiler. Though all of these ingredients are safe to put on your face, I found that I wanted to use a bowl that didn’t come from (and have to go back to) my kitchen. Dedicated lip gloss mixing bowls are a good investment. You may also find that thoroughly cleaning the cooling wax out of the bowl is challenging. Having a dedicated wax bowl is helpful.
Disposable Spoons – For spooning the warm lip gloss into the lip tins or dishes.
Super Hot Water – Boil a pot of water. It will help when it comes time to clean the metal bowl of waxy lip gloss
Kitchen Sponges – You may not want to use your dish sponge to clean the lip gloss bowl. Grab a new one!
DIY: Homemade Lip Gloss
2 tablespoons organic white beeswax pastilles
2 tablespoons sweet almond oil
2 tablespoons coconut oil
1 tablespoon olive oil
Optional:
3 drops eucalyptus oil
2 drops peppermint oil
2 drops sweet orange oil
1/2 teaspoon powdered pink plush or 1/4 teaspoon deep purple lipstick (You can use a pit of any powdered blush or lipstick color you desire to tint your lip gloss.)
Place a medium saucepan with two inches of water over medium heat. Bring to a simmer. Place beeswax, almond oil, coconut oil, and olive oil in a metal bowl over the simmering water. Stir until melted and thoroughly combined.
Add the essential oils if using. Stir.
If you’re not adding any color, turn off the heat and carefully spoon the lip gloss into small tins. Allow to cool completely before placing the lids on!
If you’re adding color, stir in the color into the warm lip gloss mixture until dissolved or melted. Spoon into small tins and let cool completely before placing the lids on.
If you’re making plain lip gloss and two colors, spoon one third of the plain gloss into prepared tins. Divide the remaining lip gloss mixture into two metal bowls. Into one bowl add the pink blush. Into the other bowl add the purple lipstick. Stir until dissolved and melted. Spoon into small tins and let cool completely before placing the lids on.
If the lipgloss begins to harden in the bowl while you’re still working with it, simply place it back over the simmering water and stir until dissolved once again.


67 Responses
How many does lip balms does this recipe make?
I’m in love with this blog! My stocking stuffers will create a lot of happiness this year – I’d hug you if I could!
This is a such a great DIY. We had to try it! Our finished products are posted here: https://acollaborativeeffort.com/a-c-e/2013/12/18/homemade-kiss-mas-gift
so well done!
I know the latch hook, so you might be up to 4. I will have to keep this in mind for next year. I think it would make a terrific gift for my SIL.
Great lip gloss recipe! I can’t wait to try my own variation on this. Thanks for the links to the products you used, it was very helpful.
Thank you for sharing this. I’m definitely going to try out these.
Do also check out https://mianchi.in/?p=200 for ways to preserve and store homemade beauty products longer.
mine isn’t glossy:(. what did I do wrong?
Hi Ingrid, these don’t get super glossy, they actually become like a matte texture!
The easiest and cleanest way to clean wax from any container (cleaned of as much wax as possible manually) that is heatproof is to put a pad of newspaper on a cookie sheet, turn the waxy container upside down on the paper, and put into a hot oven (Keep it below 400 degrees, please. Paper ignites at F452.) When all the wax has melted into the paper, it can be used as a fire starter for the BBQ. The container can now be washed in hot soapy water or the dishwasher without fear of wax clogging the pipes. If the container had a lot of wax in it, you may need to move it around on the paper a few times.
Sounds easy – looks great, and I have all the ingredients….trots off to the kitchen!
Hi! I made these and I must admit I felt at least 100times craftier than I can even take credit for :) They look amazing!! Just one question I’m hoping for help with… my batch didn’t feel very moisturizing at all so I was wondering if you could suggest an additional ingredient or maybe just tell me what I possibly didn’t do correctly? Thanks so much!
This recipe makes about 3.5 oz, enough to fill 12-14 (.25 oz) tins, and 20-22 (.15 oz) classic lip balm tubes.
Its really easy to make..I will give it a try for sure to make pink one for me.
Great post :-) also if you sprinkle the bowl with baking soda when you finish, it soaks up the leftover wax. Very easy to wipe off!!
Hi Joy! Do you have any recommendations for where to get the beeswax pastilles? Thanks!