Friends, hello! I’m here to invite you to your next kitchen superpower: HOW TO MAKE HOMEMADE DOUGHNUTS. Once you know how to make this yeasted doughnut recipe and fry it up, well… there’s no going back. You’ve gone and done it. You’re everyone’s favorite person come weekend brunch. In my early baking days I was obsessed with learning how to make yeasted doughnuts, likely inspired by my family’s Saturday night trips to the 24 hour doughnut shop.
Here’s the thing – making these classic doughnuts isn’t as hard as you might think. It’s about activating yeast, throwing all of the ingredients in a mixing bowl and having the guts to heat oil to over 300 degrees. It’s that last part that usually hangs people up, but I think you’re here because you have the guts. I mean… just look at the rewards!
I’ll walk you from dough to doughnut. Let’s bake!
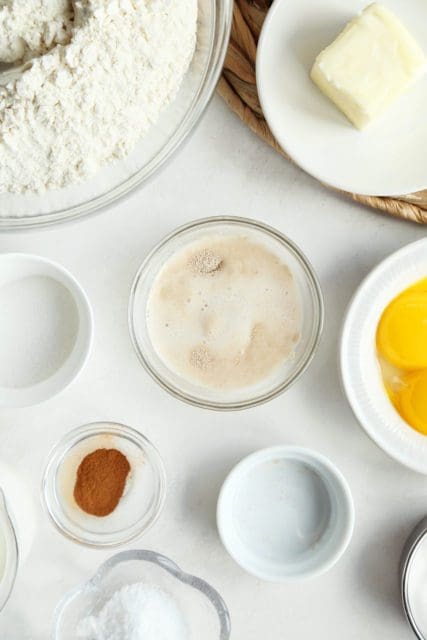
Ingredient List:
- all-purpose flour
- active dry yeast and warm water to activate it
- unsalted butter, at room temperature
- egg yolks for richness
- whole warm milk
- kosher salt and granulated sugar
- ground cinnamon
- chocolate, powdered sugar ,and cinnamon sugar for topping the doughnuts
You’ll also want to have round cookie cutter and fry thermometer to set yourself up for success.


To start your yeasted doughnuts
Activate the yeast
In a small bowl sprinkle yeast over warm water. Add a tiny pinch of granulated sugar and let the mixture sit for 5 minutes. It will foam and froth once it comes to life.
Combine the remaining ingredients
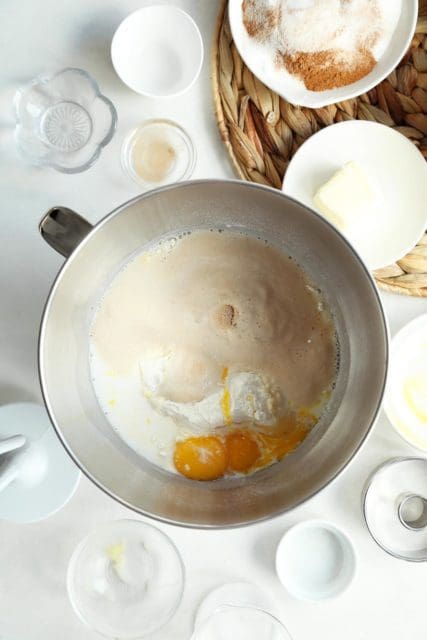
In the bowl of a stand mixer, stir and combine the rest of the ingredients. Flour, sugar, salt, milk, butter, and egg yolks. Then add the yeast mixture, too!
I like to use a stand mixer with a large bowl and a dough hook attachment for this homemade yeasted doughnut recipe since it’s a relatively soft and slightly sticky dough. You can certainly bring this dough together by hand, just try not to add too much additional flour as you hand knead it.
You’ll knead the dough in a mixer for 3 to 5 minutes or until a soft and cohesive dough forms. Pillowy soft and moist but not sticky to be exact.
You may find that you need to add a few tablespoons of extra flour to make the dough less sticky. Take it as it comes. I lean towards keeping the dough sticky rather than adding a ton more flour.
Next, shape the yeasted doughnuts
For same-day yeasted doughnuts
Cover the bowl with plastic wrap (I leave the dough in the large mixer mixing bowl) and allow to rise in a warm place until doubled in size, about 1 1/2 hours. Roll the dough to 3/4-inch thickness just after its rise. I used a 3-inch round biscuit cutter and a 1-inch round for the center holes. Cover with a clean kitchen towel and let the doughnuts rise for 30 minutes until they’re slightly puffed.
For overnight yeasted doughnuts
Cover and refrigerate the dough and refrigerate for 8 to 12 hours. Bring the dough out of the refrigerator and allow the dough to come to a cool room temperature. I usually let the dough rest at room temperature for about 45 minutes before flopping it out on a floured surface, rolling to 3/4-inch thickness and cutting with the rounds. Allow the shaped doughnuts to rise for 30 minutes.
Then, fry the yeasted doughnuts
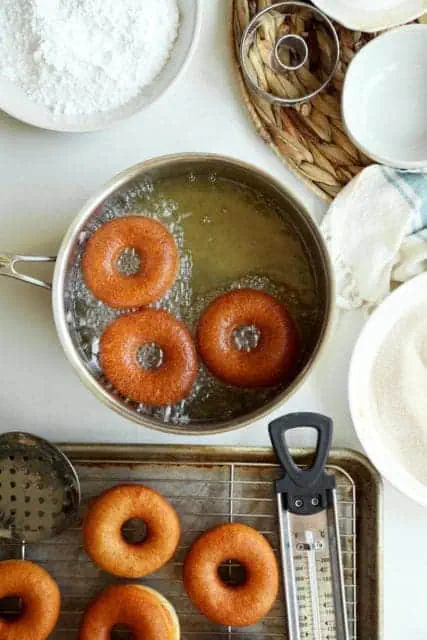
While you let the dough rise, slowly heat the fry oil over medium heat. You’ll only need a couple of inches of oil in your pan – enough that the yeasted doughnuts will float as they fry.
I like a neutral oil like canola oil or peanut oil.
Clip a fry thermometer to the edge of the pan and heat the oil to 360 degrees F. Really keep an eye on the temperature. The oil is our oven and we want the oil to be at a consistent heat to evenly fry the doughnuts to golden brown.
The oil temperature will drop to about 350 degrees F when the yeasted doughnuts are added. That’s natural. Allow them to fry on both sides and wait for the the oil to come back up to temperature before adding the next batch. Fry doughnuts for a minute on each side and flip with either a slotted spoon or tongs (though I prefer a slotted spoon or spider).


Last, glaze the yeasted doughnuts
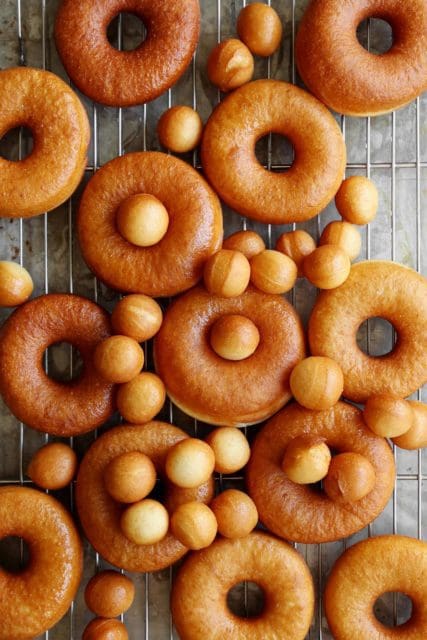
Fresh out of the oil, allow the doughnuts to rest on a baking sheet on paper towels and coat doughnuts in either powdered sugar or cinnamon sugar. Allow the yeasted doughnuts to cool just a bit before coating in chocolate donut glaze. Chocolate glaze is my favorite, thank you very much.
They’re absolutely irresistible fresh from the fryer. Like every other doughnut on earth, these gems are best the day they’re fried. Welcome to your new superpower. Carry on.
Here are few other homemade doughnut recipes for you:
Browned Butter Baked Doughnuts
Cranberry Jam Doughnuts with Orange Sugar
Classic Yeasted Doughnut Recipe
- Author: Joy the Baker
- Prep Time: 2 hours 30 minutes
- Cook Time: 2-3 minutes
- Total Time: 2 hours 35 minutes
- Yield: 10-12 doughnuts and their holes 1x
- Category: breakfast
Description
Light, chewy, fried yeasted doughnuts coated in chocolate glaze, powdered sugar, and cinnamon sugar!
Ingredients
- 1 (1/4-oz) package active dry yeast (2 1/2 teaspoons)
- 2 tablespoons warm water (105–115°F)
- 3 1/4 cups (410 grams) all-purpose flour plus additional for sprinkling and rolling out dough
- 1 cup whole milk at room temperature
- 1/2 stick (1/4 cup) unsalted butter, softened
- 3 large egg yolks
- 2 tablespoons sugar
- 1 1/2 teaspoons salt
- 1/2 teaspoon cinnamon
- About 10 cups vegetable oil for deep frying
For the Glaze:
- 1 cup powdered sugar
- 3 tablespoons unsweetened cocoa powder
- pinch of salt
- 2-3 tablespoons whole milk
- 1/2 teaspoon pure vanilla extract
For the Cinnamon Sugar:
- 1 cup granulated sugar
- 2 teaspoons ground cinnamon
For the Powdered Sugar Coating:
- Just a cup of powdered sugar
Instructions
- Stir together yeast and warm water in a small bowl until yeast is dissolved. Let stand until foamy, about 5 minutes. (If yeast doesn’t foam, discard and start over with new yeast.)
- Mix together flour, milk, butter, yolks, sugar, salt, cinnamon, and yeast mixture in mixer at low speed until a soft dough forms. Increase speed to medium-high and beat 3-5 minutes more.
- Scrape dough down side of bowl (all around) into center, then sprinkle lightly with flour (to keep a crust from forming). Cover bowl with a clean kitchen towel (not terry cloth) and let dough rise in a draft-free place at warm room temperature until doubled in bulk, 1 1/2 to 2 hours. (Alternatively, let dough rise in bowl in refrigerator 8 to 12 hours.)
- Turn dough out onto a lightly floured surface and roll out with a lightly floured rolling pin into a 12-inch round (3/4 inch thick). Cut out as many rounds as possible with 3-inch cutter, then cut a hole in center of each round with 1-inch cutter and transfer doughnuts to a lightly floured large baking sheet. If doughnuts were rested in the fridge overnight, let the chilled dough come to a cool room temperature on the counter for 45 minutes before rolling and cutting. Cover doughnuts with a clean kitchen towel and let rise in a draft-free place at warm room temperature until slightly puffed, about 30 minutes (45 minutes if dough was cold when cutting out doughnuts). Do not reroll scraps.
- Heat 2 1/2 inches oil in a deep 4-quart heavy pot until it registers 360°F on thermometer. Fry doughnuts, 2 at a time, turning occasionally with a wire or mesh skimmer or a slotted spoon, until puffed and golden brown, about 2 minutes per batch. Transfer to paper towels to drain. (Return oil to 360°F between batches.)
- I also fried the doughnut holes for about 1 minute and them tossed them in powdered sugar and cinnamon sugar straight out of the hot grease.
- To make the chocolate glaze, whisk together all of the ingredients in a medium bowl until smooth and glossy. To make the cinnamon sugar, toss the two together. Powdered sugar speaks for itself. Cinnamon sugar and powdered sugar doughnuts are best topped when the doughnuts are fresh from the fryer and still have a thin layer of grease on them.
- Doughnuts are best enjoyed the day they’re fried.
8 Responses
These look so good and I look forward to trying them! I have a question, what do you do with the leftover oil when you are done? Thanks!
I didn’t see a reply to your question, Heather, so perhaps doing what I do may interest you……..
I mark a mason jar “Sweet” and pour the oil (cooled) into it. It is definitely reusable.
When frying non-sweet foods,
Use a second mason jar, mark “Savory”. Cool the oil and reuse it for savory food frying.
Note: Pieces and bits will sink to the bottom. Omit those!
Hello,
I would like to ask you if I can bake them.
Thank you
Happy Christmas
Eleni from Greece
I’m afraid these are for frying only.
I love to fry my doughnuts too! I don’t do it quite often. but when I do, I know it’s a happy day!!
Can I use Soy milk? Sometimes soy makes items heavy. How could we combat this?
How long do these donuts last as I don’t see that l?
The best donuts i’ve made! super soft and airy. I ended up having to kneed the dough in my stand mixer for 10-15 mins just to get the gluten to develop, but they turned out great.