Browning butter is one of those life skills that should be taught to everyone alongside things like: how to change a tire, how to tip at a restaurant, how to ride a bike with no hands, and how to mince garlic. Everyone should know.
It’s a good thing I’m here. I don’t know how to change a tire… but I’m here with butter.
We talk about Browned Butter a lot. I’m always trying to wrestle you into adding it to Banana Bread, Baked Donuts, and Grapefruit White Chocolate Cookies.
Browned Butter is butter cooked until it has melted into a liquid, the water has cooked out, and the milk solids begin to toast and brown to a delicious and nutty state.
When incorporated into desserts like breads, donuts, and cookies, it subtly deepens the flavor from delicious to ‘ohmygod who made these cookies!?!?’. That’s the power of browned butter. Here’s how to make the magic.
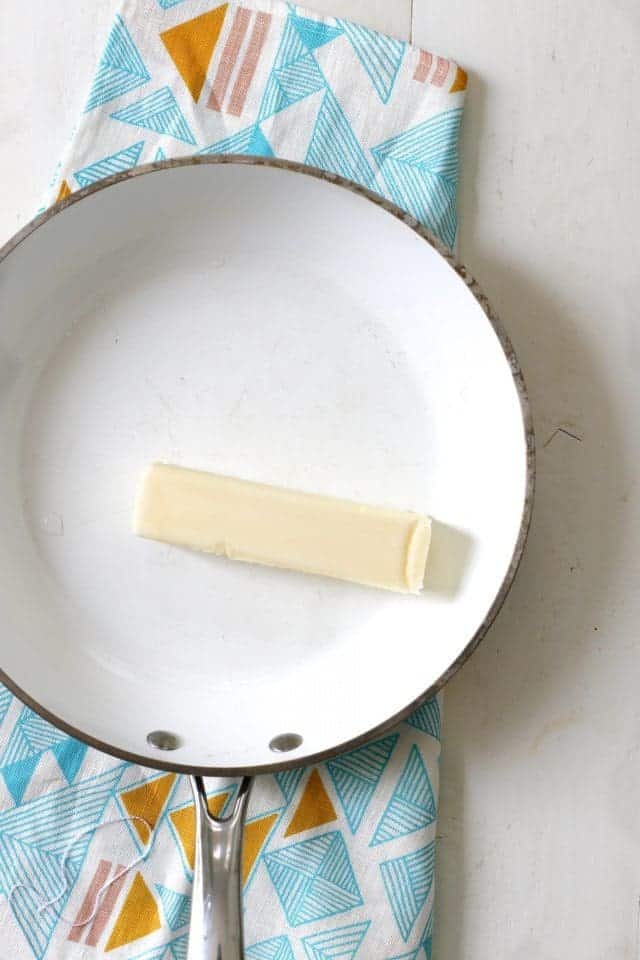
Step One: Butter (cold or room temperature, preferably unsalted) meets a lightly colored, medium skillet or saucepan.
It’s important that the bottom of the pan be lightly colored so you can actually see the butter browning. In a black-bottom pan, you’re left guessing (and probably burning). A white or silver-bottomed pan is best.
Place the butter in the pan and place the pan over a stovetop set to medium heat. Gently place your arms on your hips, assume a good attitude and peaceful face, and standby.
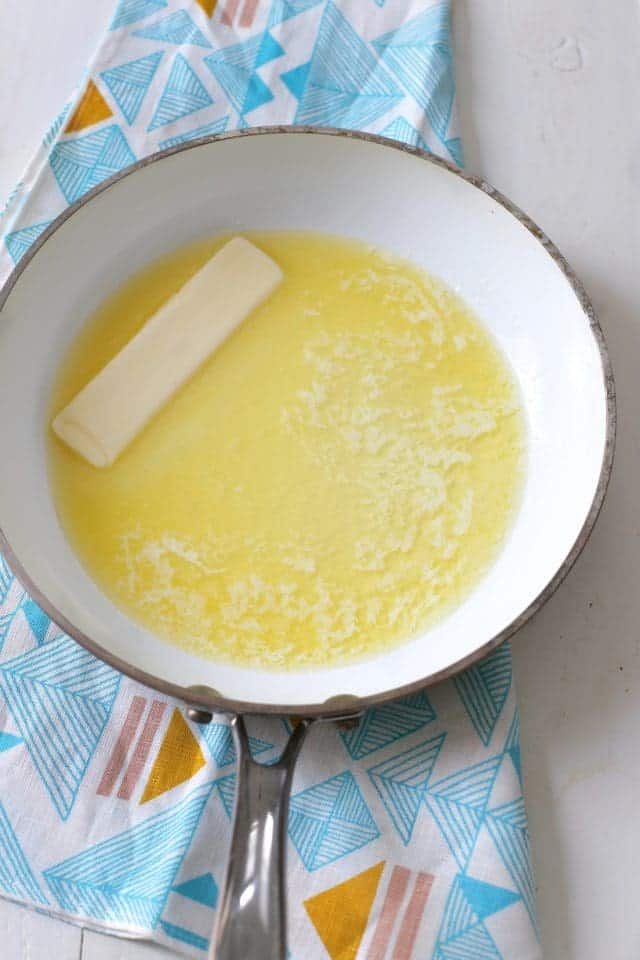
Step Two: Allow to butter to melt. No stick of butter has ever browned without melting first.
No need to stir of swirl. Just let the business melt.
Daydream a bit. That might be nice.
Whatever you do, do not multitask. As soon as you step away from your pan, it’s scientifically proven, you’re going to burn your butter.
Step Three: Now we’re going places!
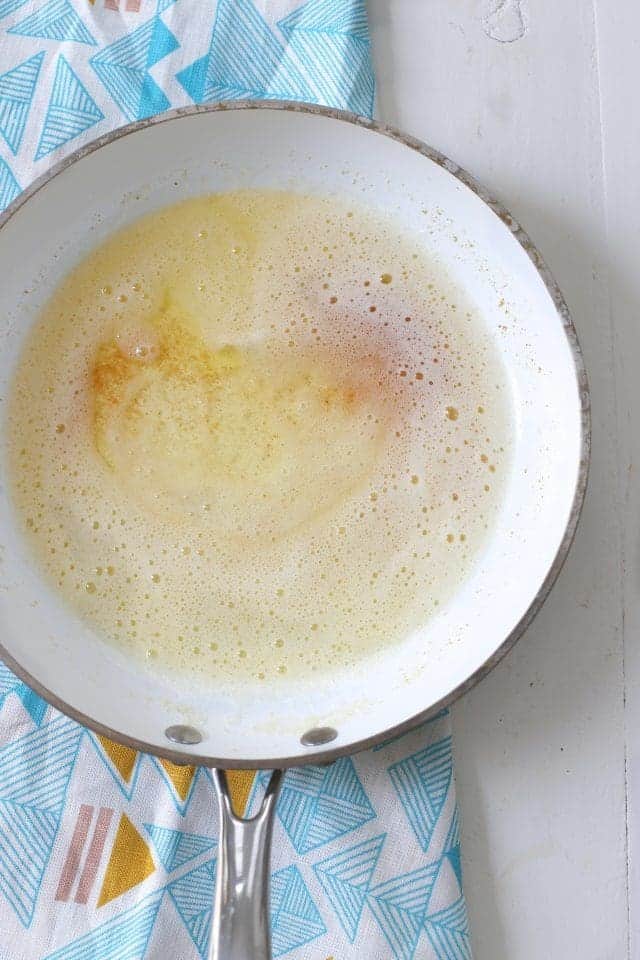
Once the butter has melted into a liquid, it will start popping and crackling. That’s the water cooking out of the butter. Once the water cooks out, the milk solids in the butter will begin to brown.
So… first popping, then browning.
Swirl the pan around if you’re feeling restless or chef-y. Don’t even think about stepping away from your butter.
Step Four: Getting there!
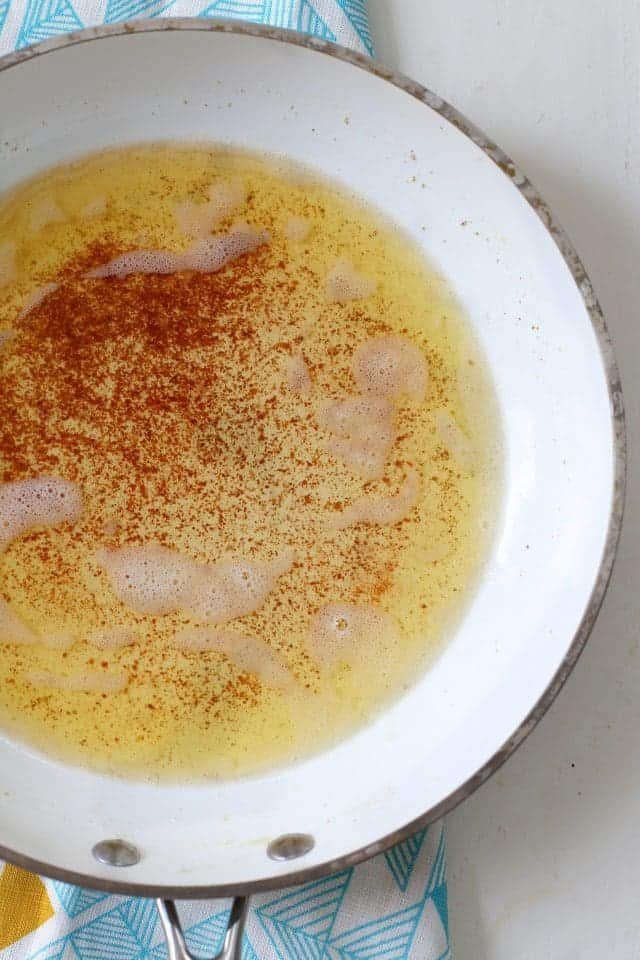
Once the crackling subsides, the butter will begin to brown. This means that little brown bits will start to appear on the bottom of the pan. The actual melted butter liquid won’t brown, but rather, the milk solids will begin to brown at the bottom of a pan.
Use a heat-proof spatula to stir the browning milk solids off the bottom of the pan so they brown more slowly and evenly.
Once you see the butter browning on the bottom of the pan, the rest of the process will move pretty quickly. But don’t forget you’re in charge!
To prevent the butter from browning too quickly and burning, simply remove the pan from the heat source. The heat of the pan alone will slowly brown the butter. Leaving the pan over the heat source will brown the butter much more quickly, forcing ninja-like reflexes upon you.
Once the butter solids are browned to golden, immediately remove the pan from the heat (if you haven’t already), and remove the butter from the pan. The pan is still hot, even when it’s not over direct heat, and will quickly burn the butter solids. So remove the butter from the pan! Burnt butter is not as good as Browned butter. That’s also been scientifically proven.
Just as the butter browns to golden, a trombone parade should be passing by your house, confetti should fall from your kitchen ceiling, the bathroom will magically clean itself, kittens will trot by wearing party hats, and a unicorn with a bag of hot french fries should be waiting at your front door.
If those things don’t happen, you’ve done it wrong.
Golden, nutty, fragrant browned butter is now ready for your favorite recipes! I humbly suggest The Best Brown Butter Chocolate Chip Cookies Known To Man… but maybe I’m biased.
Happy butter browning!


95 Responses
OMG!!! Thank you thank you thank you!!! The recipe I was using said “in a few minutes” butter will foam and turn brown….it sure didn’t. Your explanation was dead on–I waited until the popping and crackling stopped. Wonderful advice. I will make more brown butter goodies from now on!
I did this for the first time since I wanted to make the Cornbread Waffles from your cookbook Over Easy. Yummm! I was nervous wondering how brown the bits should be when I realized that I wasn’t using my sense of smell. The nuttiness was wonderful. Thank you for the instructions! I’ll just have to remember doing this ahead of time or make sure I have enough time built in to do this and cool it down a bit before incorporating it in the recipe.
ampenny51@gmail.com I have never been entertained when reading a food site before. I not only learned how to brown butter easily but it was an enjoyable, chuckle enhancing read. Thank you for your fun, whimsical & educational information.
I keep a supply of brown butter on my kitchen counter and use it as a spread, as well as for cooking.
Thank you so much for this. I’ve had a fear of browning butter. No yeast fear though. My poor cat had to stay outside a little longer than he wanted because I didn’t want to leave my butter.
Love your blog!!! At 71 I’m still learning…one quick and probably stupid question…when transferring the butt out of the pan, do I scrape up the brown bits and save it with the butter?
Yes, the browned bits are the source of the browned butter flavor.
Thank you so much! I’m 76 and still learning, and now that I know how to brown butter, I can’t wait to make your gluten free browned butter blueberry muffins. Thanks again!
When browning butter is there less mess from the popping and crackling if I use brand name butter (assume there is less water in expensive butter)?
Good question. Maybe slightly less popping! To avoid the major splatter I try to keep the heat on the medium-low end of the spectrum.
Thank u, I have been burning butter forever. Sherry
Perfection. I loved the unicorn appearing ;)