
Your next spring baking project has arrived! Mexican Sweet Bread!
We’re making spring-themed conchas, also known as pan dulce, also known as Mexican sweet breads.
Conchas translates from Spanish as seashells – usually appropriate because the sugar top traditionally resembles a seashell. This season we might want to call these conchas fresas (strawberries) or flores (flowers) because we’re making fruit and flower shaped tops for our sweat breads!
Each Mexican sweet bread is a tight-crumbed, lightly sweetened, butter roll topped with a sweet crust that expands in the oven as the bread breaks as creates cracks along the surface. It’s my favorite thing to pick up at a panaderia save for every other baked good at a Mexican bakery. There is no wrong choice.
This is a perfect weekend baking project. The kind of recipe you spend a few hours in the kitchen about with enough rest time to keep the kitchen mostly clean, and make a few friend phone calls you’ve been meaning to catch up on. It’s a sweet time with lightly sweet rewards and the perfect excuse for afternoon coffee and a treat.

This recipe was inspired by Instagram friend KC Hysmith. I saw her sweet little daisy conchas and set straight away to the kitchen to play. The internet is generous that way.
After three batches of rolls in as many days, this recipe came together with a sweetbabystrawberry version to boot.

It is my instinct to put warm bread, all warm bread, directly upon my face. Most especially Mexican sweet bread.
Not necessarily in my mouth, though most certainly eventually in my mouth, but I’m here to tell you that warm bread upon the face is one of life’s hidden treasures.
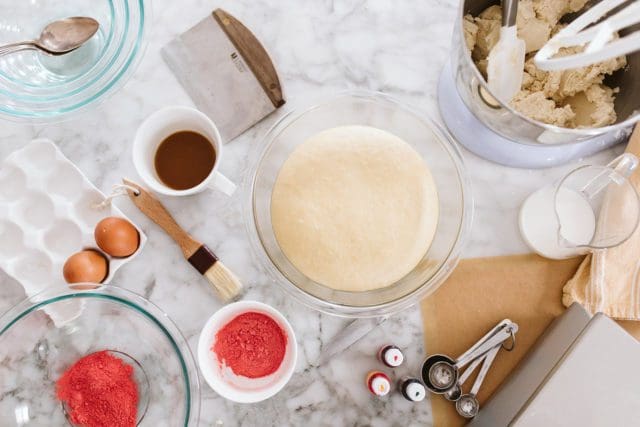
Here’s what you’ll need for this Mexican Sweet Bread project
It is a bit of a project but we’re playing with soft yeasted dough and a topping that’s essentially edible Play-Doh so it’s a FUN and super satisfying project.
For ingredients you’ll need:
• one batch of concha dough. We’ve made conchas before so if you’d like a step-by-step of the dough process, see our Mexican Sweet bread post here.
• one batch of concha topping that we’ll mix and dye below but for a step-by-step of making the topping see the post above.
• a few tablespoon of whole milk.
• dehydrated strawberry powder. Made from pulverizing dehydrated strawberries in a small spice grinder.
• an egg for wash.
• food coloring: red, yellow, and green.
For equipment you’ll need:
• a few pieces of parchment paper. These pre-cut parchment baking sheets are a life saver.
• a pastry brush
• a bench knife
• a rolling pin
• a 2 1/2 – 3 inch flower cookie cutter
• a paring knife
• an offset spatula
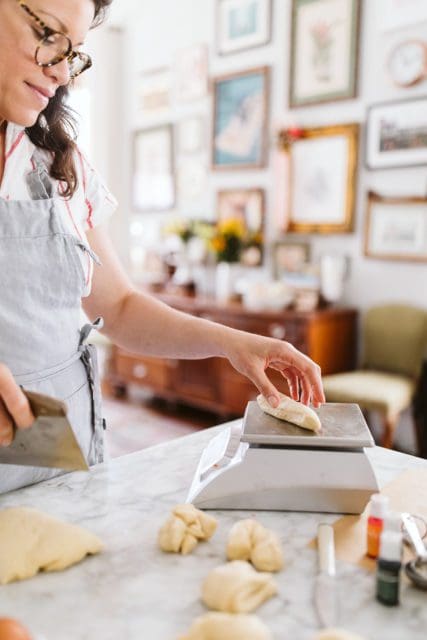
• a baking scale if you’d like to be super precise. This is the one I use on the regular.
What follows are step-by-step pictures to tint the concha topping, shape the rolls, cut out the topping shapes, and top the rolls. If you’d like a step-by-step of making the roll dough or topping dough, please see this post here. If you feel like you don’t need all of these instructions, scroll right on down to the recipe and pop back to the post if any step feels confusing.
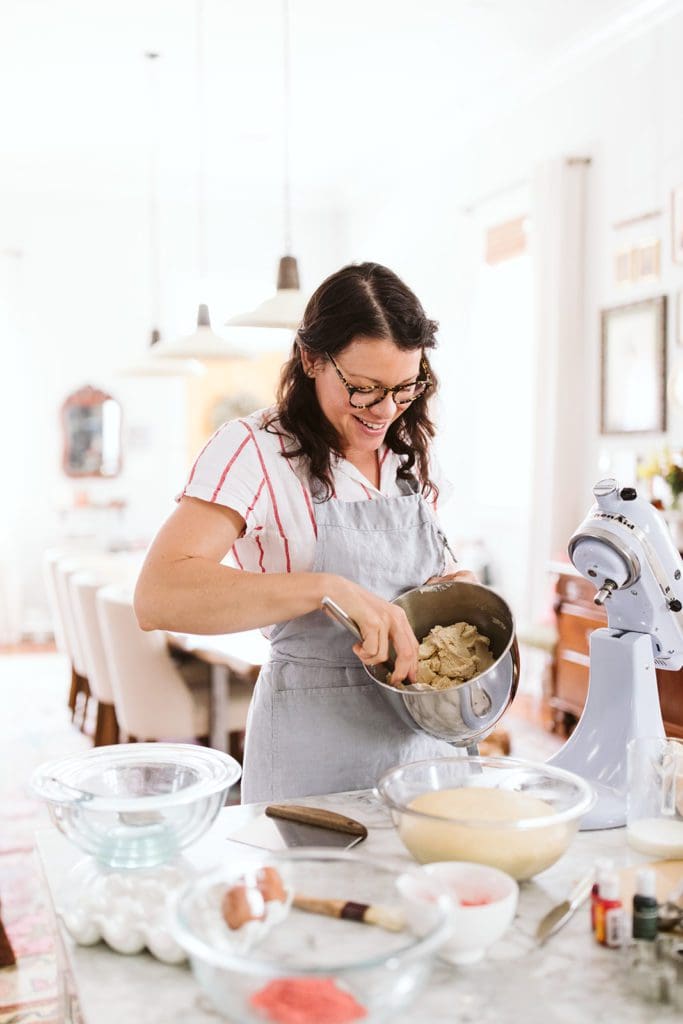
As the concha dough rises I mix together the concha topping – a mixture of butter and powdered sugar, flour, baking powder, salt, and a splash of milk. It’s a thick mixture that resembles a sugar cookie dough.
Divide the topping dough into four portions. Two portions will be larger – to create the daisy and strawberry shapes. Two will be smaller to create yellow flower centers and green leaves to top the strawberries.
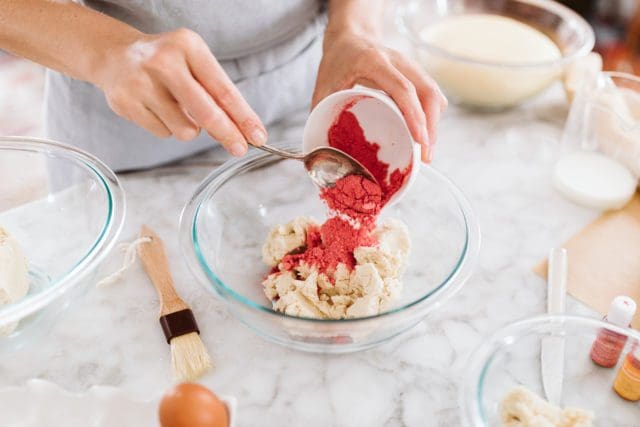
The strawberry topping is colored and flavored with dehydrated strawberry powder.
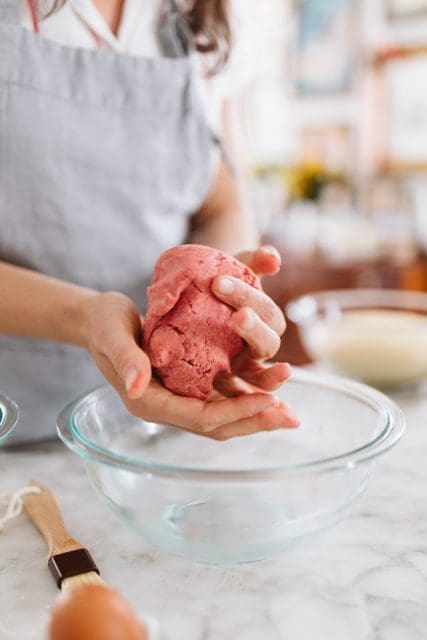
Add the strawberry powder, along with a few drops of red food coloring to the concha topping.
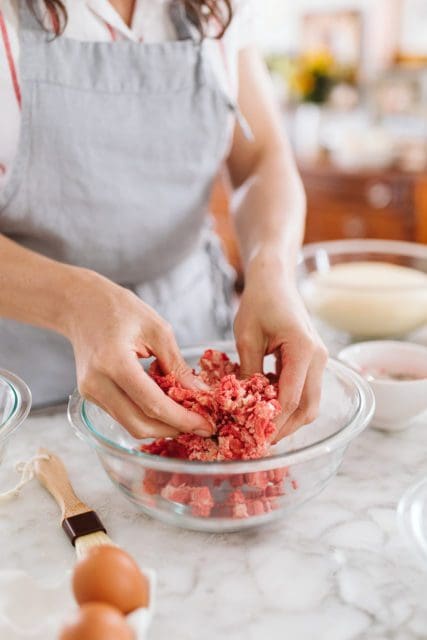
Stir to combine but eventually get your hands in there to knead the dough so the color and flavor is dispersed throughout the topping portion.
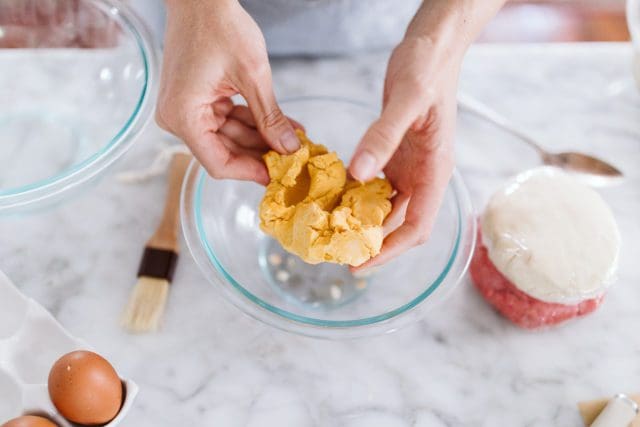
Do the same for the yellow portion of dough, adding a few drops of yellow food coloring to a small portion (about 1/2 cup) of concha topping. Knead until the color is evenly distributed.

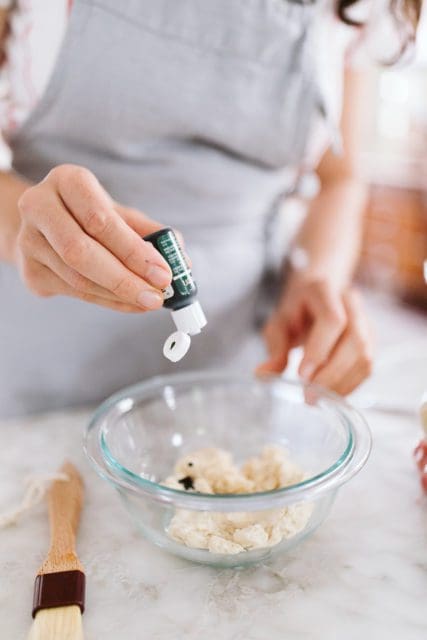
We’ll do the same with a small portion of concha topping and a few drops of green food coloring. Just a bit. We’re only using this for the strawberry leaves.

Wrap each portion of concha topping in plastic wrap and leave at room temperature while you portion and shape the rolls.
I let my bread dough rise for an hour and a half until nice and pillow fluffy.
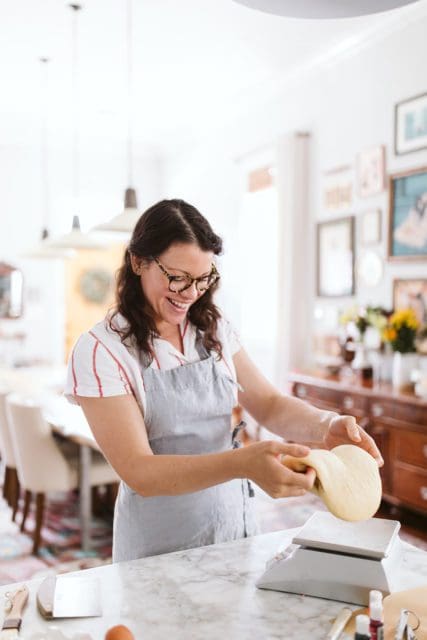
I want each dough portion to be the same size so I weight the whole dough, divide that number by 12 and use my bench scraper to cut and weigh each portion of dough.
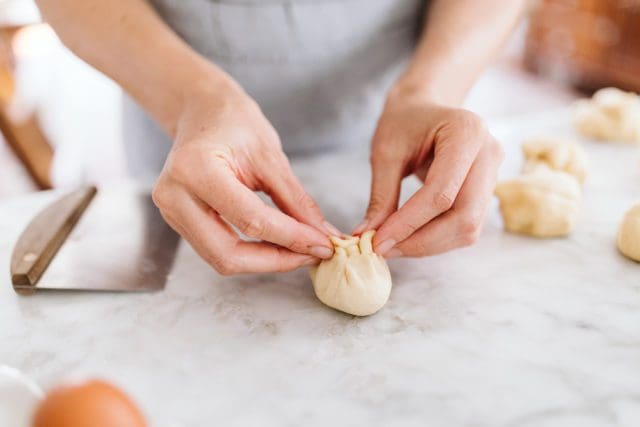
To shape each portion of dough, gather the dough into a little pouch. Gather all the ends up to meet on another.
Turn the gathered edges onto the side and glide the side of your hand across that gathered edge several times.
You’re sealing all the edges together and creating a little dough nipple. This motion seals what will be the bottom of the roll and helps create tension in the roll which will help the roll keep its tight shape in the oven.
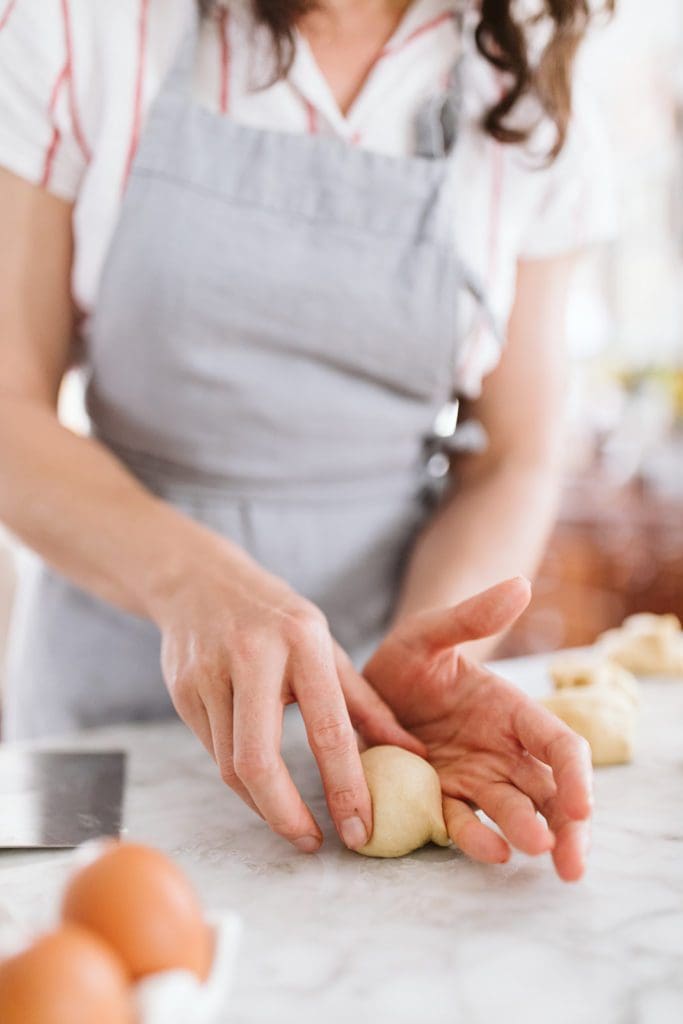
Turn the seam and nipple to the bottom side of the roll, smooth side up. Cup your hand over the roll and move your hand in a small clockwise circle to further round and tighten the dough.
I was telling my photographer Hannah that I had trouble describing this step of the recipe verbally and she said it was like I was holding an air hockey paddle (aka striker) and spinning it around in fast circles. Maybe that helps you understand what I’m doing here… but with bread.


After several repeats, you’ll end up with 12 tight little balls and you’ll want to poke each one. You can. You’re the boss here.


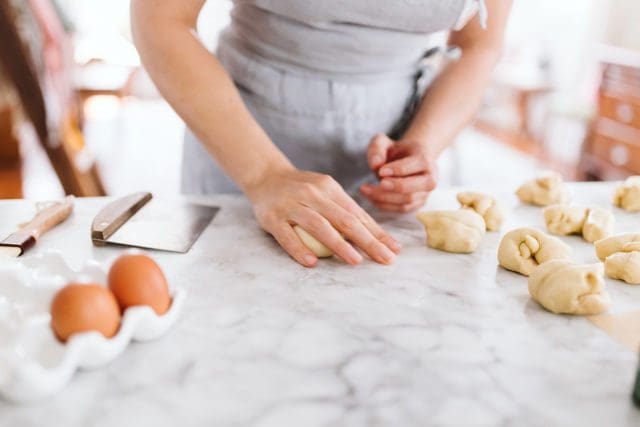
Place the rolls on a parchment lined baking sheet.
I fit 12 rolls on a half sheet baking pan. You can see the rolls are a generous 2-inches apart on the baking pan.
Beat an egg in a small bowl. This is our egg wash.
Lightly brush each roll with egg wash across the top and sides of each roll.

I take a clean kitchen towel and gently drape it over the egg washed rolls to allow them to rest at room temperature while you shape the topping.

While the Mexican sweet bread dough rises, let’s start making daisy shapes with our white concha topping.
Place the topping between two pieces of parchment paper. No need to flour the parchment. There’s enough butter that the topping shouldn’t stick.
Roll between the paper to a 1/2-inch thickness.

Peel off the top piece of parchment paper.
Troubleshooting:
If you have trouble with cracking as you’re rolling out the dough, don’t fret. This topping dough can be malleable. Don’t worry about overworking it – it’s not precious. If cracking is an issue, add a teaspoon of milk, gather the dough, press together to rehydrate and try rolling again. Add another teaspoon if you really need to but you don’t want the dough too wet and sticky. If the dough does become too sticky, dust with just a bit of powdered sugar.
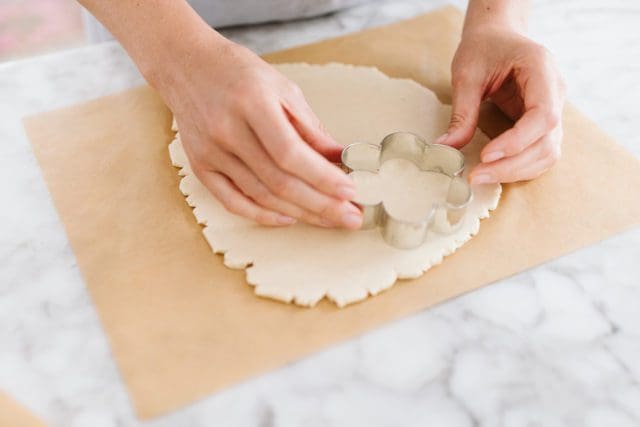
You’ll want a 2 1/2 – 3 inch flower shape to top the dough ball. I only had a 4 inch flower shape so I used it as a tracing guide instead of buying another cookie cutter.
We make it work, you know?

I traced about 1/2-inch inside the cookie cutter to make a flower shape right for my rolls.

Use an offset spatula to lift the flower shape off the parchment, pressing any rough edges smooth with your hands.
Repeat until you have six flower shapes you’re happy with. Feel free to gather and reroll the dough if you need to.
Place each flower on a clean parchment sheet, cover loosely with a towel and set aside.

Roll the yellow topping dough to 1/2-inch thickness between the same two pieces of parchment paper.
Cut 1-inch circles that will be our daisy centers.

Place each yellow center atop the white daisy.
No need to use egg wash. The two will stick.


Use a paring knife to cut an X into each yellow flower center (score, don’t cut all the way through), and gently slice into each flower petal. Just score the flower, giving the topping room to grow in the oven but don’t slice all the way down to the parchment paper.
Gently drape each flower over a dough ball.

The flower will drape over the roll but the edges of the petals may not be flush with the roll. Don’t force it. they’ll relax onto the roll as the rolls rise and bake.


Now let’s play with strawberry shapes!
Roll the strawberry dough to a 1/2 – inch thickness.
Because the strawberry dough has dehydrated strawberries, you may find that you need to add an extra teaspoon of milk to ensure that it r0lls without cracking. Don’t be shy about adding just a tiny splash of moisture and rerolling.
I cut freehand 3-inch strawberry shapes – essentially wide triangles with rounded edges.
Use an offset spatula to transfer our 6 strawberry shapes of a clean parchment.


Score into each strawberry with vertical lines. Again, don’t cut entirely through to the parchment.
Top each strawberry with tiny bits of yellow dough to look like seeds.
We’re doing the absolute most, aren’t we?

Cut little green leaves and press into the top of each strawberry.


Drape the remaining six buns with strawberries.
Loosely cover the pan with a towel while the oven preheats.
Bake the rolls for about 20 minutes, rotating halfway through baking if your oven has any hot spots. Keep an eye on the topping browning too much and transfer to the middle rack if necessary.
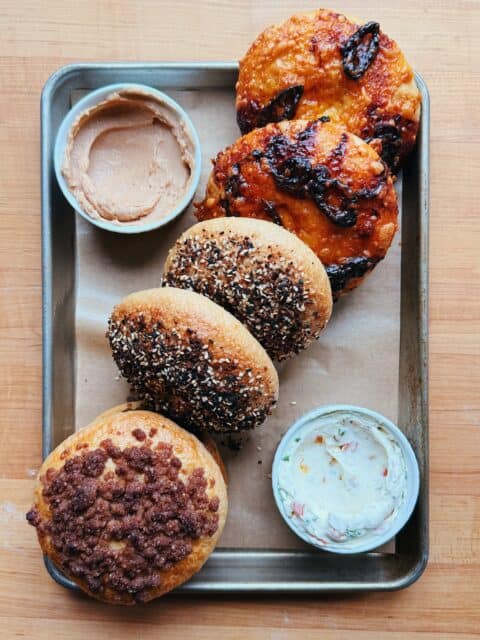
Look at these little gems!
Just like good conchas, the yeasted dough will stretch the topping. The bread will bake to a golden brown with a tight, barely sweet crumb.
I like to let the rolls cool mostly before putting the coffee pot on to enjoy.

They’re also absolutely delicious the day after they’re baked with sweet milky coffee.

I can’t wait to see you on this spring concha baking project. I completely believe in you! They take a few good hours, but the end product is super satisfying! Somehow conchas are also completely delicious as day old baked goods. They’re made to be dipped in milky coffee, after all!
If you have any questions about the recipe, please leave a comment below or send me a DM on Instagram @joythebaker and I’ll do my level best to help you through!
Happy Baking, friends! I just adore you! xo
Photos with my friend Hannah McSwain.
Print
Strawberry and Vanilla Bean Daisy Conchas (Mexican Sweet Breads)
- Prep Time: overnight plus a 2 hours
- Cook Time: 20 minutes
- Total Time: 0 hours
- Yield: 12 rolls 1x
Description
A springtime variation of traditional Mexican Sweet Breads made with strawberry powder and vanilla beans.
Ingredients
FOR THE PRE FERMENT
- 1/2 cup (123 gram) lukewarm water
- heaping 1/2 teaspoon (3 grams) active dry yeast
- 1 1/3 cups (171 grams) bread flour
- 1 teaspoon kosher salt
FOR THE CHALLAH BREAD
- 2 1/2 cups (330 grams) bread flour, plus maybe a sprinkle more for shaping
- 3 tablespoons (42 grams) granulated sugar (add a tablespoon more if you’d like the rolls a bit sweeter)
- 2 1/4 teaspoon (15 grams) kosher salt
- 1 1/4 teaspoon (5 grams) active dry yeast
- the risen and deflated pre ferment (about 290 grams), cut into walnut size pieces
- 3 large egg yolks, beaten
- 1/4 cup warm milk (about 62 grams), plus 2 more tablespoons if needed
- 3 tablespoons (42 grams) unsalted butter, softened, plus more for coating the bowl
FOR THE TOPPING
- 3 cups (381 grams) bread flour
- 1/2 teaspoon baking powder
- 1/2 teaspoon kosher salt
- 1 cup plus 5 tablespoons (296 grams) unsalted butter, at room temperature
- 2 1/2 cups (252 grams) powdered sugar
- 2 teaspoons pure vanilla extract
- 1 vanilla bean pod, seeds scrapped
- 2 – 3 tablespoons whole milk
- 1/4 cup dehydrated strawberry powder
- red, yellow, and green food coloring
Instructions
- Start by making the pre ferment the night before you’re going to make the bread dough. It will need to rest in the refrigerator for anytime between 8 and 24 hours.
- Stir the water and yeast together in a medium bowl. Add the flour and salt. Use a spoon to stir the mixture into a shaggy dough. Cover the dough with plastic wrap and let stand at room temperature for 30 minutes before refrigerating the mixture for 8 hours to 24 hours. I’ve also had success leaving the mixture at room temperature for 4-6 hours total. There is no need to return it to room temperature before using it if you refrigerated your pre ferment. Deflate it with a wooden spoon or floured fingertips before breaking into pieces to add into the bread dough.
- To make the challah bread, place the bread flour, granulated sugar, salt, and yeast in the bowl of a stand mixer fitted with a dough hook. Stir to combine. Add the pre ferment chunks, egg yolks, milk, and butter and stir into a very shaggy dough with a spatula. Mix on low speed with the dough hook until the dry ingredients are completely incorporated and the yeast has disappeared into the dough. Add a little extra milk if this hasn’t happened in 3 minutes. This will be a thick dough on the dry/firm side but there shouldn’t be dry patches of ingredients. Add a few more tablespoons of milk if this is the case. Increase the speed to medium speed and mix until the dough is smooth, pulls away from the sides of the bowl, has a bit of shine, and makes a slapping noise against the sides of the bowl, about 5 minutes. The dough will look smooth and feel slightly tacky. I like to remove the dough from the bowl and knead by hand towards the end to get a feel for it and help smooth it further.
- Coat the inside of a large bowl with butter and transfer the dough to it. Lightly dust the top of the dough with flour and cover the bowl with plastic wrap. Let stand at room temperature until the dough is puffy and supple, about 1 1/2 hours.
- While the dough is rising, make the concha topping. In a medium bowl whisk together the flour, baking powder, and salt and set aside.
- Place the butter and powdered sugar in the bowl of a stand mixer fitted with the paddle attachment and beat on medium speed until creamy, about 4 minutes. Add the vanilla extract and vanilla bean seeds and beat to combine. Add the flour mixture and 2 tablespoons of milk and beat until just combined. Keep more milk on hand to incorporate later if needed. The dough should be thick like sugar cookie dough.
- Divide the dough in four. Most of the dough will be divided into red and white portions (for the strawberry and daisy shapes). Set aside a scant 1/2 cup of the topping mixture to dye yellow and green for the daisy centers and strawberry leaves.
- Wrap one large portion of the topping dough in plastic wrap. This will be for our daisies.
- Place the other large portion of topping dough in a medium bowl and add strawberry powder, a few drops of red food coloring and a teaspoon of milk. Stir with a spoon and eventually knead with your hands to evenly incorporate the strawberry powder and dye.
- With the two remaining small portions of topping dough, tint each with a few drops of yellow and green food coloring and stir and knead until the color is well incorporated. Wrap each color of topping dough in a disk in plastic wrap and set aside at room temperature until ready to use.
- Let’s work with our risen dough and shape our rolls. Tip the risen dough onto a lightly floured surface and knead to a smooth ball. Weigh the dough and divide into 12 equal pieces (2 1/2-ounces or about 70g each).
- Form each piece into a roll (using the pictures in the blog post above) and transfer the rolls to a parchment lined baking sheets. Gently brush each roll with egg wash, cover with a clean kitchen towel and set aside to rise while you cut your topping shapes.
- Next we’ll make our topping shapes – daisies first. Roll the white topping dough between the two pieces of parchment paper, roll the topping to about 1/2-inch thick. Remove the top parchment, and using a 2 1/2-inch flower cookie cutter, cut 6 flower shapes. You can save the scraps to reroll. Roll the yellow topping dough between the same two pieces of parchment and cut 1-inch circles with a small biscuit cutter (or you can freehand them!)
- Gently score the flowers using a small paring knife, being sure not to cut fully through each flower.
- Let’s make the strawberries. Roll the strawberry topping dough between two pieces of parchment and use a small paring knife to cut 3 to 4-inch strawberry shapes, 6 in total. Use a small offset spatula to lift the shapes onto a clean piece of counter. Score the strawberries with a few vertical lines, and dot with a few yellow seeds. Roll the green topping dough and cut a few leaves. Press them into the top of the strawberry shapes.
- Gently top each lightly risen roll with either a flower or a strawberry. The topping shape will relax around the dough as the roll rises so don’t feel the need to press it down into the shape of the roll right away.
- Let the conchas stand at room temperature until they puff slightly and the dough holds indentations when pressed lightly, about 1 hour to 1 hour 15 minutes after they’ve been initially shaped. As they rise, the topping will bend and start to cover the top of the dough.
- Place racks in the upper third of the oven and preheat oven to 350 degrees F.
- Bake the puffed conchas until the base is golden brown and the topping is firm to the touch, about 18 to 20 minutes.
- Transfer to a wire rack to cool completely. Enjoy warm or at room temperature with milky coffee Store in plastic bags for up to 4 days. I like these best the day after they’re baked.
Notes
This recipe calls for bread flour but I’ve also made it with all-purpose flour in the same amounts with great success.


8 Responses
Popular kinds of pan dulce that you’re probably familiar with may include varieties such as conchas, sweet empanadas, cuernos, and puerquitos or marranitos. Bread and pan dulce first came to be in Mexico after wheat was introduced to the country by the Spanish conquistadors in the early 16th Century. Roofers Brighton
Yummy! Thanks for sharing. i must try the recipe.
These are the loveliest conchitas <3. Made me want to get cookie cutters with different shapes to play with. Thank you for the recipe!
I made these yesterday – and my topping all fell off during baking. Any idea what I did wrong? It seems like my flowers were thicker than yours, although I rolled to 1/2 inch. I feel like they were maybe too heavy for the roll, and the petals just broke. Should I try them thinner (1/4 inch)? Or do you have another idea? Maybe I didn’t score them deep enough? I love the taste and want to try them again.
thank you, haven’t ever made these, they look like a lot of fun for a weekend baking project, love the flavors too!
Despite having an half-mexican roommate when I was in uni, it’s the first time I hear about this dessert! I surely want to try it!
Hi!
I’m thinking about trying this recipe soon. Instead of refrigerating the fermenting year mixture overnight, could I refrigerated the dough overnight?
Does it result in a different outcome?
Thank you!
Cynthia
A prodigous recipe for prodigous people!