
Let’s talk about pie crust! It’s important because hopefully you have a homemade Apple Cranberry Crumble Pie making it’s way to your holiday table this year. Pies come in a few parts, homemade pie crust, loads of filling, and some sort of topping (crumble of crust) – but every solid pie starts with a flaky crust.
Making a pie from scratch can be intimidating. I know it. I really do. I teach people how to make pie crust a lot and I know it’s scary. I have a tremendous track record. We’ve got this.
There are a few tricks to making a flaky pie crust from scratch – believe in yourself (this goes a long way, I swear), keep your fat and your water cold, work fairly quickly, add more water if necessary, and knead gently but confidently.
Here are some step-by-step photos to walk us through but leave a comment below if you have any burning pie crust questions!
Others in the BAKING 101 SERIES:
- Which Oven Rack Should I Use?
- Which Whisk Is Best?
- How To Frost A Cake
- How To Brown Butter
- Why We Use Large Eggs In Baking
- The Difference Between Natural and Dutch Processed Cocoa Powder
The more you know!
Rule #1: Keep The Fats and Liquids COLD
Cold butter is essential for this pie dough recipe. We want the butter cold so when the cold butter hits the hot oven, the water inside the butter rises and evaporates quickly, creating a perfectly layered and flaky crust.
A flaky crust starts with cold butter.
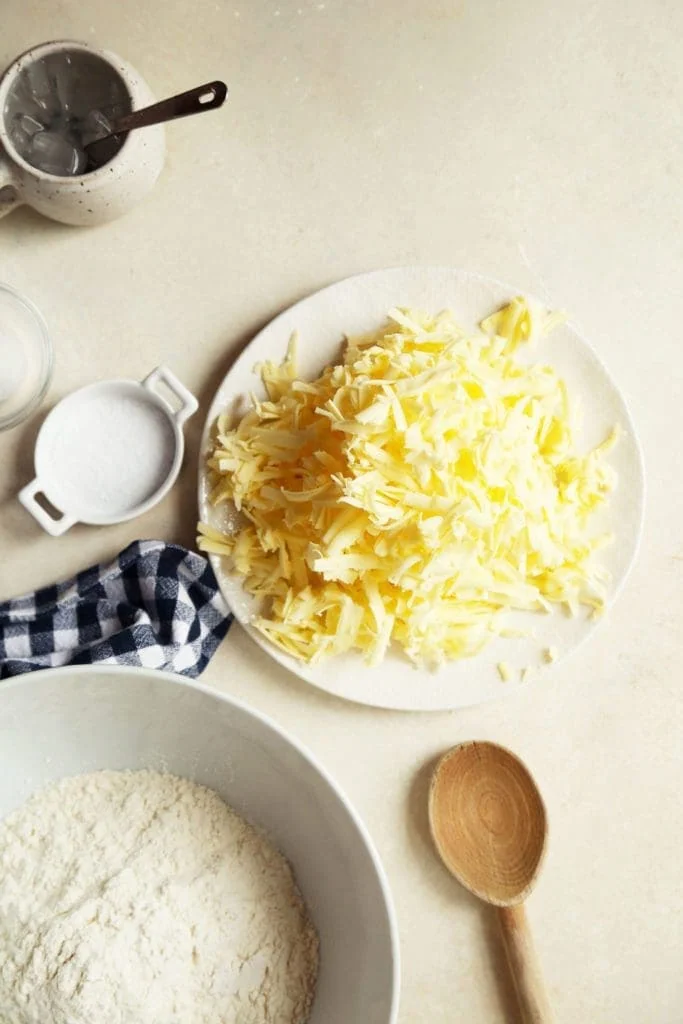
For this recipe, I’ve frozen the sticks of butter for about 30 minutes before making the pie crust and used the wide side of a box grater to grate the butter instead of chopping it into cubes. Grated the butter is fast and creates an even butter flake.
It’s also pretty dang fun!
Toss the cold, grated butter into the flour, sugar, and salt mixture. Toss to coat.
Now it’s time to get out hands in the mix which brings us to…
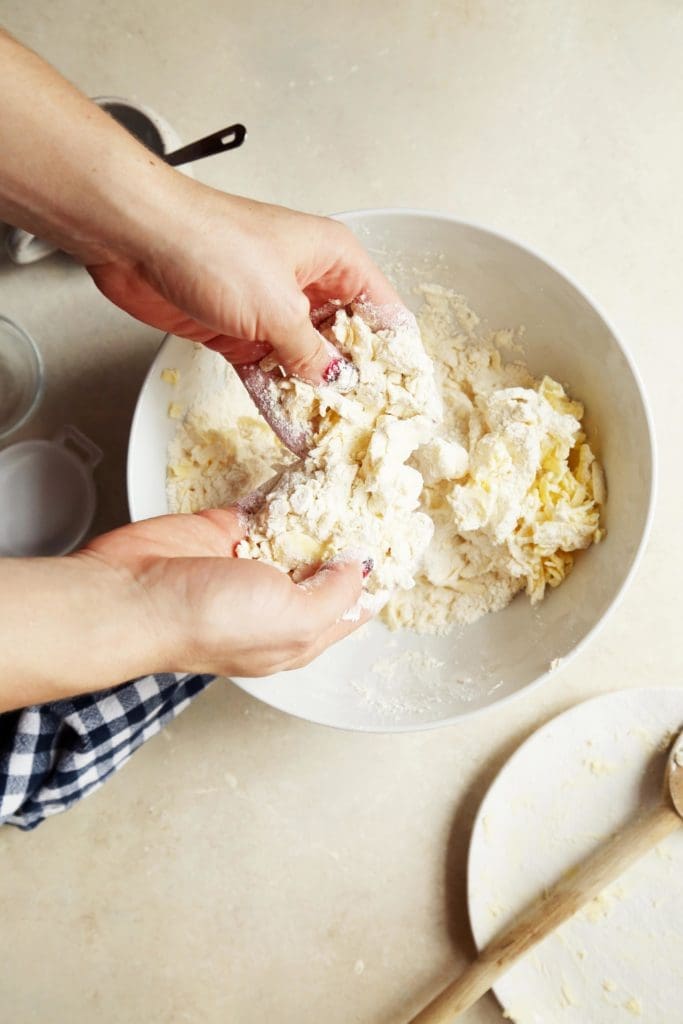
Rule #2: Work quickly
We’ll use our fingers to break the butter into the flour mixture. Gather flour and butter into your fingers and use thumbs to press the butter into the flour. Quickly repeat until some butter bits are the size of oat flakes.

Lots of butter flakes. See?
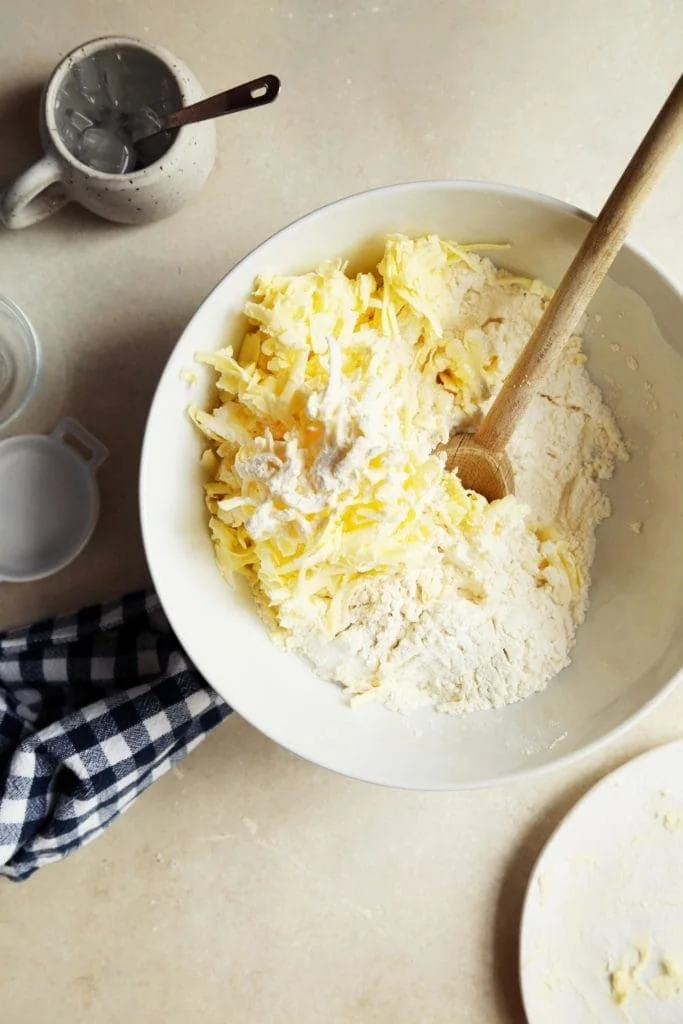
We’ll create a well in the center of the butter and flour mixture for our cold water.

We’ll start by adding 6 tablespoon of very cold ice water. No ice in the dough, just the cold cold water.

Use a fork or a wooden spoon to toss the mixture together. We’re not really stirring the dough at this point, we’re tossing the dough together in an effort to moisten every bit.
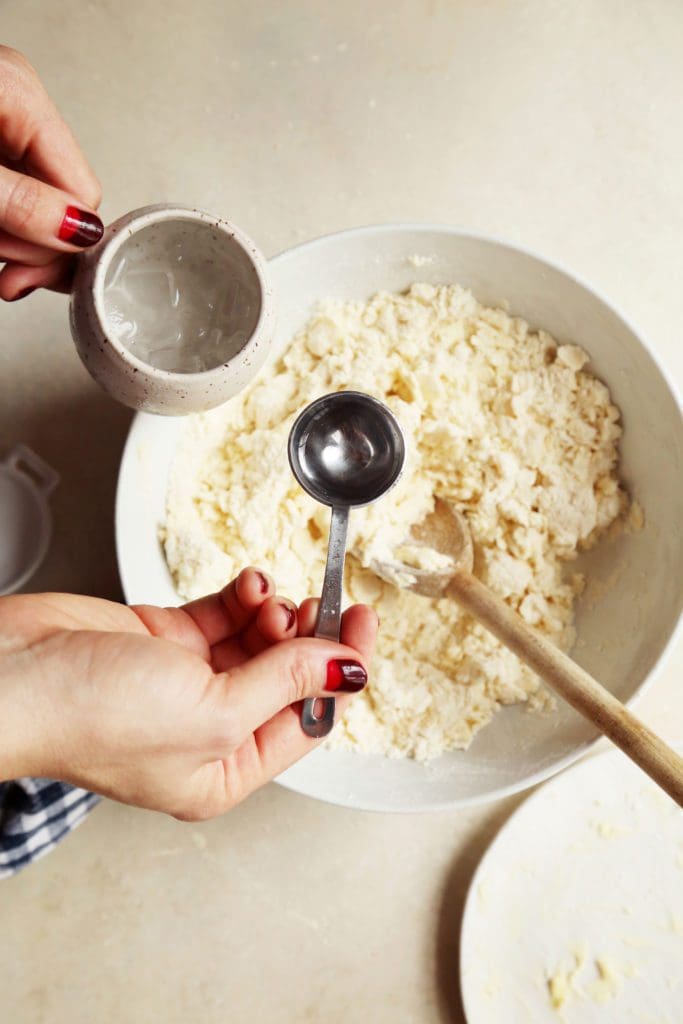
The dough may be shaggy so add more cold water and toss once again.
Keep in mind that the pie dough won’t come together in the bowl. The dough will be shaggy and moist and need a kneading on the countertop.
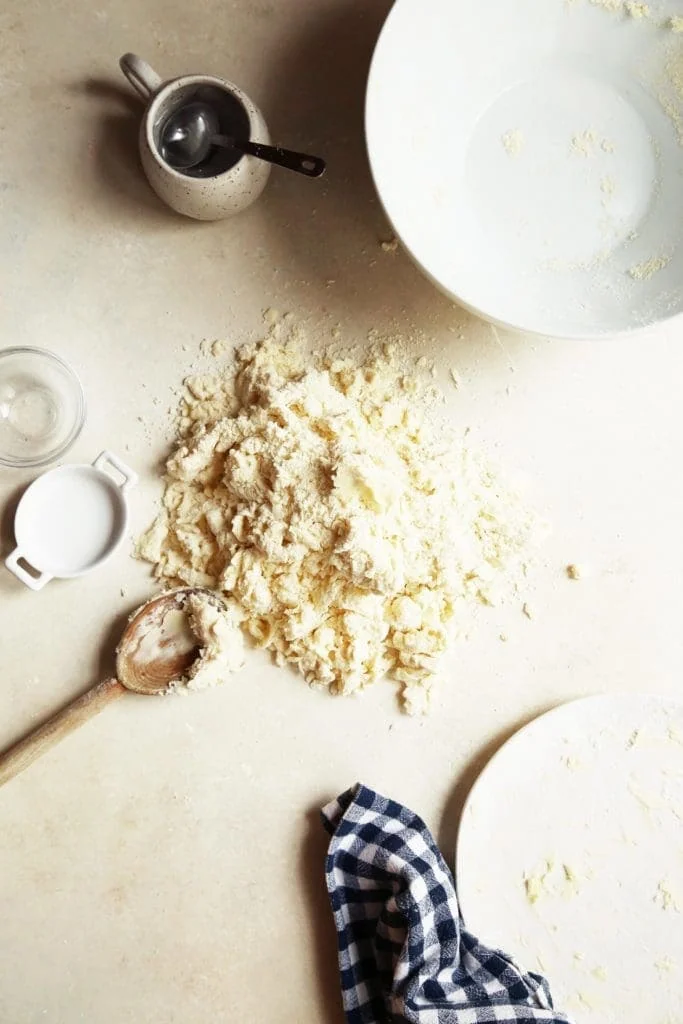
The dough mixture will be shaggy but all of the flour and butter bits will be moistened.
The mixture will be moist but far from sticky.
Don’t be afraid to dump the dough onto a clean counter. I find that spreading out a bit helps me to know if my dough has the proper amount of liquid. And at this point, it’s not too late to add more!
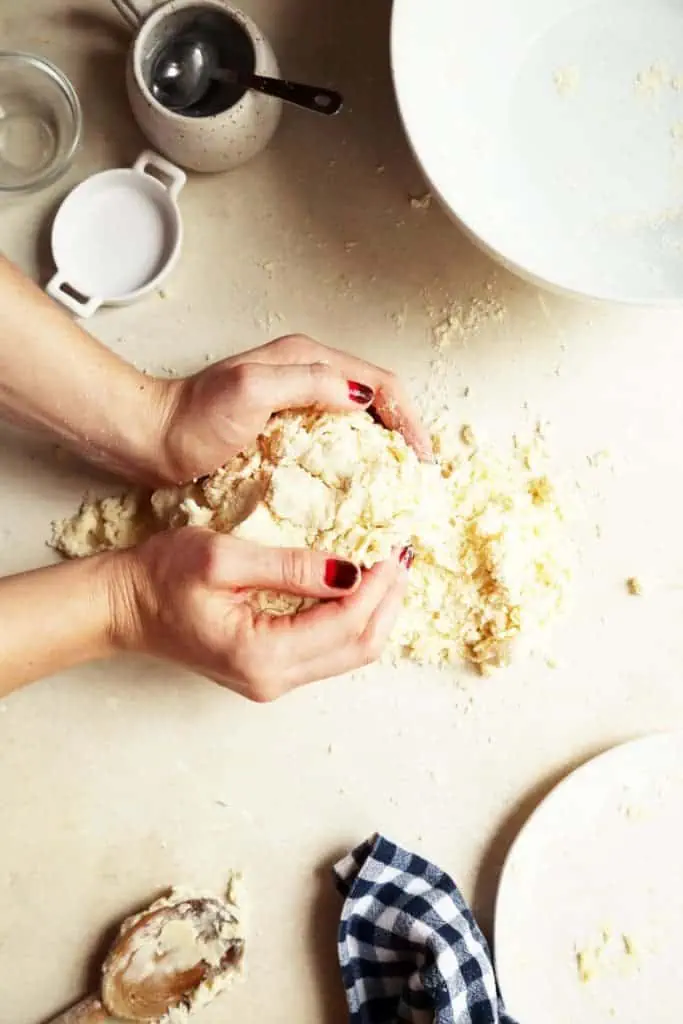
Use the sides and palms on your hands to gently but coercively bring the dough together by pressing and gently kneading.
This isn’t a tough yeasted dough we’re bringing together, so we won’t be using the palm of our hands and a lot of weight to knead this dough.
By pressing and gently kneading, we want to encourage the wet bits to come together into a disk.
Before we get too far along in the gently kneading, now is the last chance to add a dash more water if you find that the dough needs it. No fear. A sprinkle will do.

This is the dough about three kneads away from done. Still a little shaggy and cracked and that’s just right.

As we practice and grow in confidence, we’ll be able to knead the dough together while keeping the butter cold. It’s a matter of confidence and speed and we’ll get there.
Once this dough is brought together, divide it in two to create a top and bottom crust. Shape each half into a rough disk.

Wrap and refrigerate. Every step in pie making is important, but wrapping the dough and chilling it is of the utmost importance.
Use plastic wrap if you plan to keep the pie dough disks in the refrigerator for more than three hours or overnight.
If you plan on freezing the dough (which you can do for up to a month) wrap the dough disks in plastic wrap and double seal them by placing them in a freezer safe bag as well.
If you just plan to chill the dough in the freezer for one hour, you can wrap the dough in waxed paper or plastic wrap.
Off to chill!
- 1 hour is essential in the refrigerator.
- overnight is totally great
- this dough can also be frozen for up to one month. Thaw in the refrigerator overnight before rolling out.
Rule # 3: If we’re making one pie crust, we’ll make two! It’s just as easy to make a double crust pie recipe as it is a single crust. Having a pie crust in the freezer is never a bad idea!
Print
All-Butter Pie Crust From Scratch
- Prep Time: 20
- Cook Time: 60
- Total Time: 1 hour 20 minutes
- Yield: 2 1x
Ingredients
- 2 1/2 cup all-purpose flour
- 1 tablespoon granulated sugar
- 3/4 teaspoon salt
- 1 cup (2 sticks) unsalted butter, cold, grated on a box grater
- 6 tablespoons cold water plus 2 to 3 tablespoons more if your dough is dry
Instructions
- To make the crust, in a medium bowl, whisk together flour, sugar, and salt. Add cold, grated butter and, using your fingers, work the butter into the flour mixture. Quickly break the butter down into the flour mixture, some butter pieces will be the size of oat flakes.
- Create a well in the butter and flour mixture and pour in 6 tablespoons of cold water. Use a fork to bring to dough together. Try to moisten all of the flour bits. Add more water if necessary. On a lightly floured work surface, dump out the dough mixture. It will be moist and shaggy. That’s perfect. If you find the dough needs more moisture, add a bit more. Press and knead the dough into a disk.
- Divide the dough in two and gently knead into two disks. Wrap each disk in plastic wrap and refrigerate for 1 hour.
- To assemble the pie, remove one of the pie dough disks from the fridge. On a lightly floured surface, roll dough out into about a 13-inch round. Roll the dough a few strokes, then use your fingers to move the emerging circle around the floured surface. This ensures that the dough isn’t sticking to the work surface. The circle won’t be perfect, that’s ok.
- Try not to get any rips in the rolled out dough, but if you do, they can be patched together with extra dough. When you roll the dough and you can see it start springing back, that means that the butter is warming and the crust shouldn’t be rolled out anymore. Gently lift the 13-inch round from the floured surface and center in a deep 9-inch round pie dish. Place in the fridge while you roll out the top crust.
- Roll out the top crust just as you did the bottom crust, moving the dough across the floured surface every once in a while, and creating a roughly 13-inch circle.
- Bake pie according to your particular recipe. Share. Enjoy!


18 Responses
Hi
I inherited a couple of Fat Daddio metal pie pans from My Mom.
They are 10 inch. How do I upscale these pie dough recipes for 10 inches.
Almost everyone’s is a 9.
Thanks!
I’ve always been hesitant about trying pie crust with grated butter. Does the butter not start to melt when you are gratering it even if it has been frozen? Secondly, I always cannot get the dough to stick together after the allotted amount of water. Your directions are good about informing us when to add more water, however, I get really nervous about adding too much water. I tend to have problems about adding the max amount of water and still not be able to get a smooth dough that doesn’t crack as I’m rolling it out. Is this a failure of adding enough water or a failure to incorporate the butter properly into the flour? Thanks for these directions though and pictures. I can’t get enough of these instructions. If only I could work in a bakery where I had to make pie shells every day so I could build up my confidence and experience.
Me too!
I use vodka never water. Alcohol inhibits gluten development so you can add more liquid with less worry of it getting tough. If its not hydrated enough then your pie dough will crack. Just keep practicing, you will get better
Thanks so much for this, Joy. I guess I thought you always used buttermilk as your liquid in a pie crust! Ever since I discovered your Buttermilk Pie Crust, it’s the only recipe I use. What makes you decide which liquid to use?
I tried grating frozen butter for pie this Thanksgiving, but couldn’t for the life of me figure out how to grate about the last inch of butter. It started melting in my fingers as I tried to manipulate it on the grater, so I gave up and chopped the last bit, but then of course those pieces were much larger than the grated pieces. Any advice on how to grate that whole dang stick? Thanks!
I use my Food processor.
How does this crust differ from your buttermilk crust in terms of taste and texture? Which do you prefer? I love how detailed these instructions are. So helpful. Thank you
Re grating the melting butter: either put the gratings and the melting butter in the freezer for a while to harden, or measure the butter by weight, which lets you use more hard sticks and “toss” the melting ends. I usually just shave the butter rather than grate it, and I put the shavings in the freezer for a while before mixing into the flour.
Question: I once read that the resting phase could be done after the dough is rolled out. In other words, you mix the dough, roll it out, then wrap it in paper and put to rest in the fridge. It certainly is easier than trying to roll a hard, cold lump of dough, and I have had good results, but I wanted to ask a pro. It seems that it should produce the same effect of the water evaporating faster than the butter melts.
I do the same thing with cut-out sugar cookies–roll it out and then let it rest.
It’s a little intimidating for sure but it’s worth it. I recommend anyone to try it with this recipe o/
I’ll admit, I don’t make my own pie crusts nearly often enough!
Kari
https://sweetteasweetie.com/raspberry-mule-absolut-elyx/
I have been having such a hard time with homemade pie crusts lately! I do everything right – keep the butter cold, work the dough minimally, chill the crust in the pan, etc. The crust slumps and slides down nearly every time! What else can I do to prevent this? It is so sad to put in so much work to have it not turn out.
Amanda, are you using glass pie plates? They’re the worst and always cause what you describe to happen for me. Try metal or ceramic. Also, when you’re blind baking, FILL the crust all the way up to the edges of the pan with dried beans or rice to really weight it down. That can help prevent the slump.
I don’t know why I didn’t think of this. I thought my pie skills had seriously declined all of a sudden but it coincides with the time I bought a glass pie dish. Thank you!
I’mma let you finish but Stella Parks has my favorite pie crust technique ever. Cubes of butter that you smash flat with your finger, then smear into the dough. And then fold the dough into thirds and give it one turn, like a laminated dough. Easy and incredibly flaky.
I made this crust for an apple pie with my young daughter. She is in a Little House on the Prarie phase, pinafore and bonnet all day every day :) Ironically, the prarie cookbook suggested store bought crust, but homemade is so much better! (and deliciously authentic). Her favorite part was making the flour and butter into “flakes” with her fingers. Good memories! We hade enough leftover dough to put cookie cutter hearts on top of the crust for added country charm. The pie turned out delicious.
I thank both of you for your words of encouragement. This blog has been a wonderful place for me to learn, and just watch others comment, and share were they are on there journey. I can not explain what the book of Enoch has done to my life, the questions it has answered, and more that I have. It is so good to see this blog growing, and everyone putting in there two cents.
Thank you for this all butter pie crust. I have a recipe but I am open minded enough to find one that works as good or better. I think butter pie crust adds something extra for the pie that it is used for to hold the contents of the pie. That certainly makes a big difference when serving up a tasty pie .
I hope your Thanksgiving was enjoyable.
Thank you for this butter crust recipe.